Navigation Tips

Free Patterns can be seen along the sidebar (on right side),
or you can use the Free Patterns label to view all posts.

Free Pseudo-Patterns or Pattern Outlines can be found using the Free Pseudo-Patterns label.

The most comprehensive listing of Patterns, Pseudo-Patterns, and Pattern Outlines can be found on the Pattern Bibliography page.

Please read the Blog Housekeeping section in the sidebar for more info.
Showing posts with label Mindless Knitting. Show all posts

Friday, January 25, 2008

Cozy Bathrobe Scarf

Note:
1. More Free Patterns can be seen along the sidebar (on right side),
or you can use the Free Patterns label to view all posts.
2. Free Pseudo-Patterns or Pattern Outlines can be found using the Free Pseudo-Patterns label.


Pattern: Cozy Bathrobe Scarf (see below)
Yarn: Elann Cuzco, 3 balls
Needles: 9mm (US13)

Mmm.... a cozy bathrobe. That's what I had in my mind the entire time I was knitting with Elann Cuzco, a cozy soft alpaca yarn. This yarn is SO SOFT!!! I love how it is very light and warm. I had no idea how the finished scarf would come out since it went through several incarnations. Now that it is done, I find myself petting the scarf a lot. :-)

Cuzco, with it's unique qualities and heavier weight, is an unusual yarn for me to work with. I knew instantly that cable patterns would not do. I had to come up with some way to knit this up that did not involve cabling because there wouldn't be enough stitch definition with the "fluffiness" of this yarn. What to do? The quick and easy thing to do is to just cast on and knit every row until I run out of yarn. I should have done that, but I had to scratch an itch of mine to try out this and that...

At first, I envisioned a plain scarf with ruffling at the ends. It looked fine the way I envisioned it in my mind. However it didn't work out as I thought it would after trying it three different ways and not being happy with any of the results. Poor ball of Cuzco, it was completely terrorized during this process. The yarn is not terribly fun to frog when you have a bunch of K2Togs to pull apart.

I didn't want to do any fancy stitches because it would just get lost in the "fluff" of this yarn and I wanted to try something more interesting than garter stitch, so I picked out the Double Broken Rib pattern from Barbara Walker #1 pg12 thinking it might be a decent enough alternative. I know you can't see the pattern very well from the photos, due to the "fluff" factor of the yarn and my inability to take photos of any red colored knitting. So click on that link (2 sentences back) to get a better look at what the pattern is like. I know there are people who hate non-reversible stitch patterns. The Double Broken Rib stitch is not reversible, however lack of reversibility never stops me from using a stitch. It just doesn't bother me that much. This pattern is very easy to memorize so it makes for great mindless knitting. I do like the 2-stitch wide columns of knit stitches that run the length of the scarf, however the "broken rib" columns really get lost in the Cuzco fuzz. As a result, you notice that there is some sort of texture to the scarf pattern however it is difficult to see what it is clearly. Thus I do not think this stitch pattern is an ideal match for the the Cuzco.

I did not bother with a pretty chain selvedge on this scarf, thinking that it wouldn't get noticed under the "fluff" of this yarn. I think I will give it a try though, on my next Cuzco scarf. The yarn is a little difficult to work with at first, but then you get used to it and it's easy knitting.

OK, now I have one leftover ball of red Cuzco. What can I make with it???

Stitches used in this scarf include:
Double Broken Rib, BW1 pg 12


Here's how I made the scarf...

I used 3 balls of Elann Cuzco, all of it. So if you want a longer scarf, you will definitely need a 4th ball. I knit very loosely using 9mm (US13) needles. I suppose I could have used 10mm (US15) needles too, however I might have needed to use a 4th ball if I did this. My scarf came out to about 6.5 inches wide and 66 inches long (17 cm x 168 cm).

Cozy Bathrobe Scarf

Yarn: Elann Cuzco, 3 or 4 balls
Needles: 9mm (US13)

LOOSELY cast on 14 stitches.

Row 1 (WS): Purl
Row 2 (RS): Knit
Row 3: K2 * P2, K2 *
Row 4: P2 * K2, P2 *

Repeat rows 1 to 4 for pattern, knit until scarf is desired length, ending with row 2. LOOSELY bind off.

To make a Cozy Bathrobe Keyhole Scarf using 2 balls of Elann Cuzco:

LOOSELY cast on 14 stitches. Work rows 1 to 4, five or six times. (Or when scarf reaches around 7 to 9 inches or so long)

Make keyhole: Working row 1 of pattern, work 4 stitches, bind off center 6 stitches, work remaining 4 stitches.
Close up keyhole: Working row 2 of pattern, work 4 stitches, cast on 6 stitches over the gap, work remaining 4 stitches.

Continue with pattern from row 3. Knit scarf until scarf is around 28 to 30 inches long or until desired length, ending with row 1. LOOSELY bind off.

Now wrap the scarf around your neck and you will never want to take it off. Oh.... did I mention that you should LOOSELY cast on and cast off? ;-)


Elann Cuzco info:
Fibre Content: 100% Brushed Fine Grade Alpaca
Made In: Peru
Care: Hand Wash/ Dry Flat
Gauge: 8 st/4 inches on 9.0 mm (US 13)
Yardage: 40 m (43 yards)
Size: 50g (1.75 oz) ball
Price: $4.60 USD

.

Thursday, October 18, 2007

Seeded Rib Scarf

.


I had mentioned needing some mindless knitting to give my poor brain a rest from cable knitting. Here is a very easy reversible knit/purl unisex scarf pattern, you can almost do it blindfolded or in your sleep! This will be great for those last minute Christmas gifts. I love this Seeded Rib pattern from BW2 p7, it is totally reversible which makes for a great pattern for guy or gal. The pattern is adaptable to nearly any type of yarn, just use the appropriate needles for the yarn and adjust the number of stitches you cast on to get the width you need. You would need to cast on a multiple of 4 stitches plus 3 (such as: 7, 11, 15, 19, 23, 27, 31, 35, 39, 43, 47, 51, 55, 59, 63, etc.).

Stitches used in this scarf include:
Seeded Rib Pattern, BW2 pg 7


Seeded Rib Easy Reversible Scarf

Using ~400 yds of worsted weight yarn and US8 needles, cast on 35 stitches.

Row 1: K3, * P1, K3 *
Row 2: K1, * P1, K3 *, end with P1, K1

Repeat rows 1 & 2 until desired length. Bind off.


It looks almost like true ribbing when worn. I actually knitted this one with 2 extra edge stitches (don't ask me why). My scarf came out to be about 6.5 inches wide and nearly 6 feet long.


Slightly stretched to show the gently undulating "ribbing" of the pattern. It makes a soft easy stretch scarf, not stiff at all like some true ribbings can be.

.

Thursday, June 21, 2007

Andohalambo Hat (ch 2-21)


Here's another hat for Cap Karma.

This purple variegated yarn is the same as the blue variegated yarn I've made numerous hats out of. I wanted to find a way to get the colors of this purple yarn to stripe/pool differently. If I made a stockinette stitch hat from this purple yarn, it would stripe similarly to my Quinquevulnera Hat. Well that's kinda boring! So I came up with this slip stitch pattern for the purple yarn, and I am quite pleased with how it turned out. It's something different. The pattern makes me think of arches, like the ones you might see in an aquaduct. The slipped stitches add an interesting texture to the fabric. The stitch pattern is from BW4 pg13. This hat is very easy to knit, once you have memorized the pattern (very easy!), it becomes perfect Mindless Knitting for in the car or in front of the TV...

While my Andohalambo Hat and my Striped Slip Stitch Hat both use the slipped stitch technique, this Andohalambo Hat differs in that it uses one variegated yarn, while the Striped Slip Stitch Hat uses two different solid colored yarns.


I managed to get Pooh Bear to pose for me. At least Pooh Bear can sit still... :-)

M always notices any new hats I finish and was very quick to get her hands on this one to try it on. So I grabbed my camera and was pleasantly surprised to find two fairly decent photos of her wearing the hat. She usually moves around way too much/fast for my camera to auto-focus, most of my photos of her are blurry "action" shots.


Then she decided to take a swig out of her sippy cup, so I took that as an opportunity to try for another shot. Please excuse the messy in the background, the entire house is her toy box...


Stitches used in this hat include:
Alternating Slip-Stitch, BW3 pg 13
Knit-Two Purl-Two Ribbing, BW1 pg 39

Please email me if you would like your photo and a link to your blog (if you have one) to appear in My Readers' Gallery.


Andohalambo Hat pattern can be downloaded here:
Andohalambo Hat pattern from Box.net (no registration required, just click on link & save file)


.

Wednesday, April 04, 2007

Chessboard Hat

Note:
1. More Free Patterns can be seen along the sidebar (on right side),
or you can use the Free Patterns label to view all posts.
2. Free Pseudo-Patterns or Pattern Outlines can be found using the Free Pseudo-Patterns label.

You're probably wondering why I call this a chessboard hat when everybody under the sun would look at the squares and think checkerboard. I just had to be different. :-)

I was still in a 2-color knitting phase after knitting the Oblique Hat, enjoying getting more comfortable with working with yarn in both my hands, so decided to do something different in my next 2-color hat. This one was inspired by something I saw in a Vogue Stitchionary. The pattern is pretty easy to work, so I consider it "mindless knitting". It's easy to work while watching TV (which is when I did most of the knitting for this hat). You can easily work it without the use of a row counter; you just need to pay a little attention to the colors and remember where to switch colors. My hat above is a bit on the long side, as I wasn't paying attention and just continued around and around a little longer than I had intended before starting the increase, a side effect of watching tv while knitting. This is chemo hat #17 for Cap Karma this winter.

This is a great pattern for using all those little bits of leftover yarn. The minimum amount you would need for a square section is just enough yarn to work 4 rounds, and that's pretty easy requirement to meet! The possibilities are endless. You can change Main Color and/or Contrasting Color however you like, however I suggest you do it on Rounds 1 or 5 if you want to maintain the 4x4 square patterns.

Stitches used in this hat include:The 4-stitch by 4-stitch square checkerboard pattern was inspired from something in VS3, will need to look up the page number
Knit-Two Purl-Two Ribbing BW1 pg 39

Please email me if you would like your photo and a link to your blog (if you have one) to appear in My Readers' Gallery.

Chessboard Hat pattern can be downloaded from Chessboard Hat pattern on box.com (no registration required).

.

Thursday, March 22, 2007

Oblique Hat

Note:
1. More Free Patterns can be seen along the sidebar (on right side),
or you can use the Free Patterns label to view all posts.
2. Free Pseudo-Patterns or Pattern Outlines can be found using the Free Pseudo-Patterns label.


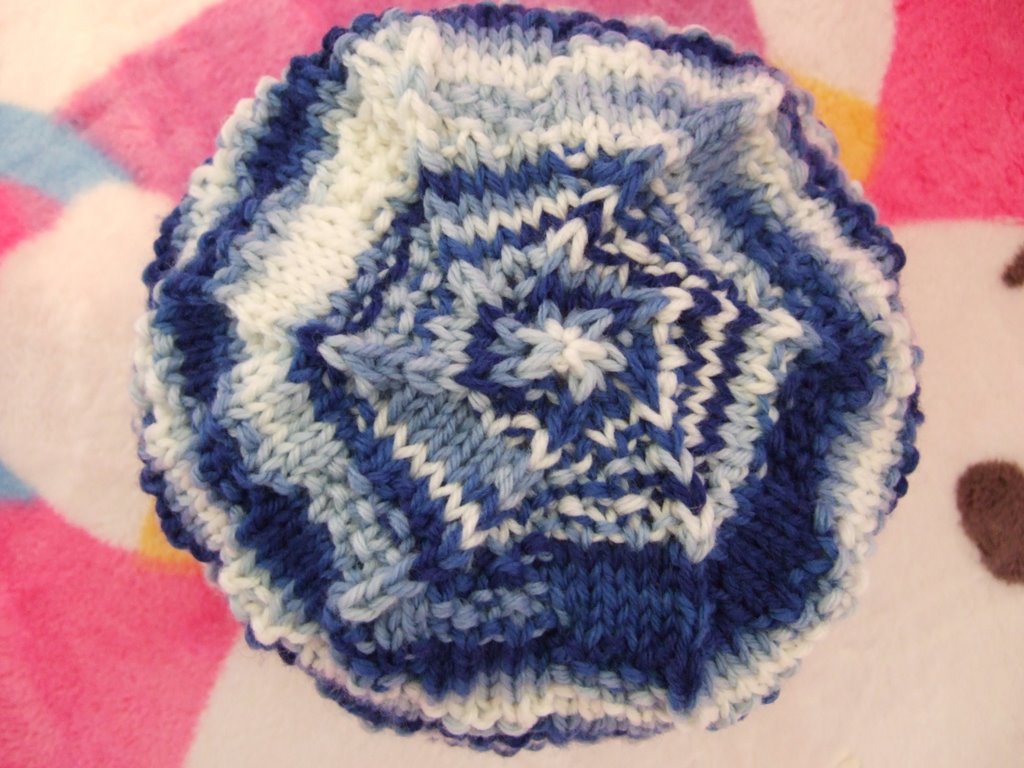
I wanted to try a new technique of knitting with 2 colors. Some will say, "but you already did a 2-color hat with your Striped Slip Stitch Hat." Yes, that is true. However these two hats are different. The Striped Slip Stitch Hat uses the slip stitch technique which only requires you to knit with one color on each round. This Oblique Hat requires knitting with both colors on each round. I've designed this hat based on a combination of VS3.10xBW1.10.

I'm sorry, the hat pictured above doesn't really show off the diagonal pattern of this hat very well. I used a blue/white variegated with a white solid. It was a poor choice to pair together because you "lose" the pattern when the white in the variegated yarn is adjacent to the white solid yarn. This hat would look lovely in two solid contrasting colors. To "see" the pattern in the photo above, first look for the diagonal white line, then you'll see the stripe created with the variegated blue yarn.

You can see a better photo of the stripe created by this pattern in this other Oblique Hat here:
http://smariek.blogspot.com/2007/03/oopsie-short-on-yarn.html

It looks something like this:


Knitting this hat was a bit awkward at first when I had to switch yarns on my right hand every 2 stitches. I had to be careful not to get the balls tangled up! Then I eventually figured out that I could hold the Main Color with my right hand and the Contrasting Color with my left hand (kinda like how you would knit Continental style) ... slow going and differently awkward for me. I guess it just takes getting used to. I think I had a tendency to knit a little tighter because of the newness of knitting with both hands this way. As a result, this hat is a snug ladies small. I continued the pattern in the decrease. Other than the awkwardness of holding 2 yarns, this hat is pretty mindless knitting once you get the hang of the pattern. After you have made this hat once, you can make it again without referring to the pattern. It's great for knitting in the car or while watching TV.

Yay, after finishing this hat, my big blue ball of yarn is now garlic sized. It's the 5th hat made from the big ball you see in that post. This Oblique Hat is my 15th hat for Cap Karma this year. That's more than I made last year, so I must be doing a lot more knitting this year. :-) I'm hoping the knitting will get better as little M gets older...

Stitches used in this hat include;
Blue Bias, VS3 pg 10
Stockinette Stitch, BW1 pg 10

Please email me if you would like your photo and a link to your blog (if you have one) to appear in My Readers' Gallery.


Oblique Hat pattern can be downloaded from:
Oblique Hat Pattern from box.com.


.

Friday, March 16, 2007

Passerby MK Hat 3

Note:
1. More Free Patterns can be seen along the sidebar (on right side),
or you can use the Free Patterns label to view all posts.
2. Free Pseudo-Patterns or Pattern Outlines can be found using the Free Pseudo-Patterns label.


I'm doing a series of "Mindless Knitting" hats which are very easy and/or boring to knit. I wanted to make some hats that I could easily put down and then later pick up without scratching my head trying to figure out where I was in the pattern. And I wanted something that I could easily knit in dim lighting, or even while talking to DH without having to worry about losing count. Besides, V is always telling me that I should choose simpler patterns, or that things don't always need to be hard (actually this was in reference to learning Latin, but I'm sure it also applies to knitting, lol). So these Mindless Knitting hats so are easy/boring that you can basically do them without having to refer to the pattern. There's nothing fancy about them, mostly basic knit/purl, no cables, no yarn overs, twist stitches, etc. They're so simple that you don't even need a row counter to help you keep track of which round you're in.

I actually saw a high school student wearing a hat with this pattern, hence the name Passerby Hat. The pseudo-pattern below is based on what I saw during the 3 seconds I saw her hat as we walked past each other while walking down the street. Her hat was a light cream colored hat so it wasn't too difficult to get a good look at the pattern in those few seconds.

What I loved about her hat is the big fold up brim ... I'm thinking, this is a GREAT way to use up all that blue variegated yarn. Sorry, it's not very easy to see what the hat pattern looks like with this yarn; It'd look better in a solid. And yes, it's another poorly lit nighttime shot too.

I'm also trying something new here with placing the "notes" section above the "pattern" section. This pseudo-pattern was intended to be a rough outline... but then I kept adding stuff and then adding more stuff ("oh wait, what if someone wants to know this", better add it), now it looks pretty much like a regular full blown pattern, lol. Anyhowz, here it is if you're interested...

Stitches used in this hat include:
Knit-Two Purl-Two Ribbing, BW1 pg 39
Reverse Stockinette Stitch, MT pg 4
Stockinette Stitch, BW1 pg 10

Please email me if you would like your photo and a link to your blog (if you have one) to appear in My Readers' Gallery.

Passerby Hat
© Designed by S.M. Kahn, Mar 2007
Smariek Knits -=<>=- http://smariek.blogspot.com

Notes:

Basic Bind Off instructions can be found on this page here:
http://www.knittinghelp.com/knitting/basic_techniques/bind-off.php

Basic Cast-on instructions can be found on this page here:
http://www.knittinghelp.com/knitting/basic_techniques/index.php

CO = Cast on

K = Knit.
K# = Knit # number of stitches, where # indicates the number of stitches to be knit.
Video to show you how to knit can be found here:
http://www.knittinghelp.com/knitting/basic_techniques/knit.php

K2TOG = Knit 2 stitches together.
Video showing how to do K2Tog can be found here:
http://www.knittinghelp.com/knitting/basic_techniques/decrease.php

P = Purl.
P# = Purl # number of stitches, where # indicates the number of stitches to be purled.
Video to show you how to purl can be found here:
http://www.knittinghelp.com/knitting/basic_techniques/purl.php

* ... * = work everything between asterisks across the round.
(asterisks are described here: http://www.knittinghelp.com/knitting/abbreviations_explained/ )

Pattern:

Please read "Notes" section before starting; it contains almost everything I think you may need to know to work this pattern. I think the only thing I haven't defined is "K2 P2 ribbing", you can email me if you have questions about how to do this.

This hat is knitted in the round with circular needles.

WW yarn. US8 (5mm) needles. CO 96 sts, join in round.

Work K2 P2 ribbing for about 5 inches (~12.5 cm). Part of this is the fold up brim, adjust length as desired.

Rounds 1-4: Knit
Rounds 5-8: Purl

Repeat rounds 1-8 until desired length (learning towards longer as the decrease section is pretty short).

Decrease Round 1: Knit
Decrease Round 2: * K12, K2Tog *
Decrease Round 3: * K11, K2Tog *
Decrease Round 4: * K10, K2Tog *
Decrease Round 5: * K9, K2Tog *
Decrease Round 6: * K8, K2Tog *
Decrease Round 7: * K7, K2Tog *
Decrease Round 8: * K6, K2Tog *
Decrease Round 9: * K5, K2Tog *
Decrease Round 10: * K4, K2Tog *
Decrease Round 11: * K3, K2Tog *
Decrease Round 12: * K2, K2Tog *
Decrease Round 13: * K1, K2Tog *
Decrease Round 14: * K2Tog *

Cut yarn, thread through remaining stitches and fasten off. Weave ends.


.

Thursday, November 09, 2006

Quinquevulnera MK Hat

Note:
1. More Free Patterns can be seen along the sidebar (on right side),
or you can use the Free Patterns label to view all posts.
2. Free Pseudo-Patterns or Pattern Outlines can be found using the Free Pseudo-Patterns label.


I'm doing a series of "Mindless Knitting" hats which are very easy and/or boring to knit. I wanted to make some hats that I could easily put down and then later pick up without scratching my head trying to figure out where I was in the pattern. And I wanted something that I could easily knit in dim lighting, or even while talking to DH without having to worry about losing count. Besides, V is always telling me that I should choose simpler patterns, or that things don't always need to be hard (actually this was in reference to learning Latin, but I'm sure it also applies to knitting, lol). So these Mindless Knitting hats so are easy/boring that you can basically do them without having to refer to the pattern. There's nothing fancy about them, mostly basic knit/purl, no cables, no yarn overs, twist stitches, etc. They're so simple that you don't even need a row counter to help you keep track of which round you're in.


Here is my Quinquevulnera MK Hat, the second hat in my "Mindless Knitting" series of hats. The first was the Sarawakense Hat. This is hat #8 for the Cap Karma Chemo Cap Project. Are you wondering how I came up with the names for these two hats? Well, I pulled them out of a hat! Ok, not really, but there is a theme to the names. Can you figure it out? Anyways, since the hats are pretty simple & plain, I thought it would be nice balance that out with an "interesting" sounding name. Silly, huh?

The hat is basically a simple checkerboard pattern of plain & seed stitch squares. The decrease at the top was done "in pattern"; I'm not sure if you can see it in the picture above. The picture below just shows you a closeup of the checkerboard pattern. I'm not sure you can see it very well with the variegated yarn. The pattern is very easy to memorize and figure out by reading your knitting as you go.

Stitches used in this hat include:
Seed Block Stitch, BW1 pg 20
Stockinette Stitch, BW1 pg 10


Please email me if you would like your photo and a link to your blog (if you have one) to appear in My Readers' Gallery.


Quinquevulnera "Mindless Knitting" Hat
© Designed by S.M. Kahn, November 2006
Smariek Knits -=<>=- http://smariek.blogspot.com

Using Worsted Weight yarn, US8 (5mm) needles, cast on 90 stitches.
Join in a round, careful not to twist the stitches.

Knit 8 rounds.

Round 1: * K5, (P1, K1)x2, P1 *
Round 2: * K6, (P1, K1)x2 *
Round 3: * K5, (P1, K1)x2, P1 *
Round 4: * K6, (P1, K1)x2 *
Round 5: * K5, (P1, K1)x2, P1 *
Round 6: * (P1, K1)x2, P1, K5 *
Round 7: * (K1, P1)x2, K6 *
Round 8: * (P1, K1)x2, P1, K5 *
Round 9: * (K1, P1)x2, K6 *
Round 10: * (P1, K1)x2, P1, K5 *

Repeat Rounds 1 to 10 three more times.

Decrease "in pattern", or just knit those stitches:

DRound 1: Work 13 stitches, K2tog
DRound 2: Work 12 stitches, K2tog
DRound 3: Work 11 stitches, K2tog
DRound 4: Work 10 stitches, K2tog
DRound 5: Work 9 stitches, K2tog
DRound 6: Work 8 stitches, K2tog
DRound 7: Work 7 stitches, K2tog
DRound 8: Work 6 stitches, K2tog
DRound 9: Work 5 stitches, K2tog
DRound 10: Work 4 stitches, K2tog
DRound 11: Work 3 stitches, K2tog
DRound 12: Work 2 stitches, K2tog
DRound 13: Work 1 stitch, K2tog
DRound 14: K2tog

Cut yarn & pull through remaining 6 stitches. Weave in ends.


Notes:

K2Tog = Knit 2 stitches together

Instructions in parentheses followed by x2 means you do what is in the paretheses twice. For example, (P1, K1)x2 means you do the following: P1, K1, P1, K1.


.

Wednesday, November 01, 2006

Sarawakense MK Hat

Note:
1. More Free Patterns can be seen along the sidebar (on right side),
or you can use the Free Patterns label to view all posts.
2. Free Pseudo-Patterns or Pattern Outlines can be found using the Free Pseudo-Patterns label.


I'm doing a series of "Mindless Knitting" hats which are very easy and/or boring to knit. I wanted to make some hats that I could easily put down and then later pick up without scratching my head trying to figure out where I was in the pattern. And I wanted something that I could easily knit in dim lighting, or even while talking to DH without having to worry about losing count. Besides, V is always telling me that I should choose simpler patterns, or that things don't always need to be hard (actually this was in reference to learning Latin, but I'm sure it also applies to knitting, lol). So these Mindless Knitting hats so are easy/boring that you can basically do them without having to refer to the pattern. There's nothing fancy about them, mostly basic knit/purl, no cables, no yarn overs, twist stitches, etc. They're so simple that you don't even need a row counter to help you keep track of which round you're in.

Actually, I have knitted this one in the dark! It gets dark earlier since we switched over to Standard Time. Yesterday, I took M on late 4:45pm car ride to get her to nap, stopped at 280 Metro Center thinking we'll stop by Joann's when she wakes up, and I knitted in the car until she woke up.... it was dark, didn't turn on the interior car lights, and still managed to "see" enough of my knitting to knit in the dark. Never did make it to Joann's though cuz she took a long nap, it was already dark & late, so we just went home instead.


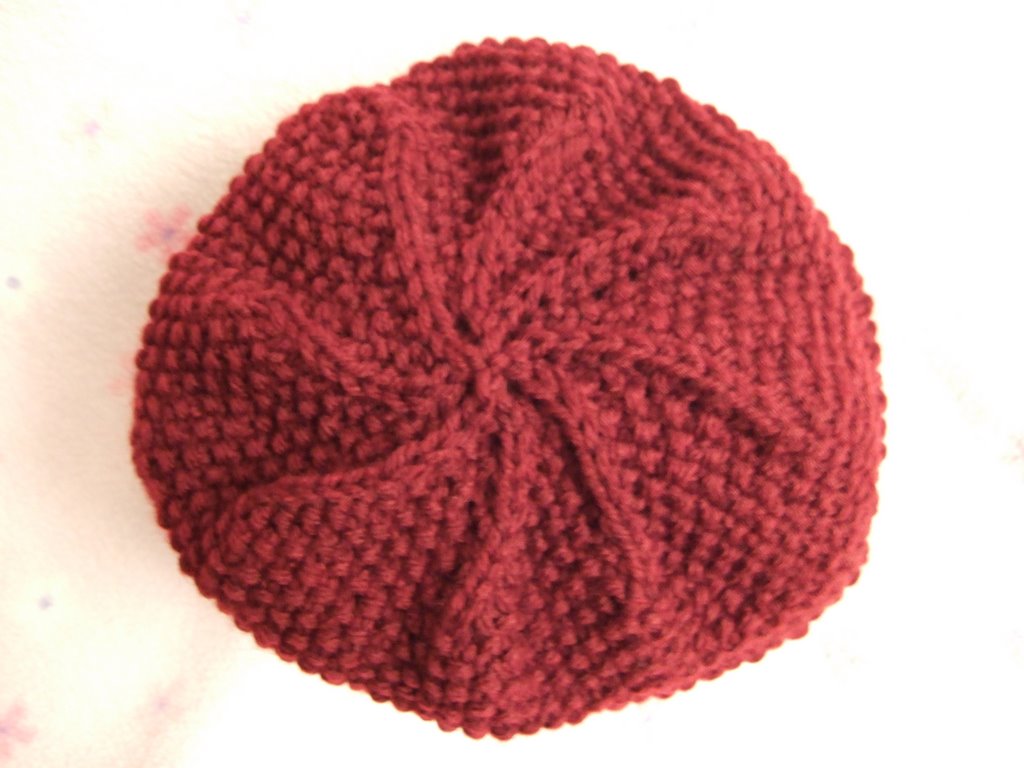
This is my Sarawakense "Mindless Knitting" Hat. Here's how the hat started out. I wanted to do a roll brim hat. I've already made many hats with a stockinette style decrease at the top. I decided that I wanted to do one with a seed stitch decrease. I love how seed stitch looks and find that I'm often drawn to patterns with it. But I didn't want to do a hat that had seed stitch in it from top to bottom, so I decide to throw in some stockinette bands just to mix it up a bit. So this is how the hat turned out the way it turned out. The picture below shows the seed stitch top. Sorry it's a little out of focus, but it was the best picture I had of the top.


This is hat #6 for this year's Cap Karma Chemo Cap Project ...

Stitches used in this hat include:
Seed Stitch, BW1 pg 11
Stockinette Stitch, BW1 pg 10

11/19/06: Thought I would add the following pattern "outline" since K asked V to knit her one. Tweak the numbers however you want.

WW yarn, US8 needles, cast on 88 stitches.
Knit 8 rounds.
Seed stitch 12 rounds.
Knit 8 rounds.
Seed stitch 8 rounds
Knit 8 rounds.
Seed stitch 12 rounds.
Seed stitch decrease: Seed stitch 9, K2tog; Seed stitch 8, K2tog; ... Seed Stitch 1, K2Tog; K2Tog.


.