Navigation Tips

Free Patterns can be seen along the sidebar (on right side),
or you can use the Free Patterns label to view all posts.

Free Pseudo-Patterns or Pattern Outlines can be found using the Free Pseudo-Patterns label.

The most comprehensive listing of Patterns, Pseudo-Patterns, and Pattern Outlines can be found on the Pattern Bibliography page.

Please read the Blog Housekeeping section in the sidebar for more info.
Showing posts with label Free Pseudo-Patterns. Show all posts

Sunday, June 01, 2008

Birthday Present

Look at my new toy! It's DH's (belated) birthday gift to me. I knew that it would need charging when I open it and was I thinking this would take several hours. I was pleasantly surprised to find that it took under an hour. It's not as if I actually measured how long it took.

So what did I get?

A box:


This is what I found when I opened this little black box. Here are all the contents, with the exception of the dollar bill which I threw into the photo for sizing purposes:


There are 2 white Apple stickers. I remember when they had multicolored striped stickers. I might still have some some where, in a box. There is also documentation & quick start guide, although not really necessary since it's pretty self-explanatory with the exception of two plastic pieces which I have not yet discovered their purpose. That would be the transparent square piece at the upper right (above the earbuds) and the white rectangular-ish piece at the lower left. Any ideas what these are? The black thing on the right side is a cleaning cloth. The white cable to the left of the iPod is the USB cable that connects between iPod and computer; the iPod charges while it is connected to your computer.


It's still shiny. No fingerprints yet. Now I'm thinking about knitting a "sock" for my iPod Touch. I'm thinking of cables on the front side. Why? Because cables make a thicker fabric. I figure that this would offer slightly more "padded" protection for the screen. I do have some sock yarn which has been sitting around for years. And it's purple! My favorite color!


So I sat down, pushed some wool around some needles and out popped this:


Pattern: Four-Rib Braid iPod Touch Sock (pseudo-pattern below)
Yarn: Sock It To Me 4 Ply
Needles: 2.75 mm (US2)

I've had a post-it flag on BW2 pg 177 for quite some time now because I liked the Four-Rib Braid pattern. I'm really surprised that Miss M hasn't yet pulled this sticky out. She usually pulls out any post-its I have protruding from my books. I've gotten into sticking them on the page, without them protruding, which usually works out better until she happens to see them when I'm flipping through a book. Anyhow this one survived and I was reminded of the pattern as I turned to it. It is a cable panel (what else would it be?) that seemed about the right width using sock weight yarn. So I decided to use this for my iPod Touch sock and converted the row-by-row intsructions for knitting in the round cuz there is no way I am going to do any seaming if I can avoid it. I am excessively lazy when it comes to that. Oh, if this cable pattern looks familiar, it's because I had also used it in my 3rd Cable Bag. :-)


I did cast on 40 stitches for my iPod Touch sock, but then reduced it to 39 after working the K2P2 ribbing. This really isn't necessary, I just wanted my sock to be a wee bit snugger. Now you're probably wondering how I divided my stitches onto 2 needles before grafting. I just put 19 stitches in front (I slipped 1 purl stitch from Needle 3 onto Needle 1 and slipped 1 purl stitch from Needle 2 to Needle 1, so that the 17-stitch cable pattern would be centered) and 20 stitches in the back. And while grafting, I worked 2 stitches from the back needle as one.

Even though I made my iPod Touch sock snug, I can still slip the earbuds (on the backside, cuz I don't want to scratch up the front screen) inside the sock when not in use.


I do love how the iPod Touch connections are all located at one side (viz. the bottom) as this allows me to keep the iPod Touch inside the sock while I have the USB cable or ear buds connected. It would have been trickier to create a sock for my older 4th generation iPod where the earbuds connected at the top and the USB cable connected at the bottom.

This is a simple no-frills sock with a simple cable pattern slapped onto the front side. I thought about shaping the end before grafting and then decided it wouldn't make much difference to me.



Here's an outline of how I made this iPod Touch sock:

Four-Rib Braid iPod Touch Sock
© Designed by S.M. Kahn, May 2008
Smariek Knits -=<>=- http://smariek.blogspot.com

YARN, NEEDLE & GAUGE:

Sock-It-To-Me Essential 4-Ply

2.75 mm (US2) Double Point Needles
(or other needles of your choice for knitting in the round)

My gauge was in the neighborhood of 7.5 stitches per inch. However you can cast on more or less stitches to make size adjustments to fit your MP3 player.

NOTES:

K = Knit

P = Purl

CB4 = Slip 2 stitches onto CN and hold in back. K2. Then K2 from CN.

CF4 = Slip 2 stitches onto CN and hold in front. K2. Then K2 from CN.

BPC = Slip 1 stitch onto CN and hold in back. K2. P1 from CN.

FPC = Slip 2 stitches onto CN and hold in front. P1. K2 from CN.

TB5 = Slip 3 stitches onto CN and hold in back. K2. Slip the purl stitch from CN back to left-hand needle and purl it. Then K2 from CN.

TF5 = Slip 3 stitches onto CN and hold in front. K2. Slip the purl stitch from CN back to left-hand needle and purl it. Then K2 from CN.

This is how I made my iPod Touch Sock which fits my iPod Touch whose dimensions are 21 cm long (4 3/8 in) and 14 cm around (5.5 in). You can cast on more stitches to make a larger sock (such as 44 sts or 48 sts so that the K2P2 ribbing still applies).


PATTERN INSTRUCTIONS:

Cast on 40 stitches, divide stitches onto three needles, and join into round.

Work K2, P2 ribbing for 8 rounds.

Begin cable pattern:

Round 1, 3, 9, 11: (P2, K2) twice, P1, (K2, P2) twice, knit to end of round
Round 2: P2, K2, P2, TB5, P2, K2, P2, knit to end of round
Round 4, 12: P2, FPC, BPC, P1, FPC, BPC, P2, knit to end of round
Round 5, 7, 13, 15: P3, (K4, P3) twice, knit to end of round
Round 6, 14: P3, CB4, P3, CF4, P3, knit to end of round
Round 8, 16: P2, BPc, FPC, P1, BPC, PPC, P2, knit to end of round
Round 10: P2, K2, P2, TF5, P2, K2, P2

Work Rounds 1 to 16 of cable pattern, three times total.
(Or work Rounds 1 to 16 until sock reaches desired length)

Divide stitches onto 2 needles and graft them (kitchener or 3-needle bind off).
Note: You should divide stitches onto front & back needles in such a way that the cable pattern will be centered before you graft.

Weave in ends.

Stitches used in this scarf include:
Knit-Two Purl-Two Ribbing, BW1 pg 39
Four-Rib Braid, BW2 pg 177
Stockinette Stitch, BW1 pg 10


.

Saturday, May 24, 2008

Two Diagonal Scarves - Flora

.
This is Part 2 in a series on Two Diagonal Scarves - Miles and Flora.
The full series is Part 1 and Part 2.

Scroll down further for outlines on how to knit the Flora Scarf.


Flora Scarf

Pattern: Flora Scarf (pseudo pattern below)
Yarn: Lion Brand Wool-Ease, Blue Mist, 3 balls
Needles: 5 mm (US8)

This is Part 2 in my series of Diagonal Scarves. I actually picked out 4 diagonal patterns I wanted to knit, three knit/purl types and one cable pattern. However I managed to limit this to only two two. The Flora Scarf is the second diagonal scarf, based on the Steep Diagonal Rib from BW2. Like the Miles Scarf, it is easy mindless knitting. Flora is actually easier to knit than Miles because once you get a row started, you are merely doing K3 P3 ribbing. This scarf is completely reversible, and it is suitable for a man. It would be lovely knit up in a better quality yarn than the one I used.

See? I'm not limited to knitting cable scarves. I have a couple of other easy knit/purl type scarves too: Asherton Reversible Scarf; Winterbourne Scarf; Seeded Rib Reversible Scarf; Pythagorean Reversible Scarf.

I like this blue yarn much more than the mushroom colored yarn I used in the Miles Scarf. This blue one has the normal feel of Wool-Ease.

.


Flora Scarf, close up
Note: Pattern corrected on 9/18/2008.


FLORA SCARF
© Designed by S.M. Kahn, April 2008
Smariek Knits -=<>=- http://smariek.blogspot.com

YARN, NEEDLE & GAUGE:

Lion Brand Wool-Ease (worsted weight yarn), about 400 to 500 yards (more if you want a longer scarf)

5.0 mm (US8)

Guage is not critical. Use a needle size appropriate for the yarn you are using. Thicker yarn & larger needles will give you a larger scarf. Thinner yarn & smaller needles will give you a smaller scarf.

NOTES:

K = Knit

P = Purl

Wrong side even numbered rows can be read as: Work stitches as they present themselves. Viz. knit the knit stitches and purl the purl stitches.


PATTERN INSTRUCTIONS:

Cast on 42 stitches.

Knit 4 rows.

Row 1: K3, * K3, P3 *, K3
Row 2: K3, * K3, P3 *, K3
Row 3: K5, * P3, K3 *, P3, K4
Row 4: K3, P1, * K3, P3 *, K3, P2, K3
Row 5: K4, * P3, K3 *, P3, K5
Row 6: K3, P2, * K3, P3 *, K3, P1, K3
Row 7: K3, * P3, K3 *, K3
Row 8: K3, * P3, K3 *, K3
Row 9: K3, P2, * K3, P3 *, K3, P1, K3
Row 10: K4, * P3, K3 *, P3, K5
Row 11: K3, P1, * K3, P3 *, K3, P2, K3
Row 12: K5, * P3, K3 *, P3, K4

Repeat rows 1 to 12 for pattern.

Knit 4 rows.

Bind off. Weave in ends.


Stitches used in this scarf include:
Garter Stitch, BW 1 pg 10
Steep Diagonal Rib, BW2 pg 5


This is Part 2 in a series on Two Diagonal Scarves - Miles and Flora.
The full series is Part 1 and Part 2.

.

Saturday, May 17, 2008

Two Diagonal Scarves - Miles

This is Part 1 in a series on Two Diagonal Scarves - Miles and Flora.
The full series is Part 1 and Part 2.

Scroll down further for outlines on how to knit the Miles Scarf.


Miles Scarf (Side A on left; Side B on right)
.
Pattern: Miles Scarf (pseudo pattern below)
Yarn: Lion Brand Wool-Ease, mushroom color, 2 balls
Needles: 5 mm (US8)
.

I finished this scarf two weeks ago and it has taken me this long to actually sit down and blog about it. I've also finished the Flora Scarf too, and will blog about it soon.

I needed a break from cable knitting because I suspect it has something to do with the wrist pain I've been experiencing. I thought it was time to do an easy, almost mindless knitting, knit purl type scarf. I wanted something with a diagonal theme to it and found several while browsing through my stitch dictionaries. I settled on this one for Miles, pattern # 61 from NKSL, which looked interesting, offering a bit of texture yet plain enough to be a "manly" scarf. It's perfect for the guy who doesn't want anything too fussy. Although it is not reversible, I find the back side not entirely unattractive. Yes, I know I could choose to do a knit purl pattern that runs diagonally and is completely reversible, but where is the fun in that? It's odd, I actually like the back side a little more than the front side. Here are photos of both sides. Side A is the one with the purple watermark. Side B is the one with the red watermark. Which side do you prefer? Can you tell which side is the "right" side and which is the "wrong" side?


Miles Scarf (Side A)


Miles Scarf (Side B)

As you can see, I am not above using acrylic/wool blend yarns that you can find at places like Jo-Ann or Michael's. I actually like acrylic/wool blends like Lion Brand Wool-Ease and Plymouth Encore. However I wasn't sure about this mushroom color Wool-Ease because it felt more scratchy than any other Wool-Ease I had used in the past. I think it might have something to do with the flecks of black that runs through the yarn. Also, I noticed that the label says it is 86% acrylic / 10% wool /4% rayon. I could have sworn that all the other Wool-Ease I used in the past were 80% acrylic / 20% wool. I'd take a guess that the black flecks make up the 4% rayon in the yarn. I wonder if I would like this mushroom color more if the yarn were softer.

See? I'm not limited to knitting cable scarves. I have a couple of other easy knit/purl type scarves too: Asherton Reversible Scarf; Winterbourne Scarf; Seeded Rib Reversible Scarf; Pythagorean Reversible Scarf.
.


MILES SCARF
© Designed by S.M. Kahn, April 2008
Smariek Knits -=<>=- http://smariek.blogspot.com

YARN, NEEDLE & GAUGE:

Lion Brand Wool-Ease (worsted weight yarn), about 400 to 500 yards (more if you want a longer scarf)

5.0 mm (US8)

Guage is not critical. Use a needle size appropriate for the yarn you are using. Thicker yarn & larger needles will give you a larger scarf. Thinner yarn & smaller needles will give you a smaller scarf.

NOTES:

K = Knit

P = Purl

Wrong side even numbered rows can be read as: Work stitches as they present themselves. Viz. knit the knit stitches and purl the purl stitches.


PATTERN INSTRUCTIONS:

Cast on 42 stitches (or 33 stitches for narrower scarf, or 51 stitches for wider scarf).

Knit 4 rows.

Row 1: K3, * K1, P1, K3, P4 *, K3
Row 2: K3, * K4, P3, K1, P1 *, K3
Row 3: K3, * P1, K1, P1, K3, P3 *, K3
Row 4: K3, * K3, P3, K1, P1, k1 *, K3
Row 5: K3, * P2, K1, P1, K3, P2 *, K3
Row 6: K3, * K2, P3, K1, P1, K2 *, K3
Row 7: K3, * P3, K1, P1, K3, P1 *, K3
Row 8: K3, * K1, P3, K1, P1, K3 *, K3
Row 9: K3, * P4, K1, P1, K3 *, K3
Row 10: K3, * P3, K1, P1, K4 *, K3
Row 11: K3, * K1, P4, K1, P1, K2 *, K3
Row 12: K3, * P2, K1, P1, K4, P1 *, K3
Row 13: K3, * K2, P4, K1, P1, K1 *, K3
Row 14: K3, * P1, K1, P1, K4, P2 *, K3
Row 15: K3, * K3, P4, K1, P1 *, K3
Row 16: K3, * K1, P1, K4, P3 *, K3
Row 17: K3, * P1, K3, P4, K1 *, K3
Row 18: K3, * P1, K4, P3, K1 *, K3

Repeat rows 1 to 18 for pattern.

Knit 4 rows.

Bind off. Weave in ends.

.
Stitches used in this scarf include:
Garter Stitch, BW 1 pg 10
Pattern # 61, NKSL pg 42
.

This is Part 1 in a series on Two Diagonal Scarves - Miles and Flora.
The full series is Part 1 and Part 2.

.

Tuesday, March 18, 2008

Embossed Leaves

Note:
1. More Free Patterns can be seen along the sidebar (on right side),
or you can use the Free Patterns label to view all posts.
2. Free Pseudo-Patterns or Pattern Outlines can be found using the Free Pseudo-Patterns label.

.


Pattern: Embossed Leaves (see below)
Yarn: Lily Sugar & Cream, Delft Blue color, 1 ball
Needles: 4.5 mm (US7)
.

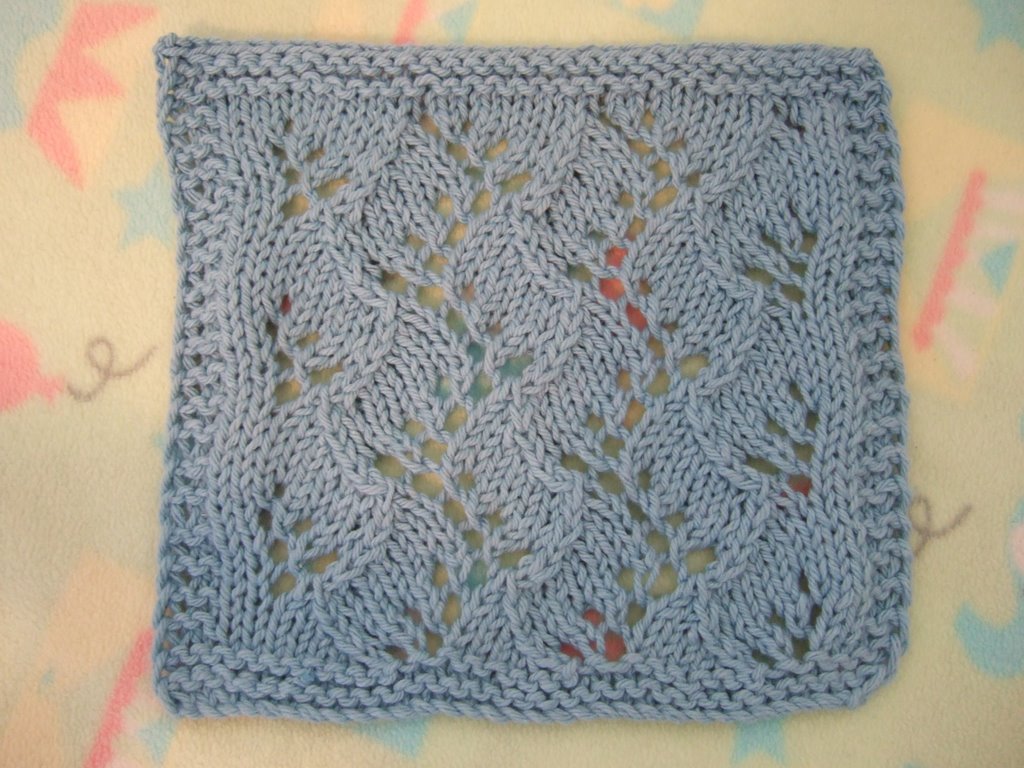
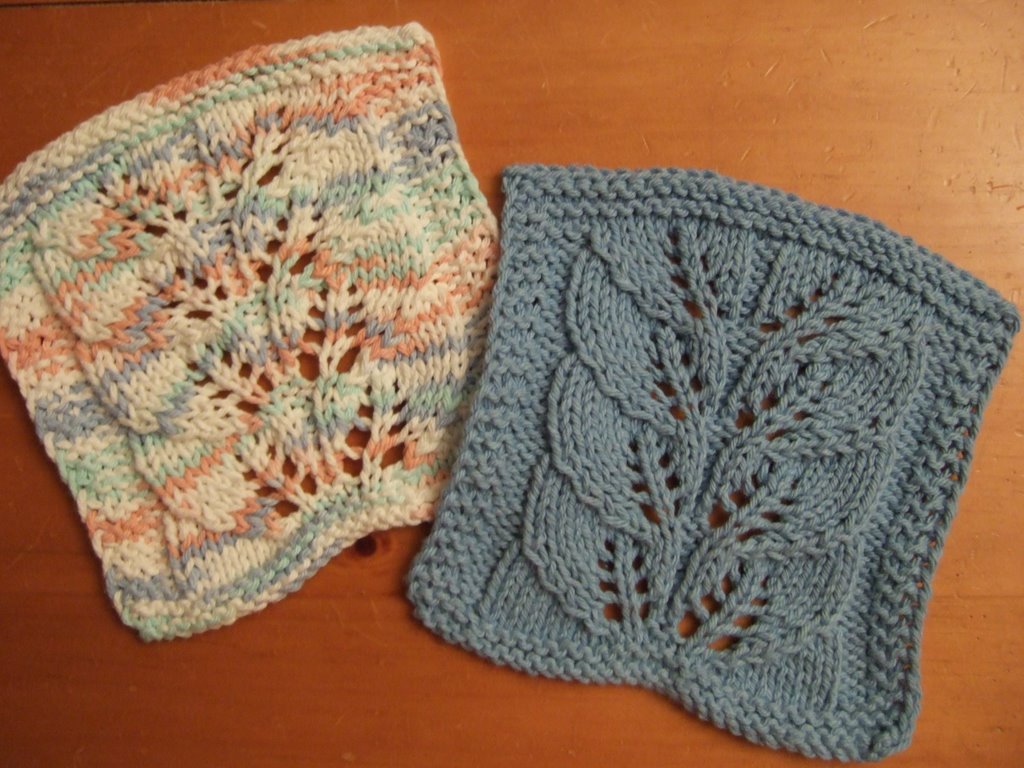
This is a follow up to the Embossed Twining Vine Leaf Cloth, where I attempted to fill in the negative space on either side of the center panel. So I perused my BWs and stumbled upon the Embossed Leaf Pattern in BW1 which looked like it would be a nice match with the Embossed Twining Vine Leaf Pattern. I had to tweak the Embossed Leaf Pattern a bit since I didn't want a staggered allover leaf pattern. I changed it to a single panel of embossed leaves and placed them around the center panel.

I must knit funny because I couldn't get the center panel to come out well when I knit it using the directions in my stitch dictionary. I had to tweak it a bit to get it to look neater; you can read about my tweaks here. I was happy to find that the leaf pattern I chose to go around the center panel did not require any tweaking, it looked fine to me knit from the instructions as-is.

I think the center panel stands out better without the leaves on either side, however I can also see how some people might find all that reverse stockinette stitch on either side to be rather blah looking.

.


Pattern: Embossed Leaves (see below)
Yarn: Lily Sugar & Cream, Soft Violet color, 1 ball
Needles: 4.5 mm (US7)


Embossed Leaves Cloth
© Designed by S.M. Kahn, March 2008
Smariek Knits -=<>=- http://smariek.blogspot.com

YARN & NEEDLE:

Lily Sugar & Cream kitchen cotton yarn, 1 ball
4.5 mm (US7)

NOTES:

B4 (4-stitch border) = Knit 4 stitches
K = Knit
K2Tog = Knit 2 Together

KRL = Knit Right Loop is done as follows:
1. Insert right-hand needle into right loop of stitch just below next stitch, place it onto the left-hand needle and knit it.
2. Knit first stitch on the left-hand needle.
(Video for KRL can be found here)

M1F (Make One Front) = From the front, lift the running thread between the stitch just worked and the next stitch with the left needle, then knit into the back loop of this stitch.
(Video for M1F can be found here)

P = Purl

Purl Inc = Purl Increase is done as follows:
1. Purl into the top loop of the stitch in the row below the first stitch on left-hand needle (inserting needle point downward from front, not through the stitch from behind).
2. Purl into the first stitch on the left-hand needle.

P2Tog = Purl 2 Together
S2KP = Slip 2 stitches together, Knit 1 stitch, Pass 2 slipped stitches over
SSK = Slip, Slip, Knit
YO = Yarn Over


PATTERN INSTRUCTIONS:

Cast on 42 stitches.
Knit 6 rows.

Row 1: B4, K9, P5, K4, P3, K13, B4
Row 2: B4, P4, P7, P2Tog, KRL, K2, P4, K2, YO, K1, YO, K2, P5, K1, P3, B4
Row 3: B4, K3, P1, K5, P7, K4, P2, K1, P1, K8, P1, K3, B4
Row 4: B4, P3, M1F, K1, M1F, P6, P2Tog, K1, Purl Inc, K2, P4, K3, YO, K1, YO, K3, P5, M1F, K1, M1F, P3, B4

Row 5: B4, K3, P3, K5, P9, K4, P2, K2, P1, K7, P3, K3, B4
Row 6: B4, P3, (K1, YO) twice, K2, P5, P2Tog, K1, Purl Inc, P1, K2, P4, SSK, K5, K2Tog, P5, (K1, YO) twice, K1, P3, B4
Row 7: B4, K3, P5, K5, P7, K4, P2, K3, P1, K6, P5, K3, b4
Row 8: B4, P3, K2, (YO, K1) twice, K1, P4, P2Tog, K1, Purl Inc, P2, K2, P4, SSK, K3, K2Tog, P5, K2, (YO, K1) twice, K1, P3, B4

Row 9: B4, K3, P7, K5, P5, K4, P2, K4, P1, K5, P7, K3, B4
Row 10: B4, P3, K2, S2KP, K2, P5, YO, K1, YO, P4, K2, P4, SSK, K1, P2Tog, P5, K2, S2KP, K2, P3, B4
Row 11: B4, K3, P5, K5, P3, K4, P2, K4, P3, K5, P5, K3, B4
Row 12: B4, P3, K1, S2KP, K1, P5, (K1, YO) twice, K1, P4, K1, KRL, P2Tog, P2, S2KP, P5, K1, S2KP, K1, P3, B4

Row 13: B4, K3, P3, K9, P3, K4, P5, K5, P3, K3, B4
Row 14: B4, P3, S2KP, P5, K2, YO, K1, YO, K2, P4, K1, KRL, K1, P2Tog, P7, S2KP, P3, B4
Row 15: B4, K3, P1, K8, P1, K1, P2, K4, P7, K5, P1, K3, B4
Row 16: B4, P9, K3, YO, K1, YO, K3, P4, K2, Purl Inc, K1, P2Tog, P10, B4

Row 17: B4, K11, P1, K2, P2, K4, P9, K9, B4
Row 18: B4, P3, K1, P5, SSK, K5, K2Tog, P4, K2, P1, Purl Inc, K1, P2Tog, P5, K1, P3, B4
Row 19: B4, K3, P1, K6, P1, K3, P2, K4, P7, K5, P1, K3, B4
Row 20: B4, P3, M1F, K1, M1F, P5, SSK, K3, K2Tog, P4, K2, P2, Purl Inc, K1, P2Tog, P4, M1F, K1, M1F, P3, B4

Row 21: B4, K3, P3, K5, P1, K4, P2, K4, P5, K5, P3, K3, B4
Row 22: B4, P3, (K1, YO) twice, K1, P5, SSK, K1, K2Tog, P4, K2, P4, YO, K1, YO, P5, (K1, YO) twice, K1, P3, B4
Row 23: B4, K3, P5, K5, P3, K4, P2, K4, P3, K5, P5, K3, B4
Row 24: B4, P3, K2, (YO, K1) twice, K1, P5, S2KP, P2, P2Tog, K1, KRL, P4, (K1, YO) twice, K1, P5, K2, (YO, K1) twice, K1, P3, B4

Row 25: B4, K3, P7, K5, P5, K4, P3, K9, P7, K3, B4
Row 26: B4, P3, K2, S2KP, K2, P7, P2Tog, KRl, K2, P4, K2, YO, K1, YO, K2, P5, K2, S2KP, K2, P3, B4
Row 27: B4, K3, P5, K5, P7, K4, P2, K1, P1, K8, P5, K3, B4
Row 28: B4, P3, K1, S2KP, K1, P6, P2Tog, K1, Purl Inc, K2, P4, K3, YO, K1, YO, K3, P5, K1, S2KP, K1, P3, B4

Row 29: B4, K3, P3, K5, P9, K4, P2, K2, P1, K7, P3, K3, B4
Row 30: B4, P3, S2KP, P5, P2Tog, K1, Purl Inc, P1, K2, P4, SSK, K5, K2Tog, P5, S2KP, P3, B4
Row 31: B4, K3, P1, K5, P7, K4, P2, K3, P1, K6, P1, K3, B4
Row 32: B4, P8, P2Tog, K1, Purl Inc, P2, K2, P4, SSK, K3, K2Tog, P9, B4

Row 33: B4, K9, P5, K4, P2, K4, P1, K9, B4
Row 34: B4, P3, K1, P5, YO, K1, YO, P4, K2, P4, SSK, K1, K2Tog, P5, K1, P3, B4
Row 35: B4, K3, P1, K5, P3, K4, P2, K4, P3, K5, P1, K3, B4
Row 36: B4, P3, M1F, K1, M1F, P5, (K1, YO) twice, K1, P4, K1, KRL, P2Tog, P2, S2KP, P5, M1F, K1, M1F, P3, B4

Row 37: B4, K3, P3, K9, P3, K4, P5, K5, P3, K3, B4
Row 38: B4, P3, (K1, YO) twice, K1, P5, K2, YO, K1, YO, K2, P4, K1, KRL, K1, P2Tog, P7, (K1, YO) twice, K1, P3, B4
Row 39: B4, K3, P5, K8, P1, K1, P2, K4, P7, K5, P5, K3, B4
Row 40: B4, P3, K2, (YO, K1) twice, K1, P5, K3, YO, K1, YO, K3, P4, K2, Purl Inc, K1, P2Tog, P6, K2, (YO, K1) twice, K1, P3, B4

Row 41: B4, K3, P7, K7, P1, K2, P2, K4, P9, K5, P7, K3, B4
Row 42: B4, P2, K2, S2KP, K2, P5, SSK, K5, K2Tog, P4, K2, P1, Purl Inc, K1, P2Tog, P5, K2, S2KP, K2, P3, B4
Row 43: B4, K3, P5, K6, P1, K3, P2, K4, P7, K5, P5, K3, B4
Row 44: B4, P3, K1, S2KP, K1, P5, SSK, K3, K2Tog, P4, K2, P2, Purl Inc, K1, P2Tog, P4, K1, S2KP, K1, P3, B3

Row 45: B4, K3, P3, K5, P1, K4, P2, K4, P5, K5, P3, K3, B4
Row 46: B4, P3, S2KP, P5, SSK, K1, K2Tog, P4, K2, P4, YO, K1, YO, P5, S2KP, P3, B4
Row 47: B4, K3, P1, K5, P3, K4, P2, K4, P3, K5, P1, K3, B4
Row 48: B4, P9, S2KP, P2, P2Tog, K1, KRL, P4, (K1, YO) twice, K1, P9, B4

Knit 5 rows.
Bind off. Weave in ends. Block slightly.
(Hint: use your fingers to gently press down the purl stitches around the leaves to help make the leaves "pop" more.)


.
Stitches used in this cloth include:
Embossed Leaf Pattern, BW1 pg 152
Embossed Twining Vine Leaf, BW2 pg 238
Garter Stitch, BW1 pg 10
Reverse Stocknitte Stitch, MT pg 3


.

Monday, March 10, 2008

Embossed Twining Vine Leaf

Note:
1. More Free Patterns can be seen along the sidebar (on right side),
or you can use the Free Patterns label to view all posts.
2. Free Pseudo-Patterns or Pattern Outlines can be found using the Free Pseudo-Patterns label.


Note: You can see the follow-up cloth to this one,
Embossed Leaves, which has additional embossed leaves around the center panel, here:
http://smariek.blogspot.com/2008/03/embossed-leaves.html

.


Pattern: Embossed Twining Vine Leaf (with slight tweaks, see below)
Yarn: Lily Sugar & Cream, Softly Taupe color, 1 ball
Needles: 4.5 mm (US7)


If you don't want to read the story behind this dishcloth, then just scroll down to the bottom where I give an outline of how I made the cloth.


A little while ago, Peggy M emailed me to ask whether I had used the Embossed Twining Vine Leaf pattern from BW2 pg 138. She was trying to use it in a baby blanket and mentioned having some problems reduplicating one of the second leaves without changing the pattern, which in turn threw everything off in the row and caused holes when decreasing. I have often stopped on that pattern while flipping through my BWs, but I never got around to doing anything with it. (There is something similar in HG5, which is a 20 stitch panel instead of the BW 26 stitch panel.) Well, I thought now is as good a time to give the pattern a whirl to see how it knit up. Perhaps there was an error in the pattern. I'd have to knit it up to get a better feel for the pattern.


So I grabbed a remnant ball of kitchen cotton yarn and went at it. As you can see from the photo above, I was short a few rows. See that dangling end of yarn at the top? That's what I had left. I didn't even get to knit the top border and bind off. I wasn't sure I'd have enough yarn. I thought making a short bottom border would help, but it clearly wasn't enough. I probably also should have made it a bit narrower too. So I put the stitches onto waste yarn to photograph what I did manage to knit up; this will ultimately get frogged and reincarnated into a smaller dishcloth.

I didn't find any errors in the pattern, however I could see some pitfalls if you're not paying attention.

1. Mind those Yarn Overs, especially wrapping the yarn all the way around when doing a YO before a purl stitch (such as in Row 10 and Row 22).

2. Mind those increases. There are 3 different types of increases in the pattern. (I changed all three decreases, and condensed it down to two decreases (one Knit Increase, one Purl Increase), read further for more info).

3. The three decreases are pretty straight forward (K2Tog, SSK, P2Tog), just pay attention to where they have to be done. Also need to make sure you do the double decreases on Row 12 and Row 24, but I think it's obvious when you get to the tip of the leaf.


If you look closely, the upper part looks slightly neater than the lower part. What particularly bugged me were the big gaping holes to the left of the right leaf branch (red arrow in photo below), so I tweaked a bit to get it to look less obvious (blue arrow in photo below). I also didn't care for how untidy the left leaf branch looked (pink arrow in photo below), but I think my tweaks must have improved it cuz it looks better in the upper one (purple arrow in photo below). The main stem running up the center is probably neater on the upper part too, but it's not as noticeable an improvement.


I discovered sometime after row 15-ish of the pattern that I didn't like how the pattern handled increases and decreases. I can't say exactly where I started, but somewhere along the way I did change the way I did the Purl Increase, KFB and M1F instructions.

So I did this for the Purl Increase (in place of "purl into front and back" of next stitch):
1. Purl into the top loop of the stitch in the row below the first stitch on left-hand needle (inserting needle point downward from front, not through the stitch from behind).
2. Purl into the first stitch on the left-hand needle.

I did KRL (Knit Right Loop) for the Knit Increase on Row 2 and Row 14 (in place of "knit into front and back" of stitch):
1. Insert right-hand needle into right loop of stitch just below next stitch, place it onto the left-hand needle and knit it.
2. Knit first stitch on the left-hand needle.

And I did step #1 of KRL in place of the M1 (aka M1F) on Row 12 and Row 24.

I believe some combination of these tweaks helped make the upper portion look a bit more tidy than the lower portion. I pulled out another ball of kitchen cotton yarn, a brand new full ball, and made another one. I applied my tweaks to this taupe colored cloth. You can compare the results of the taupe colored cloth below with the experimental green cloth above:


Here's an outline of what I did to make this dishcloth:

Abbreviations:
B4 = (4-stitch border) Knit 4 stitches
K = knit
K2Tog = knit 2 together
KRL = Knit Right Loop (see above for step instructions)
P = purl
Purl Inc = Purl Increase (see above for step instructions)
P2Tog = purl 2 together
S2KP = Slip 2 stitches together, Knit 1 stitch, Pass 2 slipped stitches over
SSK = slip, slip, knit

Cast on 44 stitches.
Knit for 6 rows.

Work 2 repeats of pattern:
Row 1: B4, K10, P5, K4, P3, K14, B4
Row 2: B4, P12, P2Tog, KRL, K2, P4, K2 YO, K1, YO, K2, P10, B4
Row 3: B4, K10, P7, K4, P2, K1, P1, K13, B4
Row 4: B4, P11, P2Tog, K1, Purl Inc, K2, P4, K3, YO, K1, YO, K3, P10, B4
Row 5: B4, K10, P9, K4, P2, K2, P1, K12, B4
Row 6: B4, P10, P2Tog, K1, Purl Inc, P1, K2, P4, SSK, K5, K2Tog, P10, B4
Row 7: B4, K10, P7, K4, P2, K3, P1, K11, B4
Row 8: B4, P9, P2Tog, K1, Purl Inc, P2, K2, P4, SSK, K3, K2Tog, P10, B4
Row 9: B4, K10, P5, K4, P2, K4, P1, K10, B4
Row 10: B4, P10, YO, K1, YO, P4, K2, P4, SSK, K1, K2Tog, P10, B4
Row 11: B4, K10, P3, K4, P2, K4, P3, K10, B4
Row 12: B4, P10, (K1, YO) twice, K1, P4, K1, KRL, P2Tog, P2, S2KP, P10, B4
Row 13: B4, K14, P3, K4, P5, K10, B4
Row 14: B4, P10, K2, YO, K1, YO, K2, P4, K1, KRL, K1, P2Tog, P12, B4
Row 15: B4, K13, P1, K1, P2, K4, P7, K10, B4
Row 16: B4, P10, K3, YO, K1, YO, K3, P4, K2, Purl Inc, K1, P2Tog, P11, B4
Row 17: B4, K12, P1, K2, P2, K4, P9, K10, B4
Row 18: B4, P10, SSK, K5, K2Tog, P4, K2, P1, Purl Inc, K1, P2Tog, P10, B4
Row 19: B4, K11, P1, K3, P2, K4, P7, K10, B4
Row 20: B4, P10, SSK, K3, K2Tog, P4, K2, P2, Purl Inc, K1, P2Tog, P9, B4
Row 21: B4, K10, P1, K4, P2, K4, P5, K10, B4
Row 22: B4, P10, SSK, K1, K2Tog, P4, K2, P4, YO, K1, YO, P10, B4
Row 23: B4, K10, P3, K4, P2, K4, P3, K10, B4
Row 24: B4, P10, S2KP, P2, P2Tog, K1, KRL, P4, (K1, YO) twice, K1, P10, B4

Knit 5 rows.
Bind off. Weave in ends. Block slightly.
(Hint: use your fingers to gently press down the purl stitches around the leaves to help make the leaves "pop" more.)

Stitches used in this cloth include:
Embossed Twining Vine Leaf, BW2 pg 238
Garter Stitch, BW1 pg 10
Reverse Stocknitte Stitch, MT pg 3


.

Thursday, February 21, 2008

Warm Hands, Warm Thumbs


Pattern: Warm Hands, Warm Thumbs (outlined below)
Yarn: Elann Highland Wool, Ruby color, 1 ball
Needles: 4.5 mm

I've been working on my 4th mitt, which is based on the first mitts I ever knit. The only difference is that I cast on 40 stitches to make a larger mitt that will fit a man's hand and I am working a wrap around thumb (which maintains the K2P2 pattern). You can follow my process by reading post1 and post2 before this one.


I finished the first mitt of this pair (photo above) and it came out well. It looks long on my hand, nearly reaching the tips of my fingers, but it'll be perfect for a man's longer hand.

This (photo below) is the second mitt of this pair, just after binding off the main section, but before knitting the wrap around thumb.


When I first designed the thumb gusset, I thought I could increase until I had 8 stitches. After several tries, I came up with this:


I knit this section while sitting in bed. When I got to my 8 increase stitches I realized that this was not large enough. So I had to figure something out. Not wanting to get out of my nice cozy warm bed (lazy me), I managed to find a small section of scratch paper within reach that was not already scribbled on and continued working up from there to work out the increases up to 12 stitches.


I continued increasing until I got 12 stitches and thought that was a good stopping point. It would be perfect after picking up 4 stitches, for a total of 16 stitches around the thumb so that I can continue the K2P2 ribbing around the thumb. (Cuz you need it to be divisible by 4 to keep the K2P2 ribbing pattern going around the thumb.)

I think I did a neater job of knitting the thumb gusset on this second mitt. The first one was a bit more sloppy. Nobody would really notice though. Just me.


My notes on knitting the mitt. You can't see Row 10 where I wrote "slip 8 onto waste yarn", then crossed it out and rewrote Row 10 to continue the thumb gusset increase because the watermark is just over that line. (I had to start putting watermarks on my photos because I began to see my photos popping up on other people's websites. And if that isn't bad enough, some people are linking directly to my blogger photos instead of saving their own copy to their space).


Here is the 2nd mitt of the pair (yes, it looks a bit long on me; I made them longer because they're for someone with much larger hands):


I think I did a better job with the second mitt, the thumb gusset looks better:


Here's the finished pair, just in time for gifting tomorrow:


.

Here's what I did to knit these:
Using 4.5mm needles, cast on 40 stitches (36 stitches for women's mitt), join into round.
Work K2P2 ribbing for 20 rounds.

Start thumb gusset (purple indicates the thumb gusset section):
1: * K2, P2 * across round
2: K2, P2, M1P, M1K, * K2, P2 *
3: K2, P2, P1, K1, * K2, P2 *
4: K2, P2, M1P, P1, K1, M1K, * K2, P2 *
5: K2, P2, P2, K2, * K2, P2 *
6: K2, P2, M1K, P2, K2, M1P, * K2, P2 *
7: K2, P2, K1, P2, K2, P1, * K2, P2 *
8: K2, P2, M1K, K1, P2, K2, P1, M1P, * K2, P2 *
9: K2, P2, (K2, P2) twice, * K2, P2 *
10: K2, P2, M1P, (K2, P2) twice, M1K, * K2, P2 *
11: K2, P2, P1, (K2, P2) twice, K1, * K2, P2 *
12: K2, P2, M1P, P1, (K2, P2) twice, K1, M1K, * K2, P2 *
13: K2, P2, (P2, K2) three times, * K2, P2 *
14: K2, P2, slip 12 stitches onto waste yarn, * K2, P2 *

Work K2P2 ribbing for 15 rounds. (knit until desired length; I use 10 rounds for women's mitt & 15 rounds for men's mitt)
Bind off in K2P2 pattern.

Thumb:
Put 12 stitches onto two needles.
Pick up 4 stitches around thumb hole using 3rd needle.
Work P2K2 ribbing for 8 rounds. <-- Note you start with P2
Bind off in P2K2 pattern.
M1K is an increase that is a knit stitch. I used whatever method, depending on the stitches adjacent to where I wanted to insert the increase, that seemed to create less gap.

M1P is an increase that is a purl stitch. I used whatever method, depending on the stitches adjacent to where I wanted to insert the increase, that seemed to create less gap.

Note: The mitts are interchangeable, so you can just make two identical mitts. However if you want a little more "symmetry", you can work it as above for the left mitt. And then for the right mitt thumb gusset, work the pink thumb gusset sections in the reverse order (after working a K2). And when you later pick up the thumb, you'll just start the ribbing with K2 P2; it'll be evident when you're looking at your knitting. :-)


Stitches used in these fingerless mitts include:
Knit-Two Purl-Two Ribbing, BW1 pg 39

.
Yarn info:
Fibre Content: 100% Highland Wool
Made In: Peru
Care: Hand Wash/ Dry Flat
Gauge: 19 st/4 inches 4.0 - 4.5 mm (US 6-7)
Yardage: 100 m (109 yards)
Size: 50g (1.75 oz) ball
Price: $2.38 USD
.

Sunday, February 10, 2008

Third Try, Normal Cables

Related posts:
Cable bag handle & fabric to line inside of bag, 04Apr2009 post.
Cable Bag #2, red color, 10Feb2008 post.
Cable Bag #1, burgundy color, 10Feb2008 post.


Pattern: Four Rib Braid Cable Bag (my own design)
Yarn: Lion Brand Wool-Ease Thick & Quick, black, 2 balls
Needles: 8 mm (US11)

After using asymmetrical cables in cable bag #1 and familiar cables in cable bag #2, I decided to go for more customary cables for my third attempt at a cable bag. I chose the Four Rib Braid Cable from Barbara Walker 2 for the center panel, and surrounded it with my favorite standard cable cross. I like how the overall look is almost the same right side up or upside down. (Cuz I'm lazy and didn't want to knit 2 separate pieces that would have to be grafted together, just so the pattern would be right side up on both sides of the bag)


Well, here's another bag that will go to Vicki for finishing ... adding a fabric lining, seamed, and then attaching a handle.

Here's what I did to make this...

Cast on 43 stitches. Worked three full repeats of the pattern, and then worked rows 1 to 3 again before binding off.

(I thought it would make seaming easier if I slipped the first stitch of every row with yarn in front as if to purl and knit the last stitch of every row.)

Cable Pattern:

1: P2, K2, P6, K2, P1, (K2, P2) twice, K1, (P2, K2) twice, P1, K2, P6, K2, P2
2: K2, P2, K6, P2, K1, P2, K2, P2, TB5, P2, K2, P2, K1, P2, K6, P2, K2
3: P2, K2, P6, K2, P1, (K2, P2) twice, K1, (P2, K2) twice, P1, K2, P6, K2, P2
4: K2, P2, K6, P2, K1, (P2, FPC, BPC, P1, FPC, BPC, P2, K1, P2, K6, P2
5: P2, K2, P6, K2, P1, (K3, P4) twice, K3, P1, K2, P6, K2, P2
6: K2, P2, CB6, P2, K1, P3, CB4, P3, CF4, P3, K1, P2, CF6, P2, K2
7: P2, K2, P6, K2, P1, (K3, P4)x2, K3, P1, K2, P6, K2, P2
8: K2, P2, K6, P2, K1, P2, BPC, FPC, P1, BPC, FPC, P2, K2, P2, K6, P2, K2
9: P2, K2, P6, K2, P1, (K2, P2) twice, K1, (P2, K2) twice, P1, K2, P6, K2, P2
10: K2, P2, K6, P2, K1, P2, K2, P2, TF5, P2, K2, P2, K1, P2, K6, P2, K2
11: P2, K2, P6, K2, P1, (K2, P2) twice, K1, (P2, K2) twice, P1, K2, P6, K2, P2
12: K2, P2, K6, P2, K1, P2, FPC, BPC, P1, FPC, BPC, P2, K1, P2, K6, P2, K2
13: P2, K2, P6, K2, P1, (K3, P4) twice, K3, P1, K2, P6, K2, P2
14: K2, P2, CB6, P2, K1, P4, CB4, P3, CF4, P3, K1, P2, CF6, P2, K2
15: P2, K2, P6, K2, P1, (K3, P4) twice, K3, P1, K2, P2, K2, P2
16: K2, P2, K6, P2, K1, P2, BPC, FPC, P1, BPC, FPC, P2, K1, P2, K6, P2, K2

Abbreviations, abbreviated:

CB4 = Slip 2 stitches onto CN and hold in back. K2. Then K2 from CN.

CF4 = Slip 2 stitches onto CN and hold in front. K2. Then K2 from CN.

CB6 = Slip 3 stitches onto CN and hold in back. K3. Then K3 from CN.

CF6 = Slip 3 stitches onto CN and hold in front. K3. Then K3 from CN.

BPC = Slip 1 stitch onto CN and hold in back. K2. P1 from CN.

FPC = Slip 2 stitches onto CN and hold in front. P1. K2 from CN.

TB5 = Slip 3 stitches onto CN and hold in back. K2. Slip the purl stitch from CN back to left-hand needle and purl it. Then K2 from CN.

TF5 = Slip 3 stitches onto CN and hold in front. K2. Slip the purl stitch from CN back to left-hand needle and purl it. Then K2 from CN.

.
Lion Brand Wool-Ease Thick & Quick Info:
Fiber Content: 80% Acrylic, 20% Wool
Made In: USA
Care: Machine Wash & Dry; Dry Cleaning OK; Do Not Bleach or Iron
Gauge: 9 st / 4 inches 9 mm (US 13)
Weight: Super Bulky
Yardage: 98 m (108 yds)
Size: 170 gm (6 oz) ball
Price: $5.99 USD

First Try, Odd Cables

Related posts:
Cable bag handle/strap, 18Apr2009 post.
Fabric for lining inside of bag, 04Apr2009 post.
Cable Bag #3, black color, 10Feb2008 post.
Cable Bag #2, red color, 10Feb2008 post.


Modèle: Thick and Thin Lattice Cable Bag (création personelle)
Laine: Lion Brand Wool-Ease Thick & Quick, 1 ball plus a bit of a 2nd ball
Aiguilles: 8mm (US11)

(Sorry about the photos, there was too much light coming in from the skylight. Photos show bag unblocked.)

This is what happened when I played around with some super bulky yarn with the intention of creating a cable bag. I had several ideas in mind, but none of these materialized. Instead, I pulled a different pattern out of one of my stitch dictionaries and decided to have a go with it. I don't know why I chose it. I think I was drawn to its asymmetrical cables. It's certainly not your typical go-to cable pattern for a cable purse.


Here's a closer look at the pattern. It's called Thick and Thin Lattice from Barbara Walker 3. If you look closely, there are 2-stitch wide cables (the "thick") and 1-stitch wide cables (the "thin"). It really is an interesting looking pattern. It is a charted design so I had to translate it to row-by-row instructions since I haven't yet learned how to knit from charts.

Working with super bulky weight yarn feels like more work than knitting with thinner yarn. It's as if I was always "fighting" with the yarn to behave. It's also more tiring on the hands. Or perhaps that's because of the larger size needles.

This rectangular strip of knitting, 12" wide & 17" long, is to be folded in half, lined with fabric, seamed along the edges, and then have handles attached. The photo below shows it folded in half. It still needs a suitable lining and purse handle to match, so imagine the top part being a bit narrower once handles are attached to it. I'm sending this off to Vicki so she can do the finishing because she is so much better at doing that sort of thing than I ever could manage. She excels at all things craft-related, it just comes naturally to her. We had talked about making cable bags a long while back, and we agreed that I would knit it and she would finish it. I will post finished photos of the bag, unless this ends up frogged and reincarnated into something else.


.

Here's what I did to make this odd piece of fabric...

Cast on 44 stitches. Worked 3 full repeats of cable pattern (I ended on Row 2 (of the 4th repeat)) and then did purl bind off.

Cable Pattern:

1 (WS): P2, K1, P2, K4, * P3, K5, P3, K4 *, P2, K1, P2
2: (RS): K2, P1, K2, * P4, 2/1 BKC, P5, 1/2 BKC *, P4, K2, P1, K2
3: P2, K1, P2, K4, * P3, K5, P3, K4 *, P2, K1, P2
4: K2, P1, * 2/2 FPC, 2/2 BPC, 1/1 FPC, P3, 1/1 BPC *, 2/2 FPC, 2/2 BPC, P1, K2
5: P2, K3, P4, * (K3, P1) twice, K3, P4 *, K3, P2
6: K2, P3, * 2/2 FKC, P3, 1/1 FPC, P1, 1/1 BPC, P3 *, 2/2 FKC, P3, K2
7: P2, K3, P4, * K4, P1, K1, P1, K4, P4 *, K3, P2
8: K2, P3, * K4, P4, SK2TP, P4 *, K4, P3, K2
9: P2, K3, P4, * K4, P1, K4, P4 *, K3, P2
10: K2, P3, * K4, P4, K1-b, P4 *, K4, P3, K2
11: P2, K3, P4, * K4, P1, K4, P4 *, K3, P2
12: K2, M1, P2, * SSK, K2Tog, P4, M2, P4 *, SSK, K2Tog, P2, M1, K2
13: P2, K4, P2, K1, * K3, P3, K4, P2, K1 * K3, P2
14: K2, P3, * P1, 1/1 FKC, P4, K1, M2, K1, P3 *, P1, 1/1 FKC, P4, K2
15: P2, K4, P2, K1, * K3, P2, K1, P2, K4, P2, K1 *, K3, P2
16: K2, P3, * 1/1 BPC, 1/1/ FPC, P2, 2/1 BPC, P1, 2/1 FPC, P2 *, 1/1 BPC, 1/1 FPC, P3, K2
17: P2, K3, P1, K2, P1, * K2, P2, K3, P2, K2, P1, K2, P1 *, K3, P2
18: K2, P2, * 1/1 BPC, P2, 1/1 FPC, 2/1 BPC, P3, 2/1 FPC *, 1/1 BPC, P2, 1/1 FPC, P2, K2

Abbreviations, abbreviated:

K1-b = Knit through back loop.

K2Tog = Knit 2 stitches together

SSK = Slip. Slip. Knit 2 slipped stitches together.

SK2TP = Slip 1, Knit 2 Together, Pass over, is done as follows:
1. Slip 1 stitch.
2. Knit 2 stitches together.
3. Pass the slipped stitch over.

M1 = Make One, done as follows:
1. Knit into the back of the stitch in the row below the 1st stitch on left-hand needle.
2. Knit into front of 1st stitch on left-hand needle.

M2 = Make Two, done as follows:
1. K1-b (leaving stitch on the left needle)
2. K1 into front of the same stitch (now you can slip the stitch off your left needle)
3. Now insert your left needle point behind the vertical strand that runs downwards from between the 2 stitches just made, and K1-b into this strand to make the 3rd stitch of the group.
This website here will help you see how this central double increase is done.
http://www.girlfromauntie.com/stitch/inc2/

Cable Crosses are indicated by X/Y fashion, where X indicates the number of stitches crossing in the front and Y indicates the number of stitches crossing in back. So... 1/1 means 1 stitch crossing over 1 stitch; 2/1 means 2 stitches crossing over 1 stitch; 1/2 means 1 stitch crossing over 2 stitches; 2/2 means 2 stitches crossing over 2 stitches.

FKC and BKC indicate that all stitches in the cable crossing will be knitted. (FKC = Front Knit Cross; BKC = Front Knit Cross)

FPC and BPC indicate that any stitches crossed in the back will be purled. (FPC = Front Purl Cross; BPC = Back Purl Cross)

1/1 FKC = Slip 1 stitch to CN, hold in front. K1. K1 from CN.
1/1 FPC = Slip 1 stitch to CN, hold in front. P1. K1 from CN.

1/2 BKC = Slip 2 stitches to CN, hold in back. K1, K2 from CN.

2/1 BKC = Slip 1 stitch to CN, hold in back. K2. K1 from CN.
2/1 FPC = Slip 2 stitches to CN, hold in front. P1. K2 from cN.

2/2 BPC = Slip 2 stitches to CN, hold in back. K2. P2 from CN.
2/2 FPC = Slip 2 stitches to CN, hold in front. P2. K2 from CN.

.

Lion Brand Wool-Ease Thick & Quick Info:
Fiber Content: 80% Acrylic, 20% Wool
Made In: USA
Care: Machine Wash & Dry; Dry Cleaning OK; Do Not Bleach or Iron
Gauge: 9 st / 4 inches 9 mm (US 13)
Weight: Super Bulky
Yardage: 98 m (108 yds)
Size: 170 gm (6 oz) ball
Price: $5.99 USD


.

Friday, January 25, 2008

Cozy Bathrobe Scarf

Note:
1. More Free Patterns can be seen along the sidebar (on right side),
or you can use the Free Patterns label to view all posts.
2. Free Pseudo-Patterns or Pattern Outlines can be found using the Free Pseudo-Patterns label.


Pattern: Cozy Bathrobe Scarf (see below)
Yarn: Elann Cuzco, 3 balls
Needles: 9mm (US13)

Mmm.... a cozy bathrobe. That's what I had in my mind the entire time I was knitting with Elann Cuzco, a cozy soft alpaca yarn. This yarn is SO SOFT!!! I love how it is very light and warm. I had no idea how the finished scarf would come out since it went through several incarnations. Now that it is done, I find myself petting the scarf a lot. :-)

Cuzco, with it's unique qualities and heavier weight, is an unusual yarn for me to work with. I knew instantly that cable patterns would not do. I had to come up with some way to knit this up that did not involve cabling because there wouldn't be enough stitch definition with the "fluffiness" of this yarn. What to do? The quick and easy thing to do is to just cast on and knit every row until I run out of yarn. I should have done that, but I had to scratch an itch of mine to try out this and that...

At first, I envisioned a plain scarf with ruffling at the ends. It looked fine the way I envisioned it in my mind. However it didn't work out as I thought it would after trying it three different ways and not being happy with any of the results. Poor ball of Cuzco, it was completely terrorized during this process. The yarn is not terribly fun to frog when you have a bunch of K2Togs to pull apart.

I didn't want to do any fancy stitches because it would just get lost in the "fluff" of this yarn and I wanted to try something more interesting than garter stitch, so I picked out the Double Broken Rib pattern from Barbara Walker #1 pg12 thinking it might be a decent enough alternative. I know you can't see the pattern very well from the photos, due to the "fluff" factor of the yarn and my inability to take photos of any red colored knitting. So click on that link (2 sentences back) to get a better look at what the pattern is like. I know there are people who hate non-reversible stitch patterns. The Double Broken Rib stitch is not reversible, however lack of reversibility never stops me from using a stitch. It just doesn't bother me that much. This pattern is very easy to memorize so it makes for great mindless knitting. I do like the 2-stitch wide columns of knit stitches that run the length of the scarf, however the "broken rib" columns really get lost in the Cuzco fuzz. As a result, you notice that there is some sort of texture to the scarf pattern however it is difficult to see what it is clearly. Thus I do not think this stitch pattern is an ideal match for the the Cuzco.

I did not bother with a pretty chain selvedge on this scarf, thinking that it wouldn't get noticed under the "fluff" of this yarn. I think I will give it a try though, on my next Cuzco scarf. The yarn is a little difficult to work with at first, but then you get used to it and it's easy knitting.

OK, now I have one leftover ball of red Cuzco. What can I make with it???

Stitches used in this scarf include:
Double Broken Rib, BW1 pg 12


Here's how I made the scarf...

I used 3 balls of Elann Cuzco, all of it. So if you want a longer scarf, you will definitely need a 4th ball. I knit very loosely using 9mm (US13) needles. I suppose I could have used 10mm (US15) needles too, however I might have needed to use a 4th ball if I did this. My scarf came out to about 6.5 inches wide and 66 inches long (17 cm x 168 cm).

Cozy Bathrobe Scarf

Yarn: Elann Cuzco, 3 or 4 balls
Needles: 9mm (US13)

LOOSELY cast on 14 stitches.

Row 1 (WS): Purl
Row 2 (RS): Knit
Row 3: K2 * P2, K2 *
Row 4: P2 * K2, P2 *

Repeat rows 1 to 4 for pattern, knit until scarf is desired length, ending with row 2. LOOSELY bind off.

To make a Cozy Bathrobe Keyhole Scarf using 2 balls of Elann Cuzco:

LOOSELY cast on 14 stitches. Work rows 1 to 4, five or six times. (Or when scarf reaches around 7 to 9 inches or so long)

Make keyhole: Working row 1 of pattern, work 4 stitches, bind off center 6 stitches, work remaining 4 stitches.
Close up keyhole: Working row 2 of pattern, work 4 stitches, cast on 6 stitches over the gap, work remaining 4 stitches.

Continue with pattern from row 3. Knit scarf until scarf is around 28 to 30 inches long or until desired length, ending with row 1. LOOSELY bind off.

Now wrap the scarf around your neck and you will never want to take it off. Oh.... did I mention that you should LOOSELY cast on and cast off? ;-)


Elann Cuzco info:
Fibre Content: 100% Brushed Fine Grade Alpaca
Made In: Peru
Care: Hand Wash/ Dry Flat
Gauge: 8 st/4 inches on 9.0 mm (US 13)
Yardage: 40 m (43 yards)
Size: 50g (1.75 oz) ball
Price: $4.60 USD

.

Thursday, January 10, 2008

Warm Hands

Note:
1. More Free Patterns can be seen along the sidebar (on right side),
or you can use the Free Patterns label to view all posts.
2. Free Pseudo-Patterns or Pattern Outlines can be found using the Free Pseudo-Patterns label.


Note: I made a follow up version with thumbs, you can see it here:

http://smariek.blogspot.com/2008/02/warm-hands-warm-thumbs.html.


.
Pattern: Warm Hands Fingerless Mitts
Yarn: Elann Highland Wool, Ruby, 1 ball
Needles: 4.5mm (US7)

As I sit in this cold house in the afternoons while Miss M "naps", I find that my hands get very very cold. After several days of this (or perhaps also the perceived cold from the 3 whammo storms we experienced last weekend), I decided that I must knit some fingerless mitts to keep my hands warm. A little something for added warmth while also allowing free use of my fingers. I didn't need anything fancy. I just wanted no-nonsense functional mitts. So these are as simple as they get. It's just a plain tube knit in K2P2 ribbing, with an opening for my thumb. Ribbing was the automatic choice for its snug yet stretchy fit. The thumb hole is pretty much made in the same fashion as the keyhole in Miss M's scarf, no real shaping, nothing fancy.

One mitt in the photo doesn't quite look like it's mate. That's because I was wearing the first mitt while knitting the second. So that first mitt got more stretched out than the second one which I hadn't worn before taking the photo you see above. My covered hand was very happy while I knit its mate. :-) I foresee myself making several of these as gifts since they are so quick and easy to make. And the K2P2 ribbing pattern makes it very easy to resize for larger or smaller hands. Miss M saw mine, tried to wear mine, and now wants her own, so I will be knitting a pair for her little hands too.

I knit these with Elann's Highland Wool yarn, which is listed as worsted weight but knits more like a very light worsted or maybe even DK weight for me. One ball is enough to make a pair of small mitts that fit my small hands. Mine are about 8 inches long, I wanted something a little longer to cover a good part of my wrist.

When you start this tube, it looks so small & narrow that you will start to wonder if it will even fit. K2P2 ribbing is pretty stretchy. After knitting an inch or so, you can slip it over you hands to check for sizing. You'll be surprised to find how much it can stretch!

Here's what I did to make my mitts, which fit my small hands:

Using 4.5mm needles, cast on 36 stitches, join into round.
Work K2P2 ribbing for 36 rounds. (about 6 inches)
Thumb hole round 1: K2, P2, Bind off 6 sts, P1, continue with * K2, P2 * to end of round.
Thumb hole round 2: K2, P2 Cast on 6 sts, P2, continue wit *K2, P2 * to end of round.
Work K2P2 ribbing for 10 rounds. (about 1.75 inches)
Bind off.
For the second, right mitt, I did the thumb hole rounds a little differently because I wanted the place where I joined the round to be situated on the palm side. I know these are reversible, it's just a quirk of mine because I can see where the join is so I don't want it on the top side. Most people wouldn't really notice where the join is situated though. I guess I'm just being anal.

Thumb hole round 1: * K2, P2 * until last 8 stitches, then Bind off 6 sts, P1.
Thumb hole round 2: * K2, P2 * until you reach the gap, then Cast on 6 sts, P2.
I have a quirk where I can't work the thumb hole opening on stitches at either end of a needle, they have to be somewhere in the middle. So for the left mitt, I worked the thumb hole on Needle 1 (first needle). For the right mitt, I worked the thumb hole on Needle 3 (last needle). I'm probably making this sound more complicated than it really is. All you need to do is bind off 6 stitches somewhere on the round, and then cast on 6 stitches over the gap on the next round. Easy peasy. I chose to bind off in a K2 P2 K2 section.

This mitt can easily be resized to fit a smaller or larger hand. Just cast on more or less stitches, as long as they are in multiples of 4 ... such as 32, 36, 40, 44, etc.

You can make these as long as you like. I knit mine for 6 inches before I made the thumb hole. You can knit more or less rounds of K2P2 ribbing to make these mitts as long or short as you like them to be.

You can choose how much finger coverage you want by knitting more or less rounds after making the thumb hole. I have small/short hands so I only knit for 1.75 inches past the thumb hole. Someone with longer fingers might want to knit a few extra rounds for more coverage.

Stitches used in these fingerless mitts include:
Knit-Two Purl-Two Ribbing, BW1 pg 39

Elann Highland Wool info:
Fibre Content: 100% Highland Wool
Made In: Peru
Care: Hand Wash/ Dry Flat
Gauge: 19 st/4 inches 4.0 - 4.5 mm (US 6-7)
Yardage: 100 m (109 yards)
Size: 50g (1.75 oz) ball
Price: $2.38 USD

.

Sunday, December 30, 2007

Accidental Hat #2

Note:
1. More Free Patterns can be seen along the sidebar (on right side),
or you can use the Free Patterns label to view all posts.
2. Free Pseudo-Patterns or Pattern Outlines can be found using the Free Pseudo-Patterns label.


.

Here's another hat for Cap Karma, it will become a chemo cap for a local cancer patient. Sorry, the photos don't look very good due to poor nighttime lighting. I'll see if I can take more photos during the daytime.

I made another Accidental Hat. You can read about how this hat came about here. It's interesting to see how differently these two hats came out, both knit with "worsted" weight yarn. Both hats were knit using the same pattern and the sizes came out significantly different. This showed me that you can't get the same results using yarns that are labeled as "worsted" because not all "worsted" weight yarns are alike. The Red/Blue hat was knit with a lighter worsted weight yarn which resulted in a small size hat that fits snugly on my head. The Green hat was knit with a heavier worsted weight yarn which resulted in a larger hat which fit DH's head. Here are the differences:

Red & Blue Hat (Hat #1)
-- Size: Snug Small size
-- Yarn: 12-13 WPI light worsted weight yarn (thinner than the green yarn in hat #2)
-- Needles: 5 mm (US8)
-- Knit at a gauge of around 19.5 sts per 4 inches

-- Length from brim to top is about 8.75 inches

Green Hat (Hat #2)
-- Pattern changes: Knit exactly the same as hat #1, with the exception of 4 rounds of K2P2 ribbing (instead of 5 rounds). Decrease section is knit the same, the only change is alternating colors every 2 rows.
-- Size: Medium/Large size
-- Yarn: 10-11 WPI heavy worsted weight yarn (thicker than the blue/red yarn in hat #1)
-- Needles: 5 mm (US8)
-- Knit at a gauge of around 17 sts per 4 inches

-- Length from brim to top is about 9.25 inches


This photo shows the alternating colors in the decrease. I changed colors every 2 rows. I think these concentric circles make the hat more interesting.


These photos give you a better comparison of size between the two hats. You can see that the pattern shows up better when there is more contrast between the two colors. You can barely see the pattern in the Red/Blue hat.

Here's an outline of how I knit the Accidental Hat:

Using worsted weight yarn and 5mm (US8) needles, cast on 96 stitches with Color 1, join into round.
Knit 5 rounds of K2P2 ribbing.
Work rounds 1 to 28 of the chart (click here to download Accidental Hat Chart from box.net).
Purl 2 rounds with Color 1.

(Decrease in Hat #1 was worked in color 2. Decrease in Hat #1 was worked in Color 1 and Color 2, alternating every 2 rows.)

Work decrease as follows:
K10, K2Tog
Knit
K9, K2Tog
Knit
K8, K2Tog
Knit
K7, K2Tog
Knit
K6, K2Tog
Knit
K5, K2Tog
K4, K2Tog
K3, K2Tog
K2, K2Tog
K1, K2Tog
K2Tog
K2Tog (4 sts)

Cut yarn and thread through remaining stitches. Weave in all ends.

Stitches used in this hat include:
Knit-Two Purl-Two Ribbing, BW1 pg 39
Pattern # 119, KFPL pg 44 & 112.
Reverse Stocknitte Stitch, MT pg 3
Stockinette Stitch, BW1 pg 10

.