Navigation Tips

Free Patterns can be seen along the sidebar (on right side),
or you can use the Free Patterns label to view all posts.

Free Pseudo-Patterns or Pattern Outlines can be found using the Free Pseudo-Patterns label.

The most comprehensive listing of Patterns, Pseudo-Patterns, and Pattern Outlines can be found on the Pattern Bibliography page.

Please read the Blog Housekeeping section in the sidebar for more info.
Showing posts with label 2006 Finished Objects. Show all posts

Friday, June 29, 2007

Double Lattice Cloth...

Note:
1. More Free Patterns can be seen along the sidebar (on right side),
or you can use the Free Patterns label to view all posts.
2. Free Pseudo-Patterns or Pattern Outlines can be found using the Free Pseudo-Patterns label.


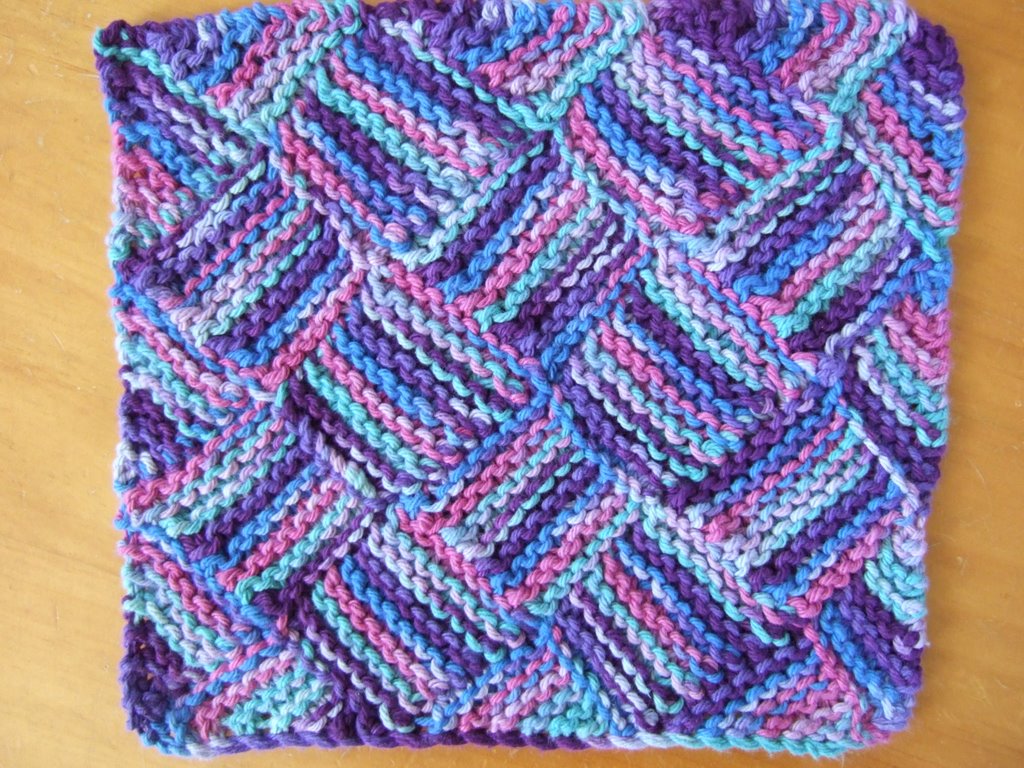
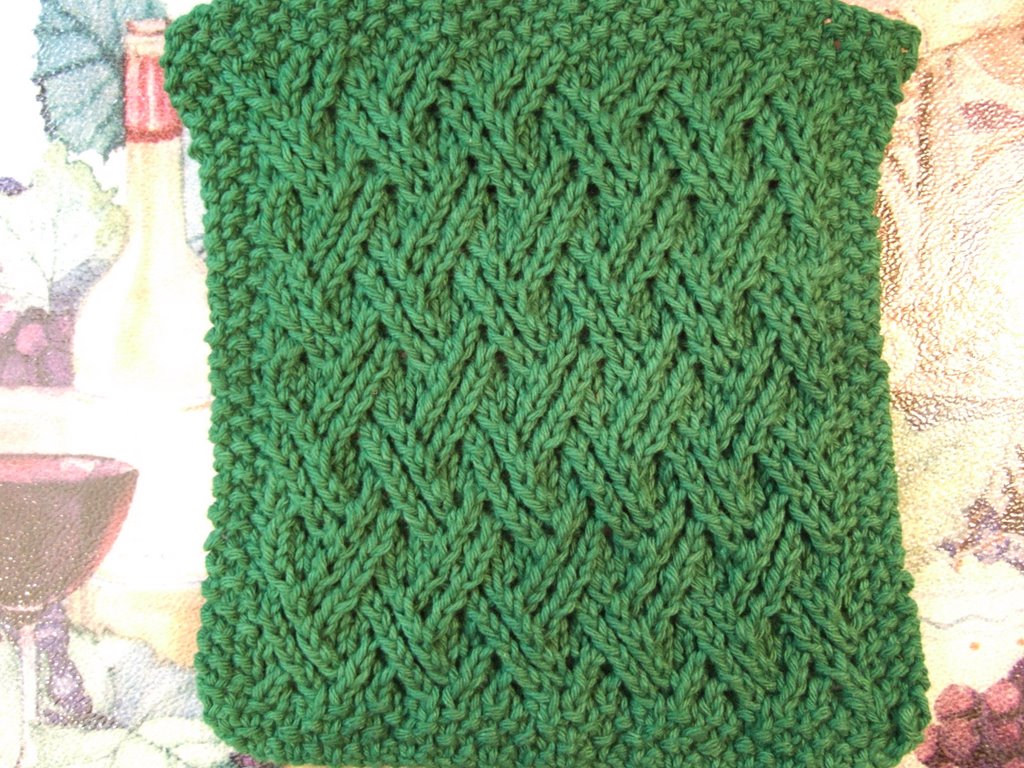
Oopsie. I've just discovered this draft post from way back in 2006 which I never posted! Oh well, better late than never, right? It's the Double Lattice pattern from BW2 pg 152. Yes, it's one of the more boring patterns, since it is one of my earlier works. But I do promise something more interesting soon (not referring to the Teardrops Cloth, which I have ready to post). This cloth is about 6.75" W by 8.75" H.

Stitches used in this cloth include:
Double Lattice, BW2 pg 152
Seed Stitch, BW1 pg 11

Please email me if you would like your photo and a link to your blog (if you have one) to appear in My Readers' Gallery.


Double Lattice Cloth pattern can be downloaded from:
Double Lattice Cloth pattern from Box.com (no registration required, just click on link & save file)


.

Thursday, February 22, 2007

Embossed Turtle and some old finished cloths


I've been fiddling around with this turtle. I feel compelled to make the turtle cloth green for some reason. I have another one in darker green which I still need to take a photo of.

I seem to be stuck on green. I have so much green yarn of various shades, but I'm sure that under the right lighting I can take pictures of them all and make them look like the exact same shade, lol.

--<>--

Ok, enough with the new. How about some old stuff? The following are some odds and ends I completed in 2006 but never got around to posting pics of. Better late than never, huh?


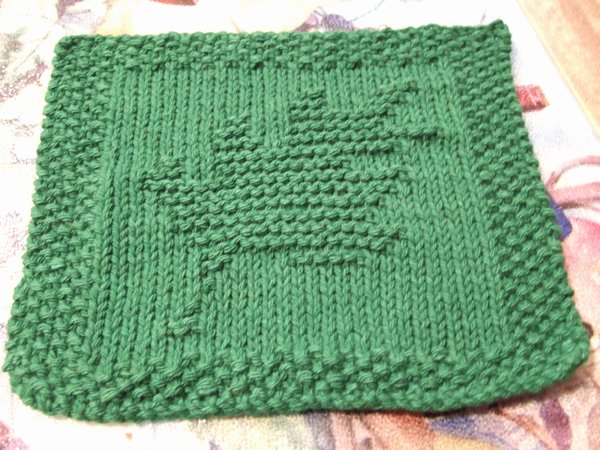
Here's an Oak Leaf cloth. It will go with a Maple Leaf cloth I've been trying to finish forever. These knit/purl cloths sometimes take me longer to work.


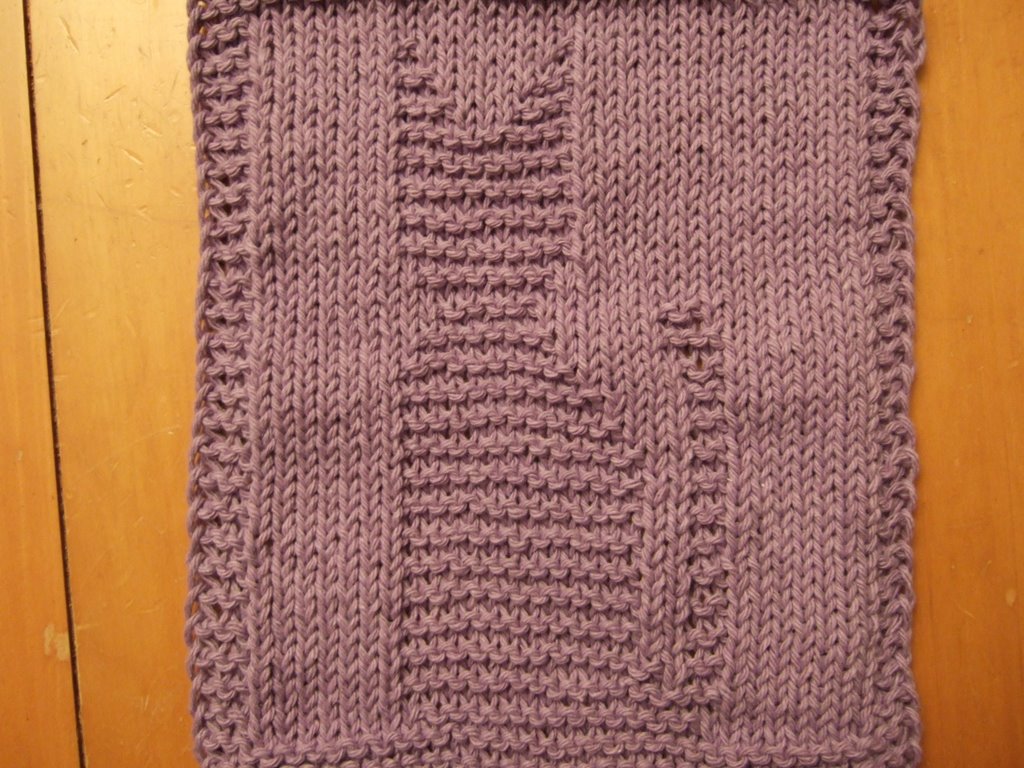
Here's a cat cloth, one of the dishcloth knitalongs. Of course I did it long after the KAL happened. Always trying to catch up...


This is the same yarn as the lacy round below, Jewels. This picture shows the colors better. I think it's because I might have taken this photo in the daytime. I started this in Sept, and finished it in Dec. I'm not very good at working these short row type patterns. Lack of concentration to get very far. It is because of this that I know I would never start Lady Eleanor, which I see a lot of people working on these days ... Bets, Joan, Lisa, Trish, just to name a few.


This is P&C Shaded Pastels. I was on a roll and made a lot of these lacy round cloths. I also did one in an orangy variegated yarn, but must have given it away before I could take a pic of it. I've got the pattern memorized now, lol. I still hate seaming though...


This picture doesn't really show the vivid colors of the cloth. It's S&C Jewel Ombre.


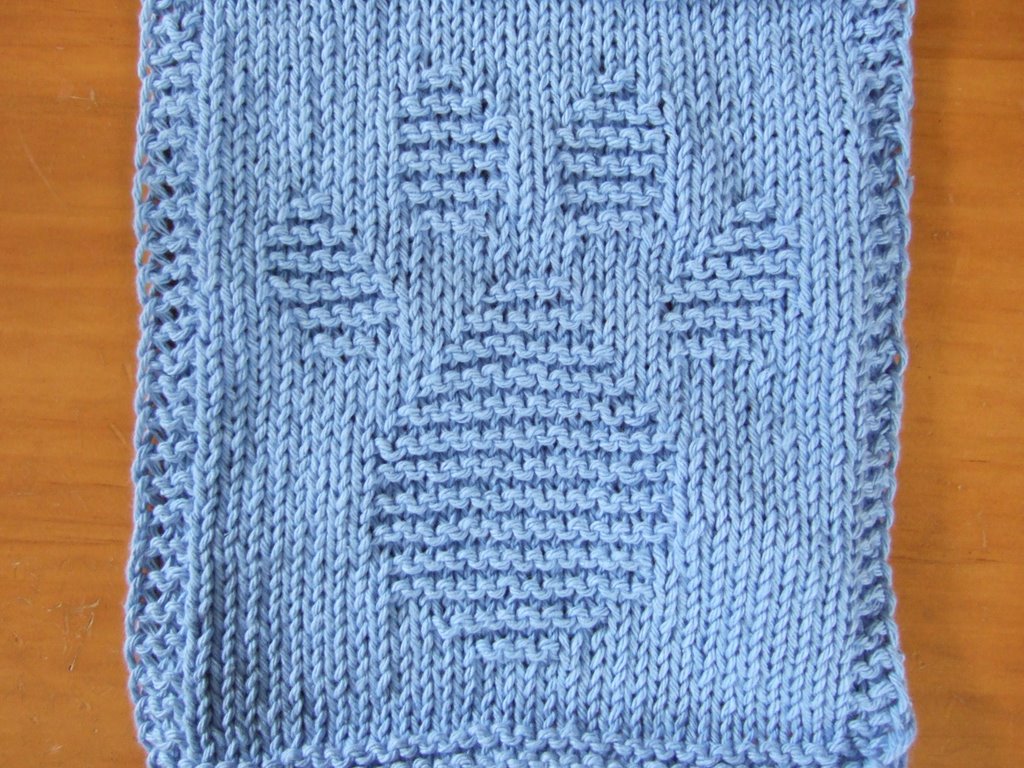
This is a Paw Cloth for Vicki, done in S&C Cornflower blue color. I completed this in Sept 2006.


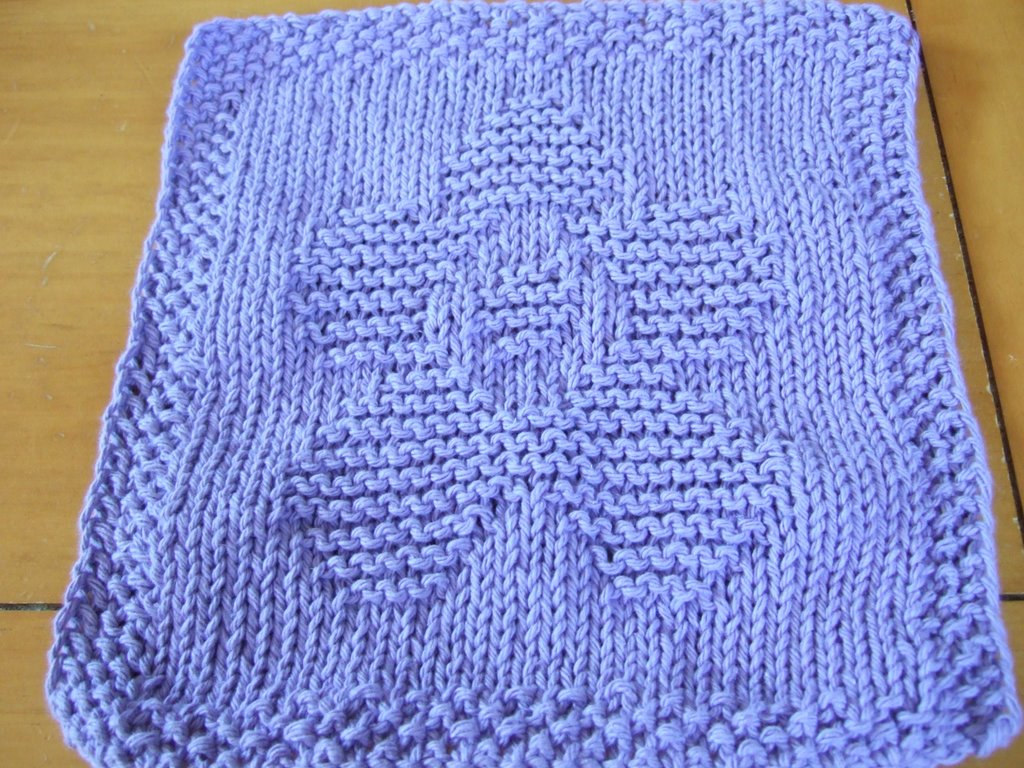
This is a Flower Cloth for my mother-in-law. It's also in the same S&C Hot Purple color as the cat below, but who would have guessed it while looking at these two photos! For some reason the Flower Cloth in this picture looks more blue. Yeah, I still need to learn how to take photos. This cloth was completed in Sept 2006.


I knitted this Cat cloth for Vicki who has 4 little kitties (ok, they're not that little anymore). The color is S&C Hot Purple, which is a lot brighter than in the picture above. Also completed in Sept 2006.

--<>--

SK a écrit: What is Yamamotoyama green tea? Japanese tea with some burn rice inside?

Yamamotoyama is the brand of teas which come in many flavors (Green tea, green w/roasted brown rice, roasted green, jasmine, oolong). Clicking on the link will take you to their webpage where you can see a picture of their packaging. You may have seen these boxes at your local supermarket or Asian market. Their teas are available loose and in tea bags. I also know you can get some of their teas from Stash. Your best bet would be to go to an Asian supermarket like Ranch 99. I've also seen their teas at American supermarkets (if not in the tea aisle, then in the Asian/Ethnic aisle) however this might be due to living in the San Francisco Bay Area, so YMMV. Although they make loose tea, I tend to get their tea bags. YMY is my "lazy" tea, when I don't feel like brewing a pot of tea. In fact, I am drinking some right now! :-)

--<>--

Ok, I am sick sick sick sick sick of being sick. On the upside, I do feel like I am getting better. I'm a bit less congested, and the times when I'm all stuffed up or when I have one of those painful coughing fits are becoming less frequent. DH is recovering nicely, I think his immune system is better than mine. He rarely gets sick, and when he does it is usually when he hasn't been "working" enough. His dad is like that too. M showed improvement yesterday and she is definitely recovering. She's still congested. Unfortunately at her age (almost 2 yrs old), she doesn't quite know how to blow her nose, and that is a source of frustration and fussiness at times. I can't tell you how many tissues I have gone through to blow my nose or to wipe her nose, but if you gave me a nickel for each tissue used, I'm pretty sure I'm close to owning that Porsche 911 Turbo. . . . ok, well, maybe not. But we have used A LOT of tissues in this house.

M can sign for medicine, and she tries to say the word too. I hope she doesn't think it is part of the regular nighttime routine.


.

Friday, December 22, 2006

Squares

Note:
1. More Free Patterns can be seen along the sidebar (on right side),
or you can use the Free Patterns label to view all posts.
2. Free Pseudo-Patterns or Pattern Outlines can be found using the Free Pseudo-Patterns label.


It is a funny thing how this cloth came about. After 4 tries, I finally got it just the way I liked. And if you saw my notes, you will find the pattern (instructions & pseudo-chart drawings) scribbled onto a piece of paper with pencil, red crayon, purple crayon, and blue rollerball ink! It's incredible that I can even read it and figure out what the correct final version instructions are. LOL.

This is part of my series of Geometric Lace Cloths...

Diamonds Cloth pattern can be found here:
http://smariek.blogspot.com/2007/01/diamonds.html

Parallelograms Cloth - Left Slanting pattern can be found here:
http://smariek.blogspot.com/2007/01/parallelograms-left-slanting.html

Parallelograms Cloth - Right Slanting pattern can be found here:
http://smariek.blogspot.com/2007/02/parallelograms-right-slanting.html

Triangles Cloth pattern can be found here:
http://smariek.blogspot.com/2006/12/triangles.html

Stitches used in this cloth include:
Garter Stitch, BW1 pg 10
Lace Check, BW1 pg 191


Please email me if you would like your photo and a link to your blog (if you have one) to appear in My Readers' Gallery.


Squares
© Designed by S.M. Kahn, Dec 2006
Smariek Knits -=<>=- http://smariek.blogspot.com

Please read "Notes" section at the bottom before starting.

Using WW kitchen cotton and US7 (4.5mm) needles, cast on 37 stitches.

Knit 4 rows border

Row 1 (WS): B3, P31, B3
Row 2 (RS): B3, K1, (YO, K2Tog)x3, K6, (YO, K2Tog)x3, K6, (YO, K2Tog)x3, B3
Row 3: B3, P31, B3
Row 4: B3, (SSK, YO)x3, K6, (SSK, YO)x3, K6, (SSK, YO)x3, K1, B3
Row 5: B3, P31, B3
Row 6: B3, K1, (YO, K2Tog)x3, K6, (YO, K2Tog)x3, K6, (YO, K2Tog)x3, B3
Row 7: B3, P31, B3
Row 8: B3, (SSK, YO)x3, K6, (SSK, YO)x3, K6, (SSK, YO)x3, K1, B3
Row 9: B3, P31, B3
Row 10: B3, K7, (YO, K2Tog)x3, K6, (YO, K2Tog)x3, K6, B3
Row 11: B3, P31, B3
Row 12: B3, K6, (SSK, YO)x3, K6, (SSK, YO)x3, K6, (SSK, YO)x3, K1, B3
Row 13: B3, P31, B3
Row 14: B3, K7, (YO, K2Tog)x3, K6, (YO, K2Tog)x3, K6, B3
Row 15: B3, P31, B3
Row 16: B3, K6, (SSK, YO)x3, K6, (SSK, YO)x3, K6, (SSK, YO)x3, K1, B3

Repeat rows 1 through 16.
Repeat rows 1 through 9.
Knit 4 rows border.
Bind off. Weave in ends.


Notes:

B3 = 3 stitch border of your choice (I used K3 for my border in the cloth above)

K2TOG
= knit 2 stitches together

SSK = slip 1 stitch, slip 1 stitch, knit these two slipped stitches together

YO = yarn over

Instructions in parentheses followed by x3 means you do what is in the paretheses the number of times indicated after "x". For example, (YO, K2Tog)x3 means you would do YO, K2Tog, YO, K2Tog, YO, K2Tog.


.

Wednesday, December 20, 2006

Triangles

Note:
1. More Free Patterns can be seen along the sidebar (on right side),
or you can use the Free Patterns label to view all posts.
2. Free Pseudo-Patterns or Pattern Outlines can be found using the Free Pseudo-Patterns label.


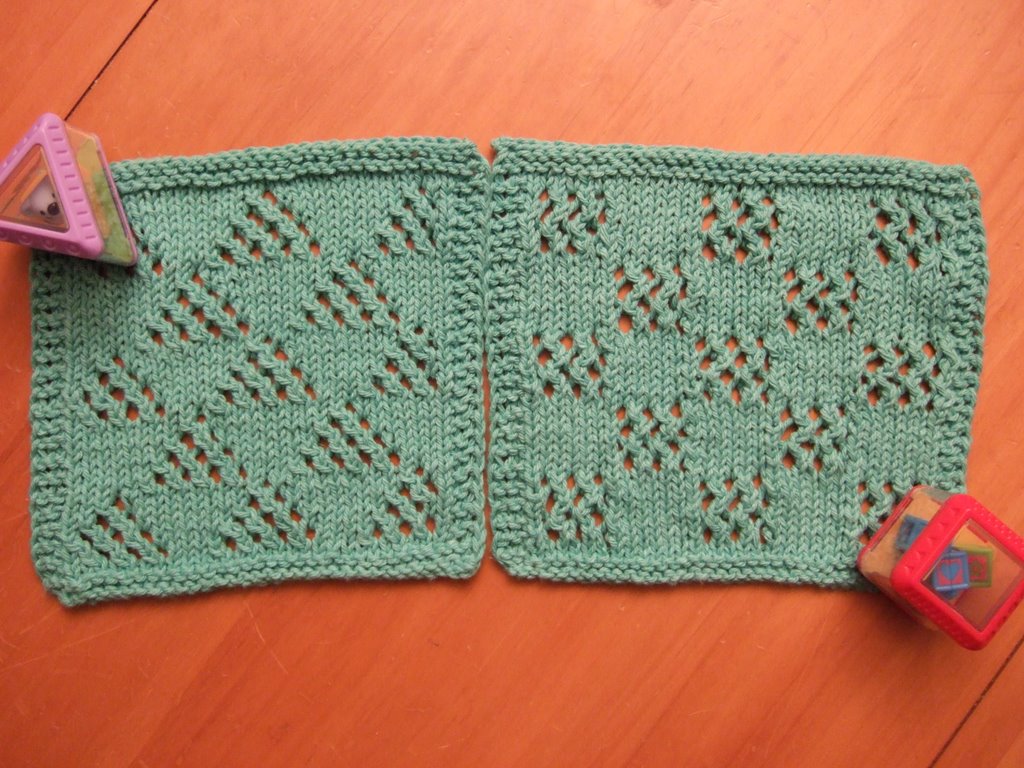
I have plenty of square blocks. I just happened to have one triangular block, it's part of M's blocks from her Fisher Price Shape Sorter box.... so of course I had to throw that into the picture. :-)

This is part of my series of Geometric Lace Cloths...

Diamonds Cloth pattern can be found here:
http://smariek.blogspot.com/2007/01/diamonds.html

Parallelograms Cloth - Left Slanting pattern can be found here:
http://smariek.blogspot.com/2007/01/parallelograms-left-slanting.html

Parallelograms Cloth - Right Slanting pattern can be found here:
http://smariek.blogspot.com/2007/02/parallelograms-right-slanting.html

Squares Cloth pattern can be found here:
http://smariek.blogspot.com/2006/12/squares.html

Stitches used in this cloth include:
Garter Stitch, BW1 pg 10
Pyramidal Lace Check, BW2 pg 264


Please email me if you would like your photo and a link to your blog (if you have one) to appear in My Readers' Gallery.


Triangles
© Designed by S.M. Kahn, Dec 2006
Smariek Knits -=<>=- http://smariek.blogspot.com

Please read "Notes" section at the bottom before starting.

Using WW kitchen cotton and US7 (4.5mm) needles, cast on 34 stitches.

Knit 4 rows border

Row 1 (WS): B3, P28, B3
Row 2 (RS): B3, K1, (YO, SKP)x3, K3, (YO, SKP)x4, K3, (YO, SKP)x3, K1, B3
Row 3: B3, P28, B3
Row 4: B4, K2, (YO, SKP)x2, K5, (YO, SKP)x3, K5, (YO, SKP)x3, B3
Row 5: B3, P28, B3
Row 6: B3, K1, (YO, SKP)x2, K7, (YO, SKP)x2, K7, (YO, SKP)x2, K1, B3
Row 7: B3, P28, B3
Row 8: B3, K2, YO, SKP, K9, YO, SKP, K9, YO, SKP, K2, B3
Row 9: B3, P28, B3
Row 10: B3, K4, (YO, SKP)x4, K3, (YO, SKP)x4, K5, B3
Row 11: B3, P28, B3
Row 12: B3, K5, (YO, SKP)x3, K5, (YO, SKP)x3, K6, B3
Row 13: B3, P28, B3
Row 14: B3, K6, (YO, SKP)x2, K7, (YO, SKP)x2, K7, B3
Row 15: B3, P28, B3
Row 16: B3, K7, YO, SKP, K9, YO, SKP, K8, B3

Repeat rows 1 through 16.
Repeat rows 1 through 9.
Knit 4 rows border.
Bind off. Weave in ends.


Notes:

B3 = 3 stitch border of your choice (I used K3 for my border in the cloth above)

SKP = slip 1 stitch, knit 1 stitch, pass slipped stitch over

YO = yarn over

Instructions in parentheses followed by x2, x3, or x4 means you do what is in the paretheses the number of times indicated after "x". For example, (YO, SKP)x3 means you do the following: YO, SKP, YO, SKP, YO, SKP.

.

Saturday, December 16, 2006

Persephone


Note: You can also see photos of the purple Persephone Scarf
here. And you can see the matching Persephone Mitts here.

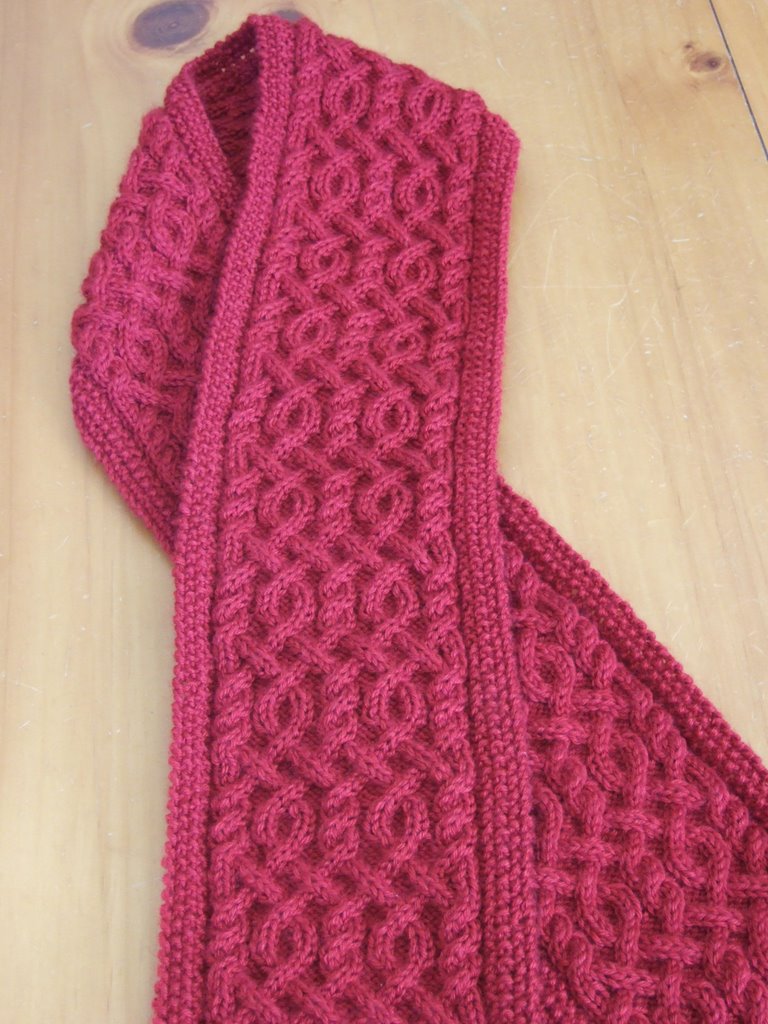
What do you get after knitting 23,952 stitches over 499 rows, and doing 1,255 cable crossings?

Come on ... take a wild guess ...

A scarf!

It's 6 inches wide (15.2 cm) and 70.5 inches long (179 cm). This was worked at a rate of 2 inches per hour. Yes, I'm a slow knitter. But it really wasn't that bad since I did all the cables without a cable needle. This would have taken forever with a cable needle, which tends to disrupt the flow of knitting.


This is the scarf I've been working on for T. I've mentioned it in previous posts, and I have received lots of comments/emails about the pattern for this cable scarf. Voilà! Here's my Christmas gift to you guys ... the pattern for the Persephone Scarf. No, it's not named after anyone in Greek mythology, however T would know what this scarf is named after. Yes that's right, I said what, not who.

BTW, I love knitting with the Highland Silk, it is such a lovely yarn. I think the width is just perfect. I wrapped the scarf around my neck and it feels wonderful without being bulky. I'm tempted to keep this scarf for myself. :-)

Stitches used in this scarf include:
Pattern 16.19, HG5 pg 39
Seed Stitch, BW1 pg 11


Please email me if you would like your photo and a link to your blog (if you have one) to appear in My Readers' Gallery.


Persephone Scarf pattern:
Persephone Scarf Pattern from box.com (no registration required, just click on link & save file)


My series of cable scarves...

Persephone Scarf:
http://smariek.blogspot.com/2006/12/persephone.html
Ariel Scarf:
http://smariek.blogspot.com/2007/04/ariel.html
Miranda Scarf:
http://smariek.blogspot.com/2007/06/miranda-scarf.html
Osiris Scarf:
http://smariek.blogspot.com/2007/09/osiris.html
Bernadette Scarf:
http://smariek.blogspot.com/2007/11/bernadette.html
Regina Scarf:
http://smariek.blogspot.com/2007/12/regina.html
Paquin Scarf:
http://smariek.blogspot.com/2008/03/paquin.html
Beaumonde Scarf:
http://smariek.blogspot.com/2008/04/beaumonde.html
Shadow Scarf:
http://smariek.blogspot.com/2008/04/shadow.html
Hera Scarf:
http://smariek.blogspot.com/2008/08/hera-scarf-pattern.html
Triumph Scarf:
http://smariek.blogspot.com/2008/08/triumph-cable-scarf-pattern.html
Ezra Scarf:
http://smariek.blogspot.com/2008/09/ezra-cable-scarf-pattern.html
Sihnon Scarf:
http://smariek.blogspot.com/2008/10/sihnon.html
Londinium Scarf:
http://smariek.blogspot.com/2008/10/londinium.html
St. Albans Valentine Cable Scarf:
http://smariek.blogspot.com/2008/11/scarf-15.html


Matching Persephone Fingerless Mitts.
.

Friday, December 08, 2006

Another cable hat completed


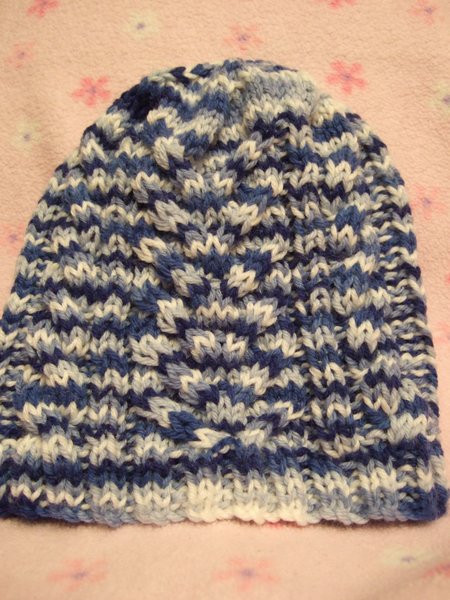
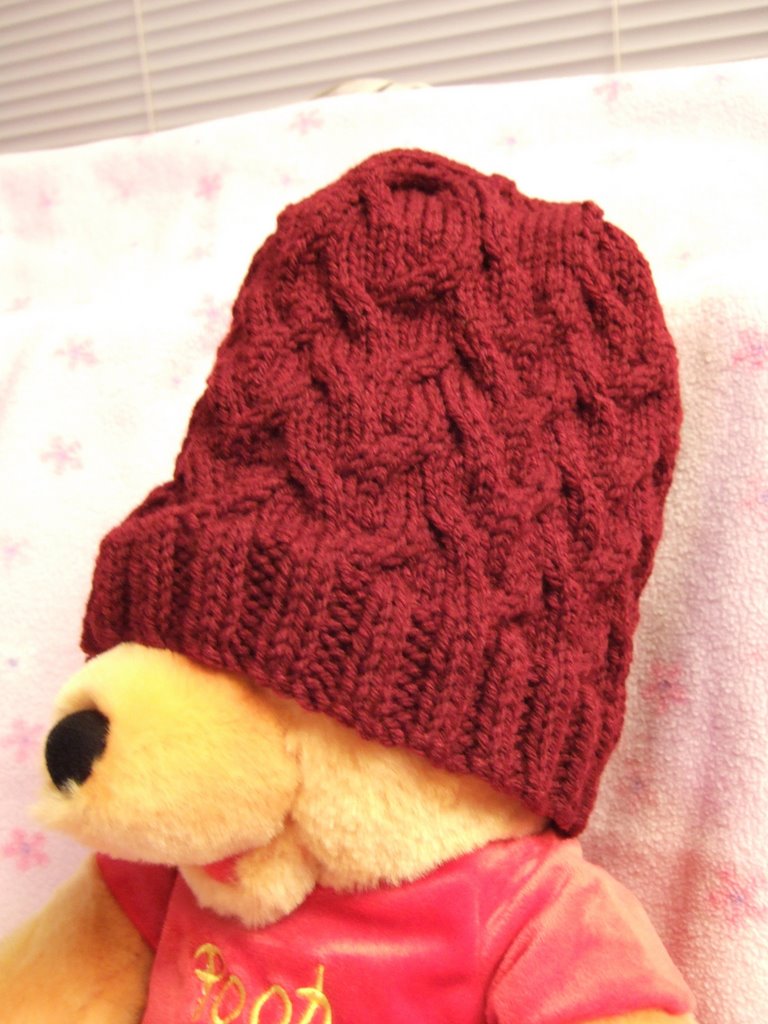
Here's hat #11 for the Cap Karma Chemo Cap project. I took 3 different cable stitches and threw them onto the hat. As you can see, it is very difficult to make out the 3 different cables used in this hat due to the variegated yarn. :-( The cable you see in the center sorta branches off outwards as you go up. The cable on the right twists towards the right as you go up. The cable on the left twists towards the left as you go up.


I'm thinking I would need to knit this hat in a solid color so the pattern shows up better.

.

Monday, December 04, 2006

Swirl Hat

Note:
1. More Free Patterns can be seen along the sidebar (on right side),
or you can use the Free Patterns label to view all posts.
2. Free Pseudo-Patterns or Pattern Outlines can be found using the Free Pseudo-Patterns label.


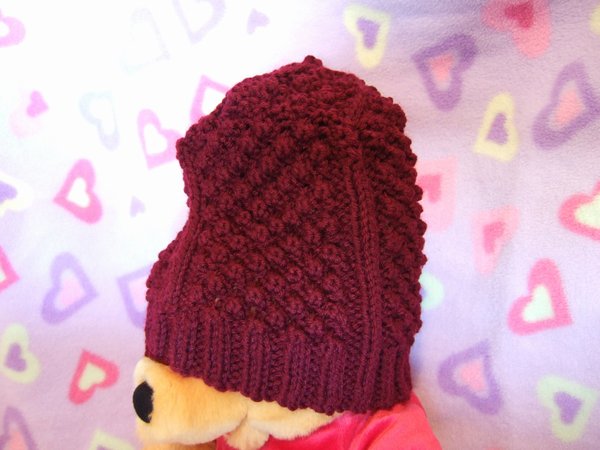
Here's hat #10 for this year's Cap Karma chemo cap project. It's hard to show the swirly pattern of this hat in pictures (there's another picture below). I think I will have to rework this hat using DK weight yarn so that there are more stitches widthwise & heightwise, so that the swirly pattern can show itself better. Ojo is my model tonight, as Pooh Bear is asleep with M. You guys must be sick of seeing stuffed toys & baby blankets in all my pics, lol. It's hard to see or tell, but I tried to continue the pattern into the decrease. If you don't like the way that looks, or don't want to bother, just do the decrease this way: K14, K2Tog; K13, K2Tog; K12, K2Tog; ... ; K1, K2Tog; K2Tog.

Stitches used in this hat include:
Knit-Two Purl-Two Ribbing, BW1 pg 39
Pattern 16.23, HG5 pg 40


Please email me if you would like your photo and a link to your blog (if you have one) to appear in My Readers' Gallery.


Swirl Hat
© Designed by S.M. Kahn, December 2006
Smariek Knits -=<>=- http://smariek.blogspot.com

This hat is knitted in the round. Please read notes at the end before starting.

Using Worsted Weight yarn and US8 (5mm) needles, cast on 96 stitches.
Join in a round, careful not to twist stitches.

K2 P2 ribbing for 1" inch to 1.5" inches. (2.54 cm to 3.81 cm)
Knit 1 round.

Round 1: * K2, CB4, K4, CB4, K2, repeat from *
Round 2: Knit across
Round 3: * K8, CB4, CF4, repeat from *
Round 4: Knit across
Round 5: Knit across
Round 6: Knit across
Round 7: * K8, CF4, CB4, repeat from *
Round 8: Knit across
Round 9: * K2, CB4, K4, CB4, K2, repeat from *
Round 10: Knit acros
Round 11: * CB4, CF4, K8, repeat from *
Round 12: Knit across
Round 13: Knit across
Round 14: Knit across
Round 15: * CF4, CB4, K8, repeat from *
Round 16: Knit across

Repeat rounds 1 through 16.
Repeat rounds 1 and 2.

Decrease:

DR1: * K8, CB4, K2, K2Tog, repeat from *
DR2: * K13, K2Tog, repeat from *
DR3: * K12, K2Tog, repeat from *
DR4: * K11, K2Tog, repeat from *
DR5: * K10, K2Tog, repeat from *
DR6: * K9, K2Tog, repeat from *
DR7: * K2, CB4, K2, K2Tog, repeat from *
DR8: * K7, K2Tog, repeat from *
DR9: * CB4, K2, K2Tog, repeat from *
DR10: * K5, K2Tog, repeat from *
DR11: * K4, K2Tog, repeat from *
DR12: * K3, K2Tog, repeat from *
DR13: * K2, K2Tog, repeat from *
DR14: * K1, K2Tog, repeat from *
DR15: * K2Tog, repeat from * (6 sts left)

Cut yarn and pull through remaining 6 stitches. Weave in ends.


Notes:

CN = cable needle

CB4 = Slip 2 stitches onto CN & hold in back. Knit 2 stitches. Then knit 2 stitches from CN.

CF4 = Slip 2 stitches onto CN & hold in front. Knit 2 stitches. Then knit 2 stitches from CN.

K2Tog = Knit 2 stitches together.

This is a snug fitting ladies xs/s size hat. If you want to make it bigger, you should probably cast on an extra 16 stitches (112 stitches total); I haven't tried this myself, but I think that would be a much larger hat.


.

Saturday, December 02, 2006

Woozy Cloth

Note:
1. More Free Patterns can be seen along the sidebar (on right side),
or you can use the Free Patterns label to view all posts.
2. Free Pseudo-Patterns or Pattern Outlines can be found using the Free Pseudo-Patterns label.


Don't you get woozy looking at this cloth? I love this pattern, and will use it to make a scarf someday. I love how it looks in the variegated yarn. I was experimenting with the brown yarn, it's not exactly a color I would choose for a lace/cable pattern.

Stitches used in this cloth include:
Garter Stitch, BW1 pg 10
Tilting Ladder, BW2 pg 210

Please email me if you would like your photo and a link to your blog (if you have one) to appear in My Readers' Gallery.


Woozy Cloth
© Designed by S.M. Kahn, November 2006
Smariek Knits -=<>=- http://smariek.blogspot.com

Please read the "Notes" section below before starting.

Using Worsted Weight yarn & US7 (4.5mm) needles, cast on 34 stitches.

Knit 4 rows border.

Row 1: B3, K2, P5, K1, P5, K2, P5, K1, P5, K2, B3
Row 2: B3, P2, K1, (YO, K2Tog)x2, P1, K5, P2, K1, (YO, K2Tog)x2, P1, K5, P2, B3
Row 3: B3, K2, P4, K2, P5, K2, P4, K2, P5, K2, B3
Row 4: B3, P2, K1, (YO, K2Tog)x2, P2, K4, P2, K1, (YO, K2Tog)x2, P2, K4, P2, B3
Row 5: B3, K2, P4, K2, P5, K2, P4, K2, P5, K2, B3
Row 6: B3, P2, K1, (YO, K2Tog)x2, P2, CB4, P2, K1, (YO, K2Tog)x2, P2, CB4, P2, B3
Row 7: B3, K2, P4, K2, P5, K2, P4, K2, P5, K2, B3
Row 8: B3, P2, K1, (YO, K2Tog)x2, P2, K4, P2, K1, (YO, K2Tog)x2, P2, K4, P2, B3
Row 9: B3, K2, P4, K2, P5, K2, P4, K2, P5, K2, B3
Row 10: B3, P2, K1, (YO, K2Tog)x2, P2, CB4, P2, K1, (YO, K2Tog)x2, P2, CB4, P2, B3
Row 11: B3, K2, P4, K2, P5, K2, P4, K2, P5, K2, B3
Row 12: B3, P2, K1, (YO, K2Tog)x2, P2, K4, P2, K1, (YO, K2Tog)x2, P2, K4, P2, B3
Row 13: B3, K2, P5, K1, P5, K2, P5, K1, P5, K2, B3
Row 14: B3, P2, K5, P1, (SSK, YO)x2, K1, P2, K5, P1, (SSK, YO)x2, K1, P2, B3
Row 15: B3, K2, P5, K2, P4, K2, P5, K2, P4, K2, B3
Row 16: B3, P2, K4, P2, (SSK, YO)x2, K1, P2, K4, P2, (SSK, YO)x2, K1, P2, B3
Row 17: B3, K2, P5, K2, P4, K2, P5, K2, P4, K2, B3
Row 18: B3, P2, CF4, P2, (SSK, YO)x2, K1, P2, CF4, P2, (SSK, YO)x2, K1, P2, B3
Row 19: B3, K2, P5, K2, P4, K2, P5, K2, P4, K2, B3
Row 20: B3, P2, K4, P2, (SSK, YO)x2, K1, P2, K4, P2, (SSK, YO)x2, K1, P2, B3
Row 21: B3, K2, P5, K2, P4, K2, P5, K2, P4, K2, B3
Row 22: B3, P2, CF4, P2, (SSK, YO)x2, K1, P2, CF4, P2, (SSK, YO)x2, K1, P2, B3
Row 23: B3, K2, P5, K2, P4, K2, P5, K2, P4, K2, B3
Row 24: B3, P2, K4, P2, (SSK, YO)x2, K1, P2, K4, P2, (SSK, YO)x2, K1, P2, B3

Repeat Rows 1 through 13.
Knit 4 rows border.
Bind off. Weave in ends. Block cloth for best results.

Notes:

B3 = Three stitch side border of your choice. I used K3 in my cloths.

CB4 = Slip 2 stitches onto cable needle & hold in back, knit the next 2 stitches, then knit the 2 stitches from the cable needle.

CF4 = Slip 2 stitches onto cable needle & hold in front, knit the next 2 stitches, then knit the 2 stitches from the cable needle.

K2Tog = Knit 2 stitches together.

SSK = Slip 1 stitch, slip another stitch, knit these two slipped stitches together.

YO = Yarn Over.

Instructions in parentheses followed by x2 means you do what is in the paretheses twice. For example, (YO, K2Tog)x2 means you do the following: YO, K2Tog, YO, K2Tog.


.

Thursday, November 30, 2006

My 3AM Cable Hat

I finally knit a hat for myself. And it fits nicely, a little loose, with enough extra brim to pull it down to cover my ears more when it's colder. I finished it this morning, weaved in the ends (yes, I'm trying to be good about doing this right after I finish something, instead of letting it sit around for weeks), and wore it when M & I took a little walk around the neighborhood. I put M in her stroller, and she did something she seldom does in the stroller ... she fell asleep!!! I got a half hour nap out of her. Now our day is a bit screwed up with her nap happening before lunch. What am I going to do with her for the rest of the day?

Anyways, the hat is definitely warm. I'm beginning to suspect that I might have a slight sensitivity to wool. My usual winter hat is a felted wool hat, and it makes my forehead itch a little bit. I thought it was just that hat. But after wearing this 3AM Cable Hat I just finished knitting, I experienced the same thing! This purple hat is made of superwash wool. I guess that makes no difference in the itch factor. ???

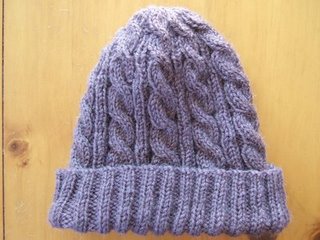
Here's what it looks like with the brim unfolded:


Here's what it looks like with the brim folded up:


The hat looks a little "peaked" doesn't it? It just came out that way when I designed it. I wanted to keep the cable pattern going up to the very top, and that's just how it worked out. I supposed it would have been easier to let the cables stop right where I start the decrease, but I didn't think it would look as good that way.

Will have to add more later ... M is fussing about being stuck in her high chair. Guess she finished her apple...

Ok, I'm back.... :-)

My 3AM Cable Hat was originally designed with Worsted Weight yarn. This purple one is knit with lighter DK weight yarn, 2 balls of Cleckheaton Country 8 Ply superwash wool (Per ball: 50 gm/1.75 oz; 96 m /105 yds; 22 st/4 inches 4.0 mm/US6) . I love this yarn, and wished I had bought more of it.

Here's what I did to knit my purple hat, using DK weight yarn:

- I took my 3AM Cable Hat pattern and cast on 108 stitches using US 6 (4.0 mm) needles.
- I did K2P2 ribbing for 3 inches; I would do this for anywhere between 1 inch and 3 inches, it depends on what kind of brim you like.
- Then I knitted Rounds 1 through 8, five times; you would want to adjust this depending on how long you made your K2P2 ribbing, and how you like your brim to be (fold-up or non-fold-up).
- Then I did the decrease. When I got to decrease round 18 (repeating round 17, doing SSK again), I had 9 stitches left on my needles. I cut off the yarn, threaded through the remaining stitches, then weaved in the ends. My hat is a ladies small size.

Hope this helps anyone who might want to make this hat using DK weight yarn instead of WW yarn. If you need to make it larger, try casting on 120 stitches; you may need to play around with the number of times you knit rounds 1-8.


Please email me if you would like your photo and a link to your blog (if you have one) to appear in My Readers' Gallery.


.

Tuesday, November 14, 2006

Striped Slip Stitch Hat

Note:
1. More Free Patterns can be seen along the sidebar (on right side),
or you can use the Free Patterns label to view all posts.
2. Free Pseudo-Patterns or Pattern Outlines can be found using the Free Pseudo-Patterns label.


Here's my first attempt at knitting a hat using 2 colors. It was something I had been avoiding for the longest time. It turned out to be OK. The trick is trying to keep the two balls of yarn from getting tangled up. I haven't figured that out, especially when I have to put it down and then pick it up again later. It was for this reason that I didn't call this a "mindless knitting" hat, otherwise the pattern is pretty easy to memorize. This is my 9th hat for the Cap Karma Chemo Cap Project this year. This hat fits me perfectly, so that would make it a ladies xs/s size.

Stitches used in this hat include:
Ridge Check Pattern, BW2 pg 36
Stockinette Stitch, BW1 pg 10

Please email me if you would like your photo and a link to your blog (if you have one) to appear in My Readers' Gallery.

Striped Slip Stitch Hat pattern can be downloaded from here:
 https://app.box.com/shared/6xop1mvt6r . No registration required for this link.

.

Twin Leaf Lace Cloth

Note:
1. More Free Patterns can be seen along the sidebar (on right side),
or you can use the Free Patterns label to view all posts.
2. Free Pseudo-Patterns or Pattern Outlines can be found using the Free Pseudo-Patterns label.


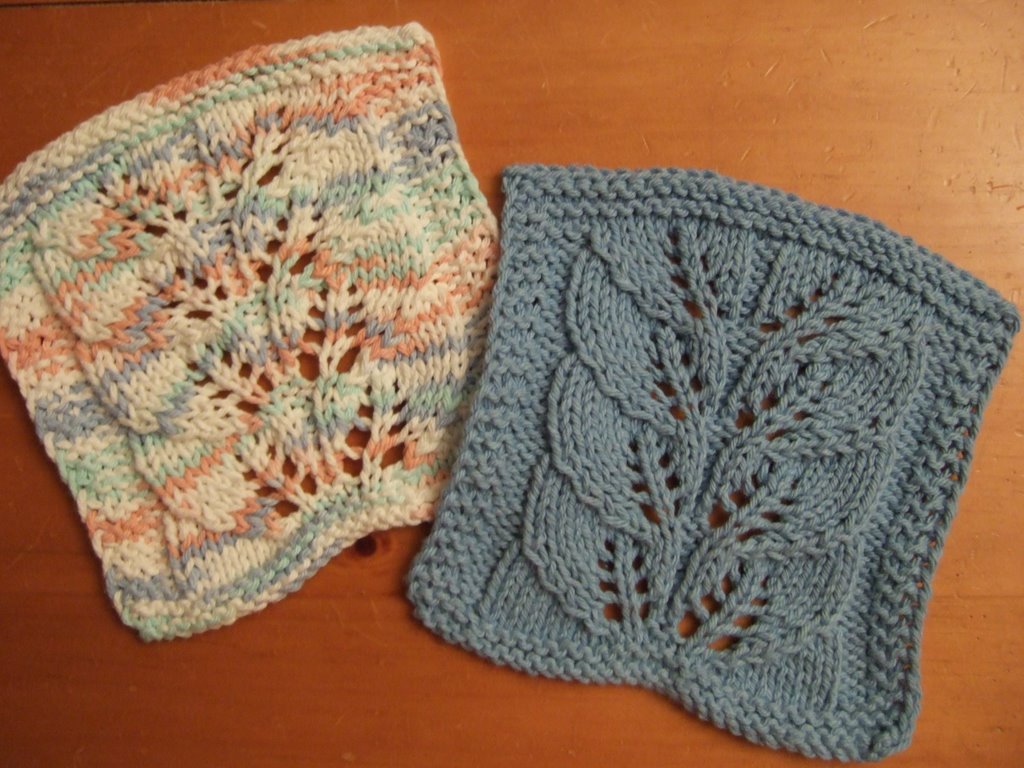
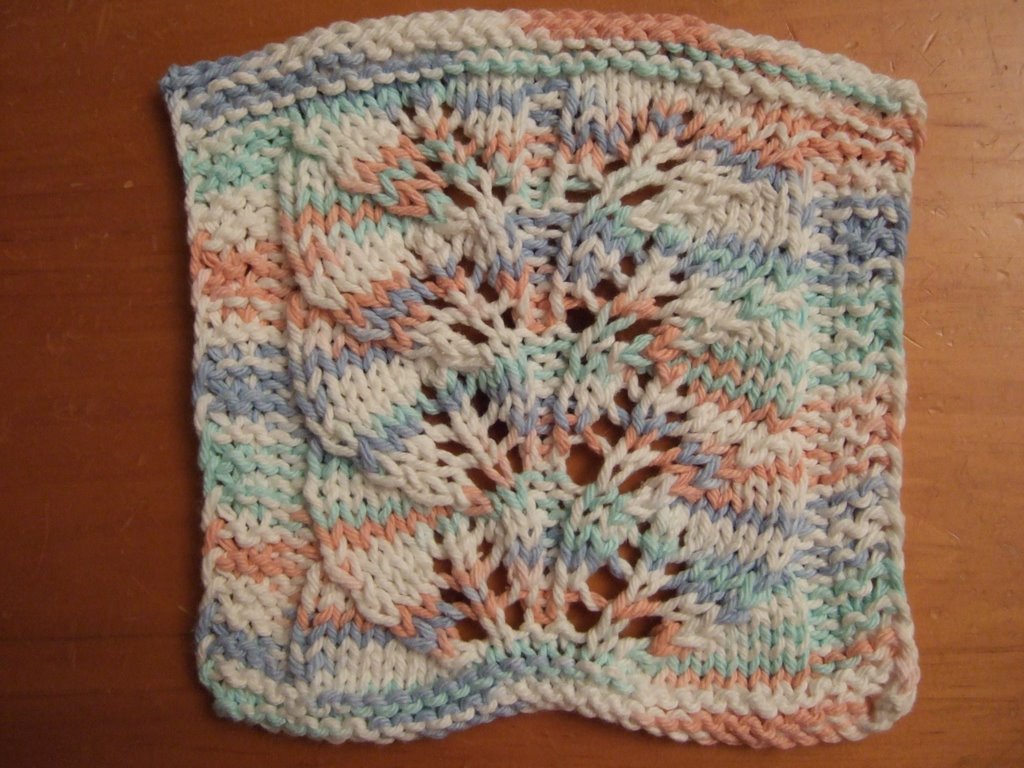
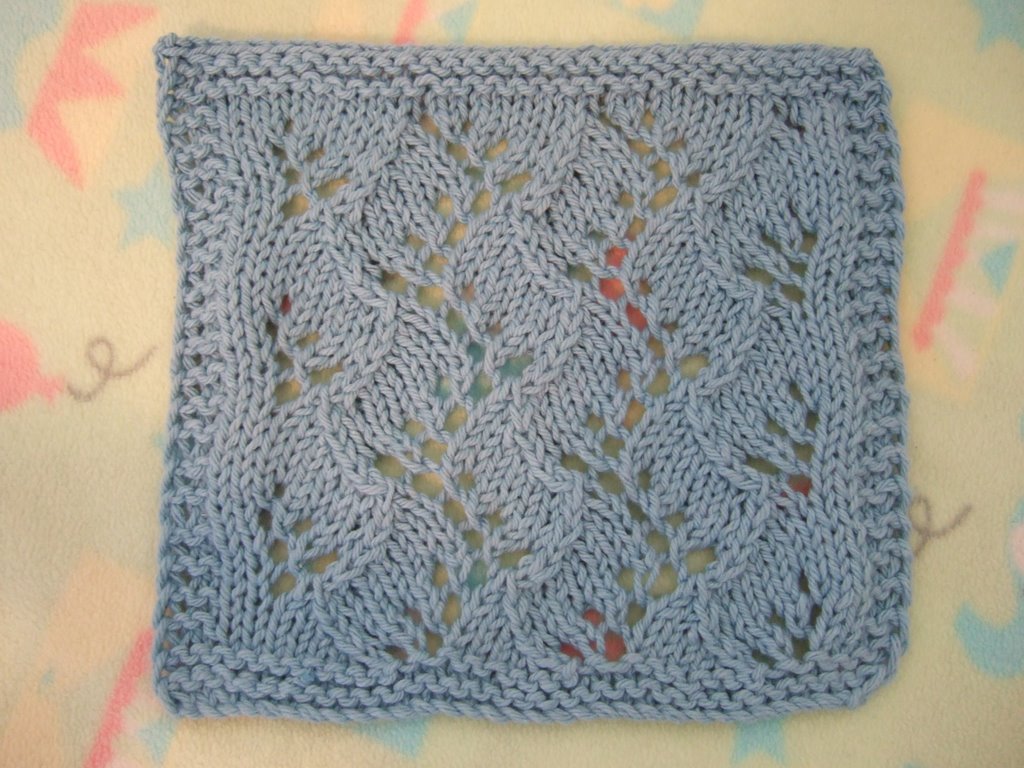
I designed this Twin Leaf Lace Cloth for the MDKAL Q4 Exchange. Since the cloths are on the small side (about 6 1/2 inches square after blocking), I made two for Cheri (my exchange partner). This is my first time participating in the dishcloth exchange. Here is a photo of both cloths. I still can't get the colors to come out right in my photos. The picture above was taken during the day, and the pictures below were taken at night. The nighttime shots always look much darker/duller, but the blue cloth isn't quite as bright as the picture above. I usually take my photos at night, after M has gone to bed, it's just easier for me that way, otherwise she tries to grab my knitting before I take my photos, or she's leaning/pushing up against me and I get more unfocused/blurry pictures. I made one cloth in a solid blue, and I was aiming for a variegated to "go" with the solid one. The variegated one has some blue in it but I couldn't get an exact match.

Stitches used in this cloth include:
Garter Stitch, BW1 pg 10
Twin Leaf Panel, BW2 pg 235


If you can do my Vine Lace Cloth, then this one just requires a smidgen more concentration to knit up. If you're new to lace knitting, see my tips below.

Please email me if you would like your photo and a link to your blog (if you have one) to appear in My Readers' Gallery.


Twin Leaf Lace Cloth
© Designed by S.M. Kahn, October 2006
Smariek Knits -=<>=- http://smariek.blogspot.com

Please look at the Notes at the end of the pattern before starting.
Using WW cotton yarn and US7 (4.5mm) needles, cast on 32 stitches.

Knit 4 rows border.
Row 1 : B3, K2, P10, K2, P10, K2, B3
Row 2 : B3, P2, K6, /2, YO, K1, YO, P2, YO, K1, YO, 2\, K6, P2, B3
Row 3 : B3, K2, P10, K2, P10, K2, B3
Row 4 : B3, P2, K4, /2, K1, YO, K1, YO, K1, P2, K1, YO, K1, YO, K1, 2\, K4, P2, B3
Row 5 : B3, K2, P10, K2, P10, K2, B3
Row 6 : B3, P2, K2, /2, K2, YO, K1, YO, K2, P2, K2, YO, K1, YO, K2, 2\, K2, P2, B3
Row 7 : B3, K2, P10, K2, P10, K2, B3
Row 8 : B3, P2, /2, K3, YO, K1, YO, K3, P2, K3, YO, K1, YO, K3, 2\, P2, B3

Repeat Rows 1 through 8 three more times.

Work one more row : B3, K2, P10, K2, P10, K2, B3
Knit 4 rows border.
Bind off and weave in ends.


Notes:

B3 = 3 stitch side border of your choice (I used K3 for my border in both cloths above)

SSK = slip one stitch, slip another stitch, knit these two slipped stitches together

/2 = Right slanting (double) decrease as follows: SSK, then slip the NEXT stitch over the stitch just made by moving stitches from needle to needle. ----- Viz. Slip 1 stitch. Slip another stitch. Knit these 2 (slipped) stitches together. Move this resulting stitch to the left needle. Now use the right needle to pass the NEXT stitch over it (the stitch you just moved to the left needle). Now slip the stitch back to the right needle. ----- See below for further clarification & walk through if this still does not make sense.

2\ = Left slanting (double) decrease as follows: Slip 1 stitch, knit 2 stitches together, pass slipped stitch over. (This is exactly the same as the SK2TP notation I have used in my other patterns)


Tips:

Mind your yarn overs, especially the 2nd YO on Row 2 (the one just before P2). This is an easy one to screw up if you're not paying attention.

Get a feel for the 2 Purl stitches in the center of the pattern (which happen to be 2 Knit stitches in the center of the wrong side). While knitting across your row, make sure that your center 2 stitches are actually where they should be. If it seems off, stop and look back on your knitting to see where you went wrong. I have bold-ed the center 2 stitches in the pattern to help you see the two halves of the rows. I hope this helps. :-)

When doing odd rows (wrong side) :

- If you are working the P10 section and run into the center 2 Knit stitches before you have finished Purling 10 (in other words, you are short 1 or more stitches), you most likely missed one (or more) YOs from the previous even row. Figure out where that is, tink back to that section (still on the even side), and pick up a strand of yarn from the row below & wrap it around the left needle to insert that missing YO. If you don't feel comfortable picking up the strand to insert the YO, just tink back to the row before and do it the normal way.

- If you are working the P10 section past the 2 center stitches and run into the P2, B3 section before you are done Purling 10 stitches (in other words, you are short one or more stitches), then you most likely missed one (or more) YOs from the previous even row. You'll need to figure it out, see tip in paragraph above.

- If you seem to have 1 extra stitch before the 2 center stitches, then you might have forgotten the "pass over" part of the 2\ instruction from the previous row.

When doing even rows (right side) :

- If you seem to have 1 extra stitch before the 2 center stitches, then you might have forgetten the "pass NEXT stitch over" part of the /2 instruction from the previous row.

Gosh, I hope I covered most of the "pitfalls" of knitting this cloth.


Some additional notes added 11/20/06 to clarify the /2 and 2\ steps in the pattern:

I've discovered that some people are having difficulties with the /2 and 2\ notation I have used in this pattern. Where did that come from? Well, I adopted it from Jackie Erickson-Schweitzer's Elegantly Simple Baby Blanket pattern (which I made a while back) where she used /3 and 3\ for her right & left triple decreases. The /2 and /3 are worked exactly the same, except that /2 is worked over 3 stitches, and /3 is worked over 4 stitches. Similarly with 2\ and 3\. I thought it would be easier to use her shorthand, rather than writing it all out. I guess choosing to adopt Jackie Erickson-Schweitzer's abbreviation was not such a great idea, huh?

Let's walk through /2 together. You do the following for /2:

1. Slip 1 stitch knitwise from the left needle.

2. Slip 1 stitch knitwise from the left needle. (Now you have 2 slipped stitches on your right needle)

3. Knit these 2 slipped stitches together. (Steps 1 through 3 completes the "SSK" part. If you still don't understand how to do "SSK", you can go to KnittingHelp.Com and look at a video which will show you how to do this. Here's the link to their abbreviations page, scroll down to "ssk" on the right side column and click on the video icon.)

4. Move the resulting stitch from step 3 to the left needle.

5. Now use your right needle to pass the NEXT stitch (the one to the left of the stitch you created from step 3) on your left needle over the stitch you just moved to your left needle (the stitch you created from step 3).

6. Now slip the stitch from your left needle back to your right needle.

Voilà! You're done! Clear as mud?


Let's walk through 2\ together. You do the following for 2\:

1. Slip 1 stitch from your left needle to your right needle.

2. Knit 2 stitches together from your left needle.

3. Pass the slipped stitch (from step 1) over the stitch you created in step 2.

Voilà, c'est fini. I have since discovered that what I have been calling SK2TP is more commonly known as SK2P. Sorry about the confusion, I'm a newbie knitter and didn't know this. You can find a video here that will show you how to do this. Scroll down on the right side column until you find "SK2P" and then click on the video icon.

I hope this helps....

.

Thursday, November 09, 2006

Quinquevulnera MK Hat

Note:
1. More Free Patterns can be seen along the sidebar (on right side),
or you can use the Free Patterns label to view all posts.
2. Free Pseudo-Patterns or Pattern Outlines can be found using the Free Pseudo-Patterns label.


I'm doing a series of "Mindless Knitting" hats which are very easy and/or boring to knit. I wanted to make some hats that I could easily put down and then later pick up without scratching my head trying to figure out where I was in the pattern. And I wanted something that I could easily knit in dim lighting, or even while talking to DH without having to worry about losing count. Besides, V is always telling me that I should choose simpler patterns, or that things don't always need to be hard (actually this was in reference to learning Latin, but I'm sure it also applies to knitting, lol). So these Mindless Knitting hats so are easy/boring that you can basically do them without having to refer to the pattern. There's nothing fancy about them, mostly basic knit/purl, no cables, no yarn overs, twist stitches, etc. They're so simple that you don't even need a row counter to help you keep track of which round you're in.


Here is my Quinquevulnera MK Hat, the second hat in my "Mindless Knitting" series of hats. The first was the Sarawakense Hat. This is hat #8 for the Cap Karma Chemo Cap Project. Are you wondering how I came up with the names for these two hats? Well, I pulled them out of a hat! Ok, not really, but there is a theme to the names. Can you figure it out? Anyways, since the hats are pretty simple & plain, I thought it would be nice balance that out with an "interesting" sounding name. Silly, huh?

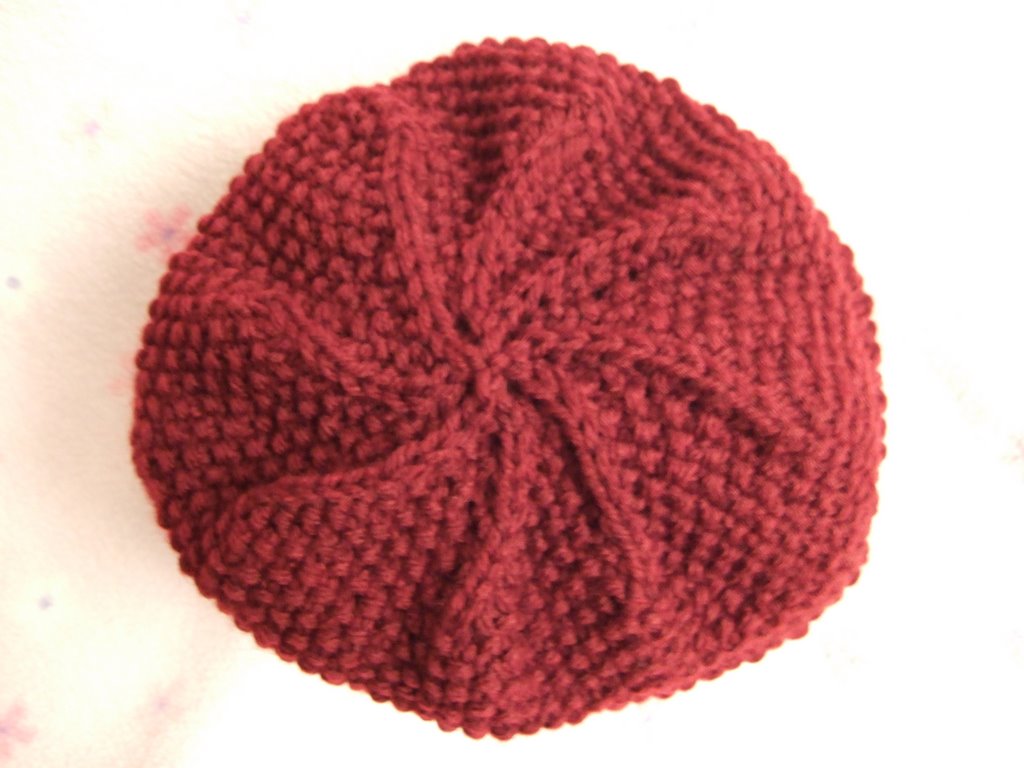
The hat is basically a simple checkerboard pattern of plain & seed stitch squares. The decrease at the top was done "in pattern"; I'm not sure if you can see it in the picture above. The picture below just shows you a closeup of the checkerboard pattern. I'm not sure you can see it very well with the variegated yarn. The pattern is very easy to memorize and figure out by reading your knitting as you go.

Stitches used in this hat include:
Seed Block Stitch, BW1 pg 20
Stockinette Stitch, BW1 pg 10


Please email me if you would like your photo and a link to your blog (if you have one) to appear in My Readers' Gallery.


Quinquevulnera "Mindless Knitting" Hat
© Designed by S.M. Kahn, November 2006
Smariek Knits -=<>=- http://smariek.blogspot.com

Using Worsted Weight yarn, US8 (5mm) needles, cast on 90 stitches.
Join in a round, careful not to twist the stitches.

Knit 8 rounds.

Round 1: * K5, (P1, K1)x2, P1 *
Round 2: * K6, (P1, K1)x2 *
Round 3: * K5, (P1, K1)x2, P1 *
Round 4: * K6, (P1, K1)x2 *
Round 5: * K5, (P1, K1)x2, P1 *
Round 6: * (P1, K1)x2, P1, K5 *
Round 7: * (K1, P1)x2, K6 *
Round 8: * (P1, K1)x2, P1, K5 *
Round 9: * (K1, P1)x2, K6 *
Round 10: * (P1, K1)x2, P1, K5 *

Repeat Rounds 1 to 10 three more times.

Decrease "in pattern", or just knit those stitches:

DRound 1: Work 13 stitches, K2tog
DRound 2: Work 12 stitches, K2tog
DRound 3: Work 11 stitches, K2tog
DRound 4: Work 10 stitches, K2tog
DRound 5: Work 9 stitches, K2tog
DRound 6: Work 8 stitches, K2tog
DRound 7: Work 7 stitches, K2tog
DRound 8: Work 6 stitches, K2tog
DRound 9: Work 5 stitches, K2tog
DRound 10: Work 4 stitches, K2tog
DRound 11: Work 3 stitches, K2tog
DRound 12: Work 2 stitches, K2tog
DRound 13: Work 1 stitch, K2tog
DRound 14: K2tog

Cut yarn & pull through remaining 6 stitches. Weave in ends.


Notes:

K2Tog = Knit 2 stitches together

Instructions in parentheses followed by x2 means you do what is in the paretheses twice. For example, (P1, K1)x2 means you do the following: P1, K1, P1, K1.


.

Travelling Vine Cloth

Note:
1. More Free Patterns can be seen along the sidebar (on right side),
or you can use the Free Patterns label to view all posts.
2. Free Pseudo-Patterns or Pattern Outlines can be found using the Free Pseudo-Patterns label.


This cloth is similar to the Travelling Vine Scarf I made a while back. The pattern really shows best after blocking. Not sure you can see the vine pattern in this picture, with the green baby blanket in the background ... look at the holes and you'll see the vine pattern travelling upwards. I'm surprised I even got such a focused picture. I put the cloth in my little girl's crib thinking it would enable me to take a picture of it without her grabbing it (which she does when I place my knitting on the coffee table), but she was fussing & leaning on me while I was trying to take photos so the camera was not very steady at all.

Stitches used in this cloth include:
Garter Stitch, BW1 pg 10
Traveling Vine, BW1 pg 219

-=<>=-

Please email me if you would like your photo and a link to your blog (if you have one) to appear in My Readers' Gallery.


Travelling Vine Cloth
© Designed by S.M. Kahn, November 2006
Smariek Knits -=<>=- http://smariek.blogspot.com

Using Worsted Weight cotton yarn and US7 (4.5mm) needles, cast on 34 stitches.

Knit 4 rows border.

Row 1 : B3, K2, (yo, K1-b, yo, ssk, K5)x3, K2, B3
Row 2 : B3, P6, (P2tog-b, P7)x2, P2tog-b, P5, B3
Row 3 : B3, K2, (yo, K1-b, yo, k2, ssk, k3)x3, k2, B3
Row 4 : B3, P4, (P2tog-b, P7)x3, B3
Row 5 : B3, K2, (K1-b, yo, K4, ssk, K1, yo)x3, K2, B3
Row 6 : B3, P3, (P2tog-b, P7)x3, P1, B3
Row 7 : B3, K2, (K5, K2tog, yo, K1-b, yo)x3, K2, B3
Row 8 : B3, P5, (P2tog, P7)x2, P2tog, P6, B3
Row 9 : B3, K2, (K3, K2tog, K2, yo, K1-b, yo)x3, K2, B3
Row 10 : B3, (P7, P2tog)x3, P4, B3
Row 11 : B3, K2, (yo, K1, K2tog, K4, yo, K1-b)x3, K2, B3
Row 12 : B3, P1, (P7, P2tog)x3, P3, B3

Repeat rows 1 to 12 two more times.

Knit 4 rows border.

Bind off. Weave in ends. Block cloth for best results.

Notes:

B3 = 3 stitch side border of your choice (I used K3 for my border in the cloth above)

K1-B = Knit 1 stitch through the back loop

K2TOG = knit 2 stitches together

P2TOG = Purl 2 stitches together

P2TOG-B = Purl 2 stitches together through the back loop
Similar to purling 1 stitch through back loop. Video to show you how to purl 1 stitch together is on Knitting Help, look under "p tbl" here:
http://www.knittinghelp.com/knitting/abbreviations_explained/

SSK = slip one stitch, slip another stitch, knit these two slipped stitches together

YO = Yarn Over

Instructions in parentheses followed by x2 or x3 means you do what is in the paretheses the number of times indicated after "x". For example, (yo, K1-b, yo, ssk, K5)x3 means you do the following: yo, K1-b, yo, ssk, K5, yo, K1-b, yo, ssk, K5, yo, K1-b, yo, ssk, K5.

.

Monday, November 06, 2006

Finished Objects so far

I found a need to enumerate all my finished objects after someone sent me email inquiring about something I made such a long time ago that I had to go figure out what exactly she was referring to. So here's a list of my finished objects so far. This list will make it easier for me to go back and find old blogger posts (I hope) . As I made this list, I couldn't believe how many dishcloths I've made this year.


2006 FINISHED OBJECTS


Squares Cloth (pattern)

Triangles Cloth (pattern)

Persephone Scarf (pattern)

3 Cable Hat

Swirl Hat (pattern)

Woozy Cloth (pattern)

3AM Cable Hat in purple (links to pattern) - for me!!! :-)

Striped Slip Stitch Hat (pattern)

Twin Leaf Lace Cloth (pattern)

Quinquevulnera Mindless Knitting Hat (pattern)

Travelling Vine Cloth (pattern)

Chemo hat #7 for Cap Karma Chemo Hat Project

Sarawakense Mindless Knitting Hat (pattern outline)

Claudia Hat (pattern)

Cap Karma Hat in wine

Diamond Lace cloth (pattern)

Cap Karma Hat in white (pattern)

Vine Lace cloth (pattern)

Asherton Hat for toddler (pattern)

Garterlac cloth

Asherton Hat in pink

Asherton Hat in red (pattern)

Asherton Reversible Scarf (pattern)

Small Arrow cloth (pattern)

Bonbons et Calissons dishcloth (pattern)

Fountain Lace cloth (pattern)

Horse cloth

Lacy Round cloth

Pig cloth

Paw & Bone cloths

Cat & Dog cloths

Intertwined dishcloth (pattern)

Oak Leaf dishcloth

Twist to the Left, Twist to the Right dishcloth (pattern)

Grapes dishcloth

Wine Bottle & Glass dishcloth

Christmas Tree dishcloth

Spring Butterflies dishcloth

Wave Pool dishcloth

Branching Out Scarf in pink

Pink Chemo Hat (chemo hat #9)

Blue 3AM Cable Hat (chemo hat #8) (pattern)

Pink Cable Hat (chemo hat #7)

Branching Out Scarf in blue Baby Silk

2005 FINISHED OBJECTS

Sue's Chemo Hat

Knitpicks Chemo Hat (chemo hat #6)

Pink cable brim hat (chemo hat #5)

Blue twist stitch hat (chemo hat #4)

Red Lacy Hat (chemo hat #3)

Baby Cable Rib Hat (chemo hat #2)

Nautilus Hat (chemo hat #1)

Roll Brim Hat

Branching Out Scarf (plum)

Marisa's Watch Cap

Grandmother's Favorite dishcloth

Marisa's Blanket

Besotted Scarf

Travelling Vine Scarf

Irish Hiking Scarf


.

Sunday, November 05, 2006

Cap #7 for Cap Karma


Here's my 7th hat for the Cap Karma Chemo Cap Project.

.

Wednesday, November 01, 2006

Sarawakense MK Hat

Note:
1. More Free Patterns can be seen along the sidebar (on right side),
or you can use the Free Patterns label to view all posts.
2. Free Pseudo-Patterns or Pattern Outlines can be found using the Free Pseudo-Patterns label.


I'm doing a series of "Mindless Knitting" hats which are very easy and/or boring to knit. I wanted to make some hats that I could easily put down and then later pick up without scratching my head trying to figure out where I was in the pattern. And I wanted something that I could easily knit in dim lighting, or even while talking to DH without having to worry about losing count. Besides, V is always telling me that I should choose simpler patterns, or that things don't always need to be hard (actually this was in reference to learning Latin, but I'm sure it also applies to knitting, lol). So these Mindless Knitting hats so are easy/boring that you can basically do them without having to refer to the pattern. There's nothing fancy about them, mostly basic knit/purl, no cables, no yarn overs, twist stitches, etc. They're so simple that you don't even need a row counter to help you keep track of which round you're in.

Actually, I have knitted this one in the dark! It gets dark earlier since we switched over to Standard Time. Yesterday, I took M on late 4:45pm car ride to get her to nap, stopped at 280 Metro Center thinking we'll stop by Joann's when she wakes up, and I knitted in the car until she woke up.... it was dark, didn't turn on the interior car lights, and still managed to "see" enough of my knitting to knit in the dark. Never did make it to Joann's though cuz she took a long nap, it was already dark & late, so we just went home instead.


This is my Sarawakense "Mindless Knitting" Hat. Here's how the hat started out. I wanted to do a roll brim hat. I've already made many hats with a stockinette style decrease at the top. I decided that I wanted to do one with a seed stitch decrease. I love how seed stitch looks and find that I'm often drawn to patterns with it. But I didn't want to do a hat that had seed stitch in it from top to bottom, so I decide to throw in some stockinette bands just to mix it up a bit. So this is how the hat turned out the way it turned out. The picture below shows the seed stitch top. Sorry it's a little out of focus, but it was the best picture I had of the top.


This is hat #6 for this year's Cap Karma Chemo Cap Project ...

Stitches used in this hat include:
Seed Stitch, BW1 pg 11
Stockinette Stitch, BW1 pg 10

11/19/06: Thought I would add the following pattern "outline" since K asked V to knit her one. Tweak the numbers however you want.

WW yarn, US8 needles, cast on 88 stitches.
Knit 8 rounds.
Seed stitch 12 rounds.
Knit 8 rounds.
Seed stitch 8 rounds
Knit 8 rounds.
Seed stitch 12 rounds.
Seed stitch decrease: Seed stitch 9, K2tog; Seed stitch 8, K2tog; ... Seed Stitch 1, K2Tog; K2Tog.


.

Sunday, October 22, 2006

The Claudia Hat

Note:
1. More Free Patterns can be seen along the sidebar (on right side),
or you can use the Free Patterns label to view all posts.
2. Free Pseudo-Patterns or Pattern Outlines can be found using the Free Pseudo-Patterns label.


The Claudia Hat is named after a strong woman who survived breast cancer twice(!), among other health issues. She is a wonderful example of how one can dodge the curve balls that Life throws at us. This is another hat that going to the Cap Karma Project this year. We are knitting chemo caps for local hospitals. It was fun when we did it last year. Check out the blog, there are some pictures of caps we made last year (check the earlist posts from October).

You'll be disappointed if you're looking for a hat knitted in the round. This Claudia Hat is knitted flat and then seamed at the end. I tried to knit this in the round but I just couldn't manage it. I'm just not experienced enough for this one. This is my very first hat knitted flatly. I have to say that it is more challenging to knit flat than to knit in the round. I could not get a good feel for how the hat was turning out as I knit it. And it just feels weird to knit a hat flat. The picture above shows a side view of the hat, which looks a lot like the front view, lol.

If you're looking for hats knitted in the round, try my 3AM Cable Hat, Asherton hat for toddler or adult, or Cap Karma Hat.

I was originally not going to share the pattern for this hat because I wasn't very happy with the way it turned out and didn't think I would knit it again, unless I sat down and worked out how to knit it in the round. I guess I really hate seaming. This was the first hat I've ever had to seam, and I have to say I much prefer knitting in the round. However I changed my mind, in case there is one person out there who might be interested in knitting one. And having the pattern here will make it that much easier for me when I'm ready to come back to it and try to convert it for round knitting.

Stitches used in this hat include:
Brocade Chevron, BW2 pg 148
Knit-Two Purl-Two Ribbing, BW1 pg 39
Stockinette Stitch, BW1 pg 10

Please email me if you would like your photo and a link to your blog (if you have one) to appear in My Readers' Gallery.


Claudia Hat
© Designed by S.M. Kahn, October 2006
Smariek Knits -=<>=- http://smariek.blogspot.com

Using Worsted Weight yarn & US8 (5mm) needles, cast on 94 stitches.

Row 1: K3, * P2, K2 *, end with K3
Row 2: P3, * K2, P2 *, end with P3
Row 3: K3, * P2, K2 *, end with K3
Row 4: P3, * K2, P2 *, end with P3
Row 5: K3, * P2, K2 *, end with K3
Row 6: P3, * K2, P2 *, end with P3
Row 7: Knit across
Row 8: Purl across
Row 9: Knit across
Row 10: Purl across
Row 11: K1, * RT, K8 * , end with RT, K1
Row 12: P1, * Sl2, P8 *, end with Sl2, P1
Row 13: K2, * LT, K6, RT *, end with K2
Row 14: K1, P1, * K1, Sl1, P6, Sl1, P1 *, end with K1, P1
Row 15: P1, K1, * P1, LT, K4, RT, K1 *, end with P1, K1
Row 16: (K1, P1)x2, * Sl1, P4, Sl1, (K1, P1)x2 *
Row 17: (P1, K1)x2, * LT, K2, RT, (P1, K1)x2 *
Row 18: K1, * (P1, K1)x2, Sl1, P2, Sl1, P1, K1 *, end with P1, K1, P1
Row 19: P1, * (K1, P1)x2, LT, RT, K1, P1 *, end with K1, P1, K1
Row 20: * (K1, P1)x3, Sl2, K1, P1 *, end with (K1, P1)x2
Row 21: * (P1, K1)x3, RT, P1, K1 *, end with (P1, K1)x2
Row 22: * K1, P1 *
Row 23: P1, * RT, (K1, P1)x4 *, end with RT, K1
Row 24: K1, * Sl2, (P1, K1)x4 *, end with Sl2, K1
Row 25: K2, * LT, (P1, K1)x3, RT *, end with K2
Row 26: P3, * Sl1, (K1, P1)x3, Sl1, P2 *, end with P1
Row 27: K3, * LT, (K1, P1)x2, RT, K2 *, end with K1
Row 28: P4, * Sl1, (P1, K1)x2, Sl1, P4 *
Row 29: K4, * LT, P1, K1, RT, K4 *
Row 30: P5, * Sl1, K1, P1, Sl1, P6 *, end last repeat with P5
Row 31: K5, * LT, RT, K6 *, end with K5
Row 32: P6, * Sl2, P8 *, end last repeat with P6
Row 33: K6, * RT, K8 *, end last repeat with K6
Row 34: Purl across
Row 35: Knit across
Row 36: Purl across

Decrease:

Row 1: K22, K2TOG, K21, K2TOG, K21, K2TOG, K22, K2TOG - 90 sts
Row 2: Purl across
Row 3: * K13, K2TOG * - 84 sts
Row 4: Purl across
Row 5: * K12, K2TOG * - 78 sts
Row 6: Purl across
Row 7: * K11, K2TOG * - 72 sts
Row 8: * P2TOG, P10 * - 66 sts
Row 9: * K9, K2TOG * - 60 sts
Row 10: * P2TOG, P8 * - 54 sts
Row 11: * K7, K2TOG * - 48 sts
Row 12: * P2TOG, P6 * - 44 sts
Row 13: * K5, K2TOG * - 36 sts
Row 14: * P2TOG, P4 * - 30 sts
Row 15: * K3, K2TOg * - 24 sts
Row 16: * P2TOG, P2 * - 18 sts
Row 17: * K1, K2Tog * - 12 sts
Row 18: * P2Tog * - 6 sts

Cut yarn, thread through remaining stitches. Sew seam. Weave ends.


Notes:

Everything between asterisks are repeated throughout the round. So * P2, K2 * just means you P2, K2 across the entire row.

x2, x3, and x4 after parentheses mean you do what is in the parentheses 2, 3, or 4 times. For example, (K1, P1) x2 means you do K1, P1 twice, viz. K1, P1, K1, P1.

K2TOG = Knit 2 stitches together

P2TOG = Purl 2 stitches together

Sl1 = slip one stitch, with yarn in front

Sl2 = slip two stitches, with yarn in front

RT = Skip the next stitch. Knit the 2nd stitch. Then knit the skipped stitch.

LT = Skip the next stitch. Knit the 2nd stitch in the back loop. Then knit the skipped stitch.

I'm a very inexperienced knitter, especially when it comes to knitting hats flat which require seaming at the end. Here's something you might want to try with this hat. Cast on 2 extra stitches to create a selvage that will make seaming easier; add a knit at the beginning and end of each row (actually, that would be knit on the right side, purl on the wrong side).

And I feel I must mention this again. I am really not very happy with how this hat turned out. Perhaps it is a bad design, perhaps it is just my lack of experience with hats knitted flat, perhaps it is my lack of experience with seaming, or a combination of all three. I hope you end up with better results if you decide to give this pattern a try. Good luck!

.
Tuesday, October 17, 2006

Cap Karma Hat #2


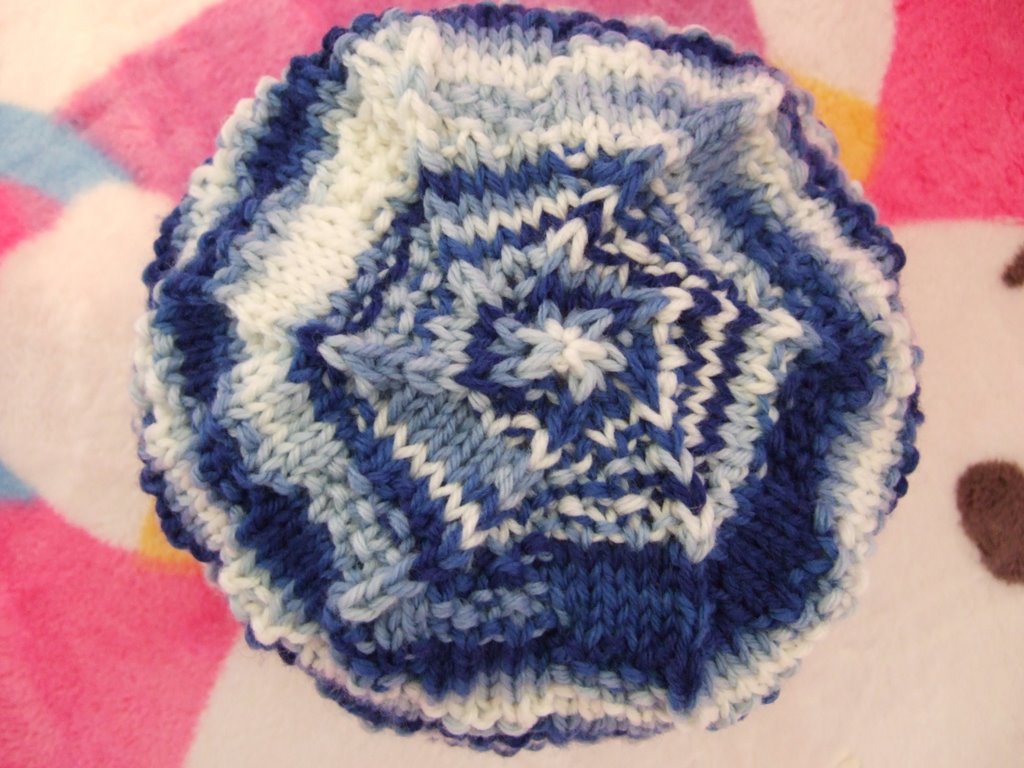
Here's my second Cap Karma Hat which actually follows the pattern I wrote. ;-) This hat is for the Cap Karma chemo hat project. Yes, we're back to Pooh Bear modelling the hats. I have another Disney bear, an orange one called Ojo (according to the label), no idea where he's from. Anyone know?

The pattern can be found here : http://smariek.blogspot.com/2006/10/cap-karma-hat.html


-=<>=-

Let's see, here are some things I'm working on :

1. Designing the Claudia Hat (named after a strong woman who survived breast cancer twice(!), among other health issues).
2. Designing a cloth for the Monthly Dishcloth KAL Q4 Exchange. Hope my exchange partner will like it.
3. Trying to finish up some knitting for family. This is where I'm making least progress.
4. Looking into making Tom Baker's Doctor Who scarf for a friend. There are so many variations that it is mind-boggling trying to figure out which pattern to use (viz. color & row sequence).


.
Sunday, October 15, 2006

Diamond Lace Cloth

Note:
1. More Free Patterns can be seen along the sidebar (on right side),
or you can use the Free Patterns label to view all posts.
2. Free Pseudo-Patterns or Pattern Outlines can be found using the Free Pseudo-Patterns label.


Here's a simple design with lacy diamonds. Sometimes I think the simpler patterns look better than more elaborate patterns. This one is pretty easy to knit up. Both pictures show the cloth unblocked. It definitely looks better after a bit of blocking. Unfortunately the pics I took after blocking were all out of focus; guess I was just having a bad camera day.

Stitches used in this cloth include:
Coral Pattern, BW2 pg 269
Seed Stitch, BW1 pg 11


Please email me if you would like your photo and a link to your blog (if you have one) to appear in My Readers' Gallery.


Diamond Lace Cloth

© Designed my S.M. Kahn, October 2006
Smariek Knits -=<>=- http://smariek.blogspot.com

Using Worsted Weight yarn, and US7 (4.5mm) needles, cast on 39 stitches.

Work 5 rows of seed stitch border.

Row 1 : B4, P31, B4
Row 2 : B4, K2, K2Tog, K1, YO, K1, YO, K1, SSK, K3, K2Tog, K1, YO, K1, YO, K1, SSK, K3, K2Tog, K1, YO, K1, YO, K1, SSK, K2, B4
Row 3 : B4, P31, B4
Row 4 : B4, K1, K2Tog, K1, YO, K3, YO, K1, SSK, K1, K2Tog, K1, YO, K3, YO, K1, SSK, K1, K2Tog, K1, YO, K3, YO, K1, SSK, K1, B4
Row 5 : B4, P31, B4
Row 6 : B4, K2Tog, K1, YO, K5, YO, K1, SK2TP, K1, YO, K5, YO, K1, SK2TP, K1, YO, K5, YO, K1, SSK, B4
Row 7 : B4, P31, B4
Row 8 : B4, K1, YO, K1, SSK, K3, K2Tog, K1, YO, K1, YO, K1, SSK, K3, K2Tog, K1, YO, K1, YO, K1, SSK, K3, K2Tog, K1, YO, K1, B4
Row 9 : B4, P31, B4
Row 10 : B4, K2, YO, K1, SSK, K1, K2Tog, K1, YO, K3, YO, K1, SSK, K1, K2Tog, K1, YO, K3, YO, K1, SSK, K1, K2Tog, K1, YO, K2, B4
Row 11 : B4, P31, B4
Row 12 : B4, K3, YO, K1, SK2TP, K1, YO, K5, YO, K1, SK2TP, K1, YO, K5, YO, K1, SK2TP, K1, YO, K3, B4
Repeat Rows 1 to 12 three more times.
Work one more row B4, P31, B4
Knit 4 rows of seed stitch border.
Bind off and weave in ends.

Notes:

Seed stitch top & bottom rows = (K1, P1) across to penultimate stitch, end last stitch K1. Or you can use whatever border rows you prefer.

B4 = 4 stitch seed stitch border. K1, P1, K1, P1 at beginning of row. P1, K1, P1, K1 at end of row. Or use whatever border stitch you prefer.

K2TOG = Knit 2 stitches together

SK2TP = slip one stitch, knit 2 stitches together, pass slipped stitch over

SSK = slip one stitch, slip another stitch, knit these two slipped stitches together


.