Navigation Tips

Free Patterns can be seen along the sidebar (on right side),
or you can use the Free Patterns label to view all posts.

Free Pseudo-Patterns or Pattern Outlines can be found using the Free Pseudo-Patterns label.

The most comprehensive listing of Patterns, Pseudo-Patterns, and Pattern Outlines can be found on the Pattern Bibliography page.

Please read the Blog Housekeeping section in the sidebar for more info.

Tuesday, November 27, 2007

Merino, Alpaca & Wool


I picked up a few more balls of yarn so my stash would have new friends to play with. I haven't actually gotten a chance to play around with this yarn yet but it feels soft. It is Filati Italian Collection Tebe Superfine Merino. That's a mouthful, huh?

My Yarnmoire is full, so these will live in the little white box they arrived in. I still have to share photos of my Yarnmoire. I keep forgetting to take photos during the daytime when the lighting is better.


This one is my favorite color. Port. It's a nice deep red. I am starting to add red to my stash because I had little or none before. I like those darker reds which aren't too bright orangey.


You can never go wrong with blues, so I picked up Bostonian Blue. I wasn't planning on picking this color, it just fell into my shopping cart. Yarn has a way of doing that with me.


I'm not really a green person, but for some reason I seem compelled to pick up green yarn. I have tons of green yarn. I rarely even wear green. It's not a good color on me. This is Wild Sage.


Now this is definitely not a color I would normally choose or even gravitate towards. It's sort of an orange/peach color, called Crabapple. I made a conscious effort to pick up something I would not normally get just to add a little variety to my stash. There's just too much pink, purple, blue, and green in my stash right now.

Notice that none of these are purple. I was really good about avoiding the purple shades. There was a beautiful deep purple called Blackberry Wine which flew out the door. They still had the Georgian Purple and Prune. The Georgian Purple is pretty, but I managed to resist.

Well that is not all I picked up. There's also some Elann Cuzco in Thistle Down and Ruby.


Not sure what I will make with these. Since I only picked up 4 balls, I think they'll turn into scarves. SK mentioned that they could be knit into scarves using US15 needles. That was definitely good to know (and also a deciding factor to give this yarn a try).

I usually never know what I will make with a yarn when I buy it. I just noticed a trend though. If I think I want a yarn, I'll just pick up 10 balls. If I just want to try it out and see what it's all about, then I pick up only 4 balls. So far I've never run into a shortage with 10 balls of any color because I haven't yet graduated to big item knitting (such as sweaters). I'm still stuck on scarves, hats, and washcloths. So 10 balls work out fine for now. I wonder what the sweater knitters do when they want to buy a yarn but don't have a specific project in mind. How many balls do they pick up? I may want to give that a try if I manage to finish Mom's vest


This blue is pretty. I'm not sure what kind of stitch pattern I can use with this yarn. I don't think it will show much stitch definition, so probably something simple knit/purl. No cables. No lace.


I've never figured out why I have such a difficult time taking pictures of red yarn (or red knitting). The color never comes out right. Is it just my camera?

I've never knitted with any of these yarns before. I'm really looking forward to playing with the DK weight Tebe. DK weight is a nice comfort zone for me.

Oh, I also picked up 4 balls of Elann Alpaca Fina sport weight yarn in Cranberry color. Don't have photos of it right now. It feels soft. I'm not sure what I can make with 4 balls, probably a lacy scarf. I have some ideas in mind, but don't feel like starting lace at the moment. I still need some mindless knitting with some simple knit/purl project.

But wait ... that's not all!


This is Austermann Inka Color. See? I was still good, no purples.


And this is my first lace weight yarn, Elann Baby Lace Merino. Oh my, I have no idea what needle size to use with this, the label doesn't say. Eeks, I may even have to dust off the US1 or US2 needles and break them in! But I do have lots of ideas for this yarn, it'll be perfect for many of the stitch patterns I've bookmarked in all my stitch pattern dictionaries. :-)

Since we're on the topic of yarn, I'm still trying to figure out what to do with some DK weight Marly. I used it for my Ariel Scarf and Hat. I don't think it is a good choice of yarn for the scarf. The fabric and drape is on the heavy side. Perhaps this yarn is better for a sweater or shawl? I don't have enough of any one color to make a sweater though. Hmmm... maybe if I just made a plain knit/purl scarf out of it, it might come out less dense than a cable pattern.

--<>--

Ok, I just had to share this tea comment DH made. I made a cup of PG Tips tea, which I recently picked up, and left it sitting on the kitchen counter. Shortly afterwards, I hear DH ask in a surprised tone, "why is your tea murky brown?!" Then I realized that it's been a long long long long LONG time since he ever saw me adding milk to my tea, thus his odd comment. It's true. I drink most of my tea plain, rarely with any sweetener (I think Chai is the only one), even the blends most people add milk to.

Right now I'm enjoying some Lupicia Ripe Mango Oolong.

--<>--


I finally got around to blocking this scarf, which you saw here earlier this month. Now it is 77" x 9", and the sides aren't as straight as before due to the pinning process. I've noticed that knitting comes out softer after a little soak in Eucalan Wool Wash (I got mine here). I've heard that blocking helps even out the stitches. I don't know about that, but I do think knitting usually looks better after blocking. The downside is that I'm pretty lazy about the whole process and it could take me a long while before I get around to it, hmmm, kinda like weaving in ends.


--<>--


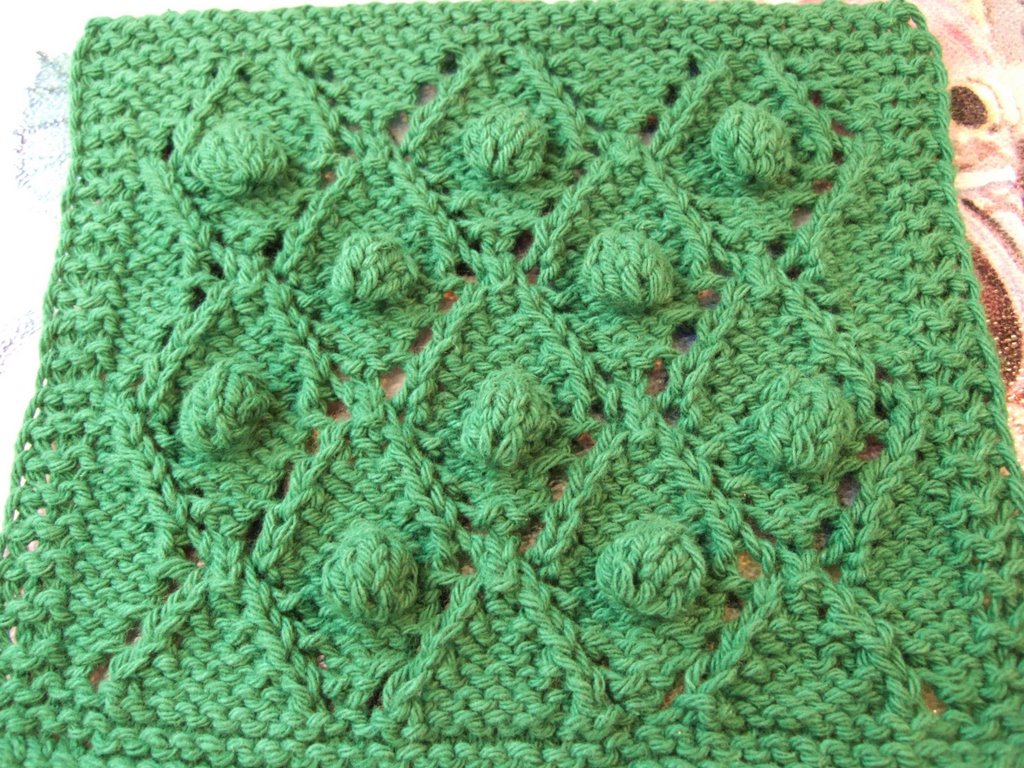
I've made little progress since my last post about this vest. I had frogged it a bit, and then redid it so that each row of blocks ended on Row 4 instead of Row 2 (see photo in last post) which seems to look better to me.

In the photo above, you can see that I have just started the armhole shaping. I'm a little worried about the vest being too short. When I hold it up against me, I feel like the bottom edge should come down further. Perhaps I should work each block pattern for another 4 rows to get some added length. Oh I hate the thought of having to frog what I have here. I think I'll have to hold it up against my mom to see how it looks on her before proceeding.

I do have difficulties following directions. The beginning of the "Back" section says to keep 1 stitch at each edge in stockinette stitch for the selvedge. I've been doing that up to the arm hose decrease. I couldn't figure out how to knit the 1 stitch, and then follow with 6 bind off stitches... cuz that would have left me with one stitch, a gap, and then the main part of the vest. ??? Now I'm looking at the instructions where it says to decrease 1 stitch each edge every other rows, 6 times. Should I go back to adding the 1 stitch selvedge at the beginning of the row, and start the decrease with the 2nd & 3rd stitches? Should I keep a 1 stitch selvedge at the end of the row, and start the decrease with the penultimate & antepenultimate stitches?

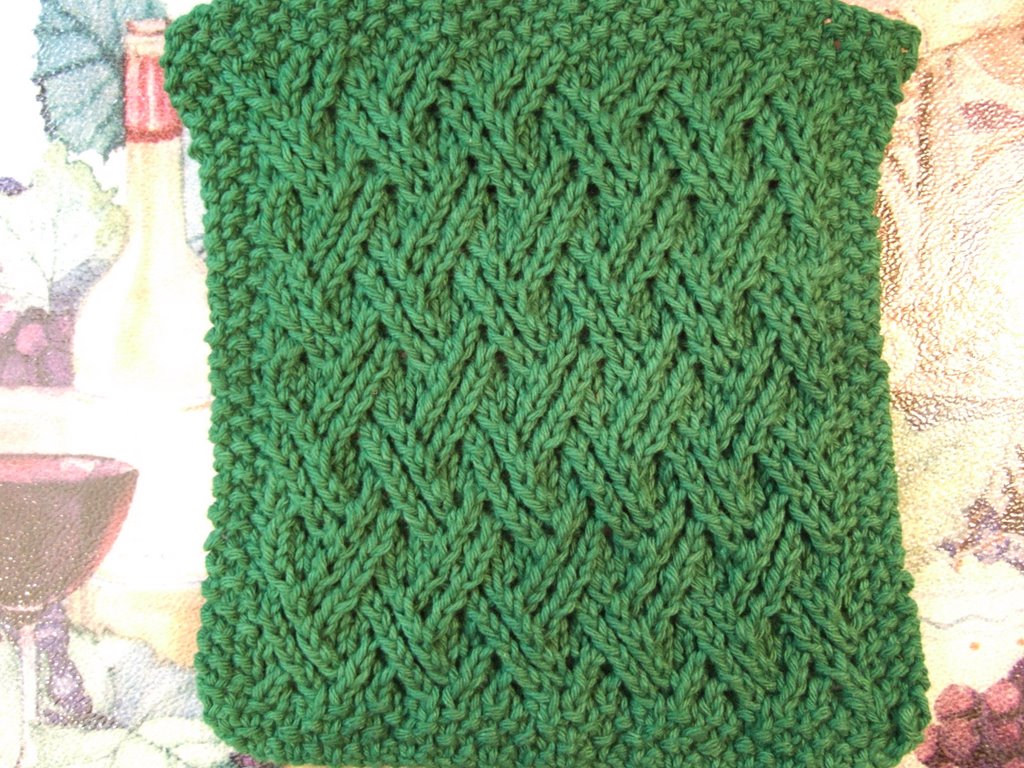
I have to say that although this is a simple knit/purl pattern, it does take a bit of concentration for me to keep track of the 3 diffferent pattern blocks. I found I messed up more when I read directly from the pattern page, because I'd lose track of which pattern block order I should be doing (that I, II, III on RS rows, and III, II, I on WS rows really screwed me up) and I also sometimes did the wrong row number. So I had to rewrite it by rows. I think my brain just can't process keeping track of too many things at one time. Oh and I can't seem to listen to an audio book while knitting this vest. :-(

At this rate it doesn't look like I will complete this vest by Christmas.

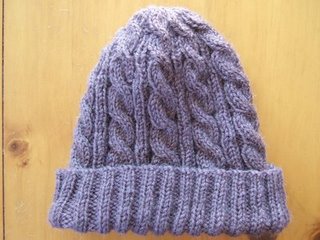
What else am I working on right now? Just another cable scarf, which I think I will name Hera. But I may put this down for a while cuz I think I need a break from cables. I am also working on another Jayne Cobb Hat, knit at 17 sts per 4 inches in the same yarn, to get a smaller fitting hat. And as soon as I can find a spare US8 circular needle, I will start some charity hats. I'm in the mood for something really mindless...


.

Bernadette


Meet Bernadette. If you have knit Miranda, then you will definitely see the similarities between the cables in these two scarves. They both use the same BC and FC cables. Like Miranda, Bernadette is also a good cable scarf for mindless TV knitting because you spend most of your time doing K2P2 ribbing with a few cables every 8th row. The pattern is very easy to memorize too. You can even do the cables without a cable needle, although it is just a smidgen trickier than a regular straight cable (CF6, CB6, etc). The pattern is the Lattice Cable from Barbara Walker #1. I have all 4 of her Treasuries and spend way too much time browsing through them and getting inspired to knit all sorts of things I never have time to bring to fruition.


I knit this scarf using 5 balls of Elann's Superwash Merino yarn, color is Capri Blue. This was my first time playing around with this yarn and I was extremely and pleasantly surprised to find out how soft it was. This yarn is soft, soft, soft, soft, SOFT!!! I can't get over the fact that it is machine washable! I think I like this yarn even more than Zara. I wish this Superwash Merino came in as many colors as Highland Wool, then I would be a happy camper. And I hope the yarn doesn't become discontinued like their Devon, which I discovered too late to add any significant amount to my stash.

The pattern is a bit "scrunched" when you knit it, and some people may prefer the way that looks. If you don't, then the scarf will benefit from a bit of blocking afterwards to allow the pattern to bloom. This scarf is approximately 8 inches x 80 inches (~ 20 cm x 200 cm). Of course YMMV depending on how wide or long you decide to make your scarf. If you want to change the width of the scarf, just cast on more or less stitches in multiples of 8 + 2 stitches and then add 2 stitches for the border (one edge stitch at the beginning of the row, one edge stitch at the end of the row), viz. 20, 28, 36, 44, 52, 60, 68,76, etc.


My first attempt at creating a chart (for the Osiris Scarf) for the chart knitters was a challenge for me using the Aire River Font due to its limitations, especially for representing cables. So I sought an alternative for this scarf, trying out this Knitting Chart Maker. I still had to jump through many hoops in an attempt to get the output in some sort of usable format because I couldn't figure out a straight forward way to save the result; their instructions to select all, copy, and then paste into a notepad document did not work for me. The output was not pretty. I'd be interested in hearing any hints for using this chart maker. I had put the chart here for anyone interested, but decided to remove it because it really was not very good to look at, not because the chart maker output is bad, but because I am not very good at creating charts. I am not a professional pattern writer, and I sure as heck don't know how to create a proper looking chart. I was just playing around with this chart maker to see how it worked. The scarf pattern is so simple, you really don't even need to refer to a chart. The pattern is very easy to memorize.


Stitches used in this scarf include:
Lattice Cable, BW1 pg 276.


Bernadette Scarf pattern:
Bernadette Scarf Pattern from Box.com (no registration required, just click on link & save file)


My series of cable scarves...

Persephone Scarf:
http://smariek.blogspot.com/2006/12/persephone.html
Ariel Scarf:
http://smariek.blogspot.com/2007/04/ariel.html
Miranda Scarf:
http://smariek.blogspot.com/2007/06/miranda-scarf.html
Osiris Scarf:
http://smariek.blogspot.com/2007/09/osiris.html
Bernadette Scarf:
http://smariek.blogspot.com/2007/11/bernadette.html
Regina Scarf:
http://smariek.blogspot.com/2007/12/regina.html
Paquin Scarf:
http://smariek.blogspot.com/2008/03/paquin.html
Beaumonde Scarf:
http://smariek.blogspot.com/2008/04/beaumonde.html
Shadow Scarf:
http://smariek.blogspot.com/2008/04/shadow.html
Hera Scarf:
http://smariek.blogspot.com/2008/08/hera-scarf-pattern.html
Triumph Scarf:
http://smariek.blogspot.com/2008/08/triumph-cable-scarf-pattern.html
Ezra Scarf:
http://smariek.blogspot.com/2008/09/ezra-cable-scarf-pattern.html
Sihnon Scarf:
http://smariek.blogspot.com/2008/10/sihnon.html
Londinium Scarf:
http://smariek.blogspot.com/2008/10/londinium.html
St. Albans Valentine Cable Scarf:
http://smariek.blogspot.com/2008/11/scarf-15.html


.

Sunday, November 25, 2007

Jayne Cobb Hat

Wash: "A man walks down the street in that hat, people know he's not afraid of anything."
Jayne: "Damn straight.".
I am really enjoying this journey of creating a Jayne Cobb hat for T. If you haven't been following, and are interested in the process , you can read the series of posts:

Yarn for the Jayne Cobb Hat:
http://smariek.blogspot.com/2007/11/red-orange-and-yellow.html
Jayne Hat started:
http://smariek.blogspot.com/2007/10/jayne-hat-started.html
Jayne Hat earflaps:
http://smariek.blogspot.com/2007/10/jayne-hat-earflaps.html
Jayne Hat earflaps continued:
http://smariek.blogspot.com/2007/11/jayne-hat-earflap-shaping-continued.html
Pom-Pom minor update (scroll down):
http://smariek.blogspot.com/2007/11/zara.html
Pom-Pom completed:
http://smariek.blogspot.com/2007/11/jayne-cobb-pompom.html
Jayne Cobb Hat completed:
http://smariek.blogspot.com/2007/11/jayne-cobb-hat.html
.


Well here it is, my very first hat with earflaps and pom-pom. This is my interpretation of the Jayne Cobb Hat, the hat Adam Baldwin wore in the Firefly episode "The Message". I can't tell you how many times I've watched that episode, and paused/zoomed to get a better look at this hat. This is my first attempt, I may make improvements on it when I make my next one. You can read about my Jayne Cobb Hat journey using the links above.

Stitches used in this pattern include:
Knit-Two Purl-Two Ribbing, BW1 pg 39
Stockinette stitch, BW1 pg 10


Jayne Cobb Hat Pattern can be downloaded in PDF format from:
Jayne Cobb Hat from Box.com (no registration required, just click on link & save file)

Pattern instructions are also below.


Jayne Cobb Hat
© Designed by S.M. Kahn, November 2007
Smariek Knits -=<>=- http://smariek.blogspot.com

Yarn:

Elann Highland Wool (100% highland wool, worsted weight -- 19 st/4 inches, 4.0-4.5 mm (US 6-7) -- 100 m / 109 yds per 50 gm ball)

Ruby (red) - 1 ball
Burnt Orange (orange) - 1 ball
Freesia (yellow) - 1 ball

Note: I bought my yarn in Oct 2007, just before Elann discontinued Burnt Orange and Freesia a few couple weeks afterwards. They still have Pumpkin (orange) and Allspice (yellow) which is not quite as bright as the Burnt Orange and Freesia combination; I rather like this slightly more muted color combination with the Ruby (red).

Needles:

4.5 mm (US7) circular needles and/or double point needles, depending on your preferred method of making a hat.

Additional Materials:

4 stitch markers, yarn needle, crochet hook

Note: Use stitch markers like the Clover Split Ring Markers, like these,
http://www.shopatron.com/product/part_number=347/181.0, which are open ended, rather than the closed-ring type.

Gauge:

Somewhere in the neighborhood of 18 sts = 4 inches.

Size:

Should fit an adult head. Brim circumference is around 21.5-22 inches.

Notes:

Basic Cast On instructions can be found on this page here:
http://www.knittinghelp.com/knitting/basic_techniques/index.php

K = Knit.
K# = Knit # number of stitches, where # indicates the number of stitches to be knit.
Video to show you how to knit can be found here:
http://www.knittinghelp.com/knitting/basic_techniques/knit.php

K2Tog = Knit 2 stitches together.
Video showing how to do K2Tog can be found here:
http://www.knittinghelp.com/knitting/basic_techniques/decrease.php

P = Purl.
P# = Purl # number of stitches, where # indicates the number of stitches to be purled.
Video to show you how to purl can be found here:
http://www.knittinghelp.com/knitting/basic_techniques/purl.php

P2Tog = Purl 2 stitches together
VIdeo is on Knitting Help under "p2tog" here:
http://www.knittinghelp.com/knitting/abbreviations_explained/

P2Tog-TBL (Purl 2 together through back loop) = same as P1-b except you work it on 2 stitches.
Video to show you how to do P1-b is on Knitting Help, look under "p tbl" here: http://www.knittinghelp.com/knitting/abbreviations_explained/

PM = Place Marker

RS = Right Side, referring to the "front" side of the knitted object

Slip1 wyif = Slip 1 stitch purlwise, with yarn in front

SSK = slip 1 stitch, slip 1 stitch, knit these two slipped stitches together
Video showing you how to do SSK can be found here:
http://www.knittinghelp.com/knitting/basic_techniques/decrease.php

st = stitch
sts = stitches

WS = Wrong Side, referring to the "back" side of the knitted object

* ... * = work everything between asterisks across the round.
(asterisks are described here: http://www.knittinghelp.com/knitting/abbreviations_explained/ )


Pattern Instructions:

Please read "Notes" section before starting; it contains almost everything I think you may need to know to work this pattern.


ORANGE SECTION:

Using ORANGE yarn and 4.5 mm (US7) needles, CO 96 stitches, join into round without twisting stitches.

Work K2, P2 ribbing for 5 rounds.

Knit around for 16 rounds.
(Orange section should measure ~3.75"-4")


YELLOW SECTION:

Using YELLOW yarn, knit around for 19 rounds.
(Yellow section should measure ~3.5")


DECREASE SECTION:

Continue with yellow color.

Row 1: * K14, K2Tog * (90 sts)
Row 2: * K13, K2Tog * (84 sts)
Row 3: * K12, K2Tog * (78 sts)
Row 4: * K11, K2Tog * (72 sts)
Row 5: * K10, K2Tog * (66 sts)
Row 6: * K9, K2Tog * (60 sts)
Row 7: * K8, K2Tog * (54 sts)
Row 8: * K7, K2Tog * (48 sts)
Row 9: * K6, K2Tog * (42 sts)
Row 10: * K5, K2Tog * (36 sts)
Row 11: * K4, K2Tog * (30 sts)
Row 12: * K3, K2Tog * (24 sts)
Row 13: * K2, K2Tog * (18 sts)
Row 14: * K1, K2Tog * (12 sts)
Row 15: K2Tog (6 sts)
Optional Row 16: K2Tog again (3 sts)

Draw yarn through remaining stitches.


EARFLAP SECTION:

We will place 4 stitch markers around the brim of the hat to designate earflap sections. Earflaps will be 23 stitches wide. The 25 stitch wide sections will be the front or back of the hat.

Arrange stitch markers along brim of hat as follows:
PM1, 23 stitches, PM2, 25 stitches, PM3, 23 stitches, PM4
(You should now have 25 stitches between PM4 and PM1)

With RS of hat facing you and using RED yarn, pick up 23 stitches between PM1 and PM2.

Row 1 (WS): Slip 1 wyif, P21, K1
Row 2 (RS): Slip 1 wyif, K22

Repeat Rows 1 & 2 until you have completed 26 rows.
(Earflap should measure ~4.5" at this point)

Shape earflaps as follows:

Row 3 (WS): Slip 1 wyif, P2Tog, P17, P2Tog-TBL, K1 (21 sts)
Row 4 (RS): Slip 1 wyif, SSK, K15, K2Tog, K1 (19 sts)
Row 5: Slip 1 wyif, P2Tog, P13, P2Tog-TBL, K1 (17 sts)
Row 6: Slip 1 wyif, SSK, K11, K2Tog, K1 (15 sts)
Row 7: Slip 1 wyif, P2Tog, P9, P2Tog-TBL, K1 (13 sts)
Row 8: Slip 1 wyif, SSK, K7, K2Tog, K1 (11 sts)
Row 9: Slip 1 wyif, P2Tog, P5, P2Tog-TBL, K1 (9 sts)
Row 10: Slip 1 wyif, SSK, K3, K2Tog, K1 (7 sts)
Row 11: Slip 1 wyif, P2Tog, P2, P2Tog-TBL, K1 (5 sts)
Row 12: Slip 1 wyif, SSK, K2 (4 sts)
Row 13: Slip 1 wyif, P2Tog, K1 (3 sts)
Row 14: K3Tog (1 st)

Cut yarn leaving long strand (for one of the dangling yarn bits at the end of the earflap) and pull through remaining stitch.

Cut another piece of yarn slightly more than double this length and attach to end of earflap; use crochet hook to attach it the way you would for fringe.
Trim these 3 dangling yarn bits to desired length.

Make second earflap, picking up stitches between PM3 and PM4.


POMPOM SECTION:

Make a pompom, around 3.5 inches in diameter, using all three yarn colors. I used this pom-pom how-to: http://www.helloknitty.com/pdfs/pompom.pdf.

Hold one strand of each color when you wind it around the template. Attach pompom to top of hat.


FINISHING:

Weave in all ends. Enjoy!


.

Jayne Cobb Pompom


.
I am really enjoying this journey of creating a Jayne Cobb hat for T. If you haven't been following, and are interested in the process , you can read the series of posts:

Yarn for the Jayne Cobb Hat:
http://smariek.blogspot.com/2007/11/red-orange-and-yellow.html
Jayne Hat started:
http://smariek.blogspot.com/2007/10/jayne-hat-started.html
Jayne Hat earflaps:
http://smariek.blogspot.com/2007/10/jayne-hat-earflaps.html
Jayne Hat earflaps continued:
http://smariek.blogspot.com/2007/11/jayne-hat-earflap-shaping-continued.html
Pom-Pom minor update (scroll down):
http://smariek.blogspot.com/2007/11/zara.html
Pom-Pom completed:
http://smariek.blogspot.com/2007/11/jayne-cobb-pompom.html
Jayne Cobb Hat completed:
http://smariek.blogspot.com/2007/11/jayne-cobb-hat.html


This is the hat after completing the 2nd earflap. The edges curls up and they look a bit more triangular at the ends than they really are. It's really less tapered, like the 3rd photo you see here. I left about 18 inches of yarn on the ends, I still haven't decided how I will do the dangling bits.

Onwards to the pompom. I think this was the biggest challenge, having never made one before. I am using this pom-pom how-to (PDF) for making it. You can see my attempt with Template #1 here (scroll down). I was afraid the pom-pom would be too small. It's always easier to make a large one and then trim it down if it is too big, right?


So I made a slightly larger pom-pom template, using the larger template (the 2 in the top row) instead.


This is after I wound the yarn and snipped it. I actually wound the yarn as instructed, twice. I probably should have made it denser the first time around. Well, I didn't expect it to come out perfectly, after all, this is my first attempt at making a pom-pom.


Well there you have it. My littleTribble. Er, I mean pom-pom. It's about 3.5 inches in diameter.


Attaching the pom-pom was the easiest part of making a pom-pom. :-)

Oh, I also attached extra red yarn to the ends of the earflaps. Just a long strand, attached like fringe. I left the dangling ends on the long side so that the recipient of the hat can trim it to his desired length.

Now to weave in all those ends...


.

Wednesday, November 21, 2007

Miss M's First Scarf

Note:
1. More Free Patterns can be seen along the sidebar (on right side),
or you can use the Free Patterns label to view all posts.
2. Free Pseudo-Patterns or Pattern Outlines can be found using the Free Pseudo-Patterns label.


Miss M's first scarf is completed, the Asherton Toddler Scarf. It's a short scarf that stays secure by slipping one end through a hole at the other end. The short ends should reduce any strangulation hazard that could arise from using a long dangling type scarf. I can just visualize something bad happening with those long dangling types at the escalator, elevator, and slides.

Pooh Bear is a great model who is able to stay still long enough for me to take a photo. However I was lucky enough to get a relatively in-focus shot of Miss M wearing her scarf...


Her scarf is about 28 inches long. She wore it in the morning and didn't want to take it off when I told her she was overheating. Toddlers are stubborn that way. They wear jackets on hot days, and refuse to put on on when it is cold.

I mentioned in a previous post that this was inspired by a bow-knot scarf that Barbara pointed out to me. Someone else informed me that the type of scarf I made is also called a keyhole scarf. Same shishkabob, different texture I guess.


Yarn: Cleckheaton Country 8 Ply (100% superwash wool -- DK weight, 22 st per 4 inches on 4mm/US6 needles -- 96m/105yd per 50 gm ball)
Needles: 4mm (US6)

Miss M's scarf is based on the Asherton Scarf pattern. I only worked half the pattern so that the moss stitch diamonds aren't staggered; I wanted them aligned vertically. You can always work the full pattern, rows 1 to 44, if desired. I guess I should make her a matching Asherton Toddler Hat in this same purple yarn; she already has two, one in light pink and one in dark pink. Here's what I did to modify it into a keyhole/bow-knot type scarf for her:

Cast on 36 stitches, not caring about selvedge stitches.

Knit 6 repeats of rows 1 to 24, but worked (row 1 of) the slit on row 24 of the 6th repeat.
Slit Row 1: Work 14 stitches of pattern (row 24), bind off 8 stitches, work 13 stitches.
Slit Row 2: Work 14 stitches of pattern (row 1), cast on 8 stitches, work 14 stitches.
(Note, the stitch left on your needle after binding off the 8th stitch, added to the 13 stitches you work after working the slit, will form the 14 stitches on that side of the slit.)

Continue to work 2 more repeats of the pattern (beginning with row 2, since you worked row 1 when you did "slit row 2"). Then bind off.
At first I made the slit too big by binding off 10 stitches in the middle of the row, so I reduced it to 8 stitches and it seems perfect for the yarn I'm using. I think the number of stitches in the slit would vary depending on what type of yarn I use. Of course the number would also vary if the number of stitches cast on is different.

To make scarf wider or if using thinner yarn, cast on more stitches in multiples of 12.

To make scarf narrower or if using thicker yarn, cast on less stitches in multiples of 12.

Add 2 extra stitches if you want a nice selvedge edge (slip 1st stitch of every row with yarn in front as if to purl, knit last stitch of every row).

--<>--

Look what I found!!!


Some gals at Ravelry's Cup'a Tea group raved about PG Tips. Having never heard of it before I set out in search of it. This was not an easy task. I finally found it at Cost Plus at the Hillsdale Shopping Center in San Mateo, CA. There's probably a Cost Plus closer to me in the south bay, will have to do a search.

The first box I saw at the store was a DCaf version. The second box I saw was a Special Blend version. I didn't see this Regular Blend until I walked around another display rack, cuz it wasn't grouped together with the other two. All came in boxes of 80 bags. I definitely didn't want the DCaf version, and had no idea whether I should choose the Regular Blend or Special Blend. I couldn't remember what the gals on Ravelry said, I don't think they specified which flavor. So I picked the Regular Blend to start with. I have no idea what difference there is between the Regular Blend and Special Blend. Anybody know?

I've made this tea 4 times so far and it's not bad with a splash of milk. I didn't know what to expect when I opened the box. I was a bit surprised to find all the teabags in the paper box. I thought they would be individually foil wrapped or something. Since I didn't have an available tea tin to put all those pyramid shaped tea bags in, I put the entire box in a large plastic bag instead. However I may just move all the bags into a Zip-Lock bag instead.

Ok, drinking several cups of this tea in mid-afternoon is probably not helping me with my (inability to fall asleep) sleep issues.

--<>--

I just remembered that I had mentioned I would be sharing some of the Rubber Stamp Mail Art I have received. Here are a few more...


There are times when I think I should get back into stamping, but when would I find the time? And where would I put all the supplies??? My yarnmoire is full and overflowing. Half the cupboard is full of yarn (yes, there is some space for my clothes, only because I don't have a lot of clothes), and there are large plastic boxes full of yarn in the bedroom.


--<>--

I am starting to think about Miss M's Christmas presents this year. So far we have a giant Pooh Bear and a Lego Duplo Doll's House set (#4966). I'm entertaining the idea of picking up a Tickle Me Elmo, but I have never seen one in person so don't know yet. Amazon shows a regular Tickle Me Elmo and a Tickle Me Elmo Extra Special Edition. Not sure which one is better. Either way, I think it will be something that will delight Miss M and probably drive us crazy after a short time.

Every time I look at the Lego box, I have this great desire to open it and play with it myself. I think part of it is because I did not have any Legos of my own when I was a kid.

Pooh Bear was a bit dusty/dirty from being dragged, stepped on, and who knows what else before we rescued him from the Disney Store so I wanted to give him a bath before wrapping him up. Miss M can identify Pooh Bear by his bottom, I think there's something very distinctive about his coloring. Anyhow, I attempted to wash this Pooh Bear a couple weeks ago when M was napping one day. Can't have her see Pooh Bear as I take him from my closet to the washer in the garage, you know. I only realized how large Pooh Bear was when I got to the washer and saw that he was too big for my top-loading washer. So we took him to my MIL's house where she recently replaced her old top-loader with one of those new front-loaders. Pooh Bear will do nicely in there.

--<>--

Will it ever go away???

I seem to have the opposite problem of Barbara, whose blog disappeared from the face of the planet a while back, and then later on, her email address through her DSL provider disappeared too. Well, I have the opposite problem to hers. I can't get a service to go away.

As some of you may know, we moved house in early September. We decided to cancel our DSL service at our Old House since we were no longer using it over there and didn't feel we needed to continue paying $64.95 for a service we no longer used. Well, our DSL just won't go away. Here's how it went...

9/17/07:

Called My Local Phone Company (MLPC) to disconnect DSL service.

10/22/07:

Our next bill still showed the $64.95 DSL charge for service between 9/22/07 to 10/21/07.

Called MLPC. Spoke to Y, who handles Business DSL. (Don't know why calling their main customer support number for internet services automatically dumps you to the Business DSL dept, but it does this every time I call them). Got transferred to J, who confirmed that their records showed that we called them on 9/17/07 to disconnect DSL, but she said the service didn't actually get disconnected. She removed the $64.95 DSL charge from the bill and then transferred me to another dept that handles the actual DSL disconnect. Spoke to N, who disconnected the DSL and provided me with a confirmation number.

So I thought this was a done deal, until...

11/19/07:

... until I received my next bill which showed a $64.95 DSL charge for service from 10/22/07 to 11/21/07.

Called MLPC again. I should mention that it is not a simple matter of just calling and getting things done with these people. You spiral through a maze, talk to several people, get put on hold for an eternity (and wonder whether they hung up on you). Of course I got dumped into the Business DSL dept and had to get transferred to the Residential DSL dept. Spoke to M, who made a bill adjustment and she also confirmed that the DSL was already disconnected (so no action required on her part for that). I'm a bit skeptical about the competency of MLPC. Anyhow, since we are also not using phone service at the Old House, I asked to be transferred to the Phone Service Dept. I spoke to someone there who disconnected the phone service and provided a confirmation number.

So here's the million dollar question. Will I be charged $64.95 for DSL service on my next bill? Will I also still be charged for phone service on my next bill? We'll have to wait another month to see what happens...

I am not holding my breath. Seems to me that this sort of thing shouldn't be so difficult. The funny thing is during the time I'm on the phone with them to get DSL or phone service disconnected, the person on the phone is also trying to sell me other service "packages" that MLPC offers.

For a separate issue, we called MLPC on 11/5/07 to see if my email address associated with our Old DSL acct could be transferred over to our New DSL acct. Both Old and New DSL accts were from the same company, MLPC. You'd think it should be no big deal. But to make a long story short, they can't do it.


.

Friday, November 16, 2007

Zara


Here are two balls of Zara, one is color 1722 and the other is color 1669. I swear that these two balls of yarn look like the identical shade of purple. And if you look carefully at the photo, you will notice that the yarn labels look different too. I'm not sure why that is. Somebody tell me that I'm not smoking crack in thinking that these two are identical purples.... and if that's the case, can I mix & match color 1722 and color 1669 in the same knitted work?

I played around with a ball of Zara, OMG this stuff is so soft in the hands!


I decided to start the Osiris Scarf using Zara, it's one of the two balls above (can't recall which). This one shows the color of the yarn a bit better than the balls above.

The original scarf was knitted in fingerling weight yarn. When I started it using DK weight Zara, my scarf would have ended up 12 inches wide. That was much wider than I wanted it, so I tweaked it a bit.

The swatch above showed my attempt at reducing the width by 12 stitches. I used a 2-stitch seed stitch side border instead of the 4-stitch original. (I also reduced the bottom edge border by 3 rows) And instead of using the 8-stitch wide Chain Cable, I changed it into a 4-stitch wide cable. Yes, there is a boo-boo in the photo. I zigged where I should have zagged 2 rows down in the chain cable on the left side. I also knit a little tighter than usual.

After knitting this for a while, I decided that I really did not like the results of using a 4-stitch wide cable in place of the 8-stitch wide cable. I dunno, maybe I'll try it again in the future. I frogged this one.


I started again, this time keeping the original 8-stitch wide cable, and just reducing the total width by 4 stitches by using a 2-stitch wide seed stitch border. I also reduced the bottom border by 4 rows. Still knitting a bit on the tight side. I think the overall fabric is softer when knit in my usual loose fashion.

I love the stitch definition I get with Zara. Cables and Zara, a good combination. Cables and Baby Cashmere, not. I wonder if it's the alpaca content in the Baby Cashmere which makes it less desirable for cable applications. It's just a guess. Since I have tons of Baby Cashmere in my stash, I am going to play around with it some more and see how it works out for plain knit/purl applications. I even have a pattern in mind from BW2! And I know I want to do this in fingerling weight Baby Cashmere, but part of me also wants to do it in DK weight yarn. What will probably happen is I'll pick out some DK weight yarn and turn it into a cable scarf.

I was thinking of making this scarf for myself, however I am having second thoughts because Miss M was playing around with the last scarf I made and she clearly wanted to wear it. Miss M is 2 and I think she's still a little young to wear something long and dangling around her neck, strangulation hazard you know (somehow elevators and escalators come into mind). Way back in Sept on the Elann chat site, CatBookMom pointed me to a bow-knot scarf, so I've started knitting something like this. It's not exactly like the one pictured in that link, but it is a short little strip of knitting where one end feeds into an opening on the other end to keep it secure. It's just something to keep Miss M's neck warm this winter with a reduced strangulation risk.


I'm hoping that there'll be enough yarn in that ball to finish. I'm on the second ball, and it wasn't even a full ball to begin with. I'm close to the end, I need to make it another 36 rows or so. If it looks like the scarf is too short, then I'll have to dig out another ball of yarn. I'm guesstimating that the scarf will be 28 inches unblocked. This was my second attempt at the opening. I made it too wide the first time around. The scarf is purple, the nighttime lighting has screwed up the coloring in the photo.

This doesn't answer the question of what will keep my neck warm this winter. I've got ideas flowing through my head. I'm thinking of one of those tubes you wear around your neck. A cowl. In a lace pattern. Nothing long and dangling for Miss M to want to get her hands on and wear herself. I've got plenty of Baby Cashmere to use for this. I'm getting the feeling that Baby Cashmere yarn is only good for lace applications, and I really do not want to knit so much lace right now. Yes, I'm still in a cable phase...


Oh and besides all this, I have finally cast on for Mom's vest. I've been thinking about this since last April or May. This is my very first truly "shaped" knitting project, cuz scarves, dishcloths, & hats don't really count in the shaping dept. So I'm a bit anxious to see whether I can pull off a vest. I'm using the Lion Brand Patchwork Textured Vest pattern. It was one of the simpler looking patterns that met Mom's criteria for her vest. I'm a little worried about whether the vest will come out the right size for my Mom. I think Lion Cotton yarn is slightly heavier/thicker than the yarn I am using.

I've started the back section. There are only 3 patterns and you work the first section: Pat I, Pat II, Pat III. I goofed at first when knitting the WS rows by knitting the patterns in the same sequence, I, II, III. It took several rows of knitting before I realized that it just wasn't looking quite right. That's when I figured out that I should have worked the WS rows in this sequence, III, II, I. This wasn't clearly stated in the pattern or it wasn't obvious to me. Of course now it seems so obvious...

Anyhow, I am going to frog this thing cuz I don't like where I stopped in the bottom row of squares. The pattern said to knit until 3.5 inches, ending on WS, which I did. It turned out to be after working Row 2 of the 4-row repeat patterns. As you can see, the boxes are not very well defined because of this. I should have ended on Row 4 before moving on to the next section of squares. It's very obvious when you look at the 1st and 4th squares (from left, on bottom row of squares). Those top 2 rows look like it's part of the stockinette square above, but it's really part of the bottom row of squares. I will add notes to my pattern about ending on Row 4, so I don't make this mistake again. I hope that stopping slightly short of the 3.5 inches won't screw up the rest of the vest. We'll see...

I'm knitting this vest in Elann Highland Wool, Allspice color. I showed Mom the shade cards and that is the one she chose. The funny thing is before she chose this color, we were talking about making her vest some sort of lavender color. She later decided that Allspice would be a more versatile color to wear. I'm not sure what she's thinking there...

--<>--

Let's see.... another thing I have been entertaining in my mind is knitting a hat to go with the Persephone Scarf. It would be similarly constructed as the Ariel Hat, however I think I could change the way I pick up stitches from the band so that the cable band does not turn up. The double layer you get with the cable band turned up results in a hat that is way too warm for the moderate San Francisco Bay Area climate.

And I've got two cable scarves coming down the pike, something simple along the lines of Miranda (in fact, one has similar FC & BC cables). I just need to decide which yarn to use and this is largely determined by the recipients. I like knitting with the hand wash yarns, but most people I know are machine wash people. So I absolutely love it when I can get my hands on superwash wool in the right colors.

It's not that I don't like lace. I'm just finding it difficult to concentrate on lace right now. Cables make for good TV knitting. Lace, not so much.

--<>--

I am really enjoying this journey of creating a Jayne Cobb hat for T. If you haven't been following, and are interested in the process , you can read the series of posts:

Yarn for the Jayne Cobb Hat:
http://smariek.blogspot.com/2007/11/red-orange-and-yellow.html
Jayne Hat started:
http://smariek.blogspot.com/2007/10/jayne-hat-started.html
Jayne Hat earflaps:
http://smariek.blogspot.com/2007/10/jayne-hat-earflaps.html
Jayne Hat earflaps continued:
http://smariek.blogspot.com/2007/11/jayne-hat-earflap-shaping-continued.html
Pom-Pom minor update (scroll down):
http://smariek.blogspot.com/2007/11/zara.html
Pom-Pom completed:
http://smariek.blogspot.com/2007/11/jayne-cobb-pompom.html
Jayne Cobb Hat completed:
http://smariek.blogspot.com/2007/11/jayne-cobb-hat.html


Here's a minor update on my Jayne Cobb Hat. I'm struggling with the hardest part of this hat, the pom-pom. I've managed to find a pom-pom how-to (PDF file link). So far I have cut out a pom-pom template that is about 3.5 inches in diameter. I didn't have cardboard handy, so I just used a manilla file folder. I used a mug to draw the circle cuz I don't have one of those doohickeys we used to use in school to make circles. Then I sat on these circles for a week because I didn't know how to trace out an inner circle that would be centered (because I don't have one of those doohickeys). I eventually dug out a coin (nickel?) to trace a circle in what I thought was the center. After cutting it out I'm pretty sure it's slightly off center.


Then I started pulling out three strands of yarn, one of each color, and started winding it around the template. I didn't get very far before I thought this template would give me a pompom of about 1.5 inches, way smaller than what I was aiming for. I think I was aiming for something around 3 to 4 inches.

Ok, what did I do wrong here???

I guess I need to make a MUCH larger template, and then trace the inner circle at about 3.5 inches from the outer edge?

I think it will take me longer to make one pom-pom than it took for me to knit the main body of this hat...

Sigh... back to the drawing board...

--<>--

Not too long ago when I was catching up with blog reading, which happens in spurts :-( , I came across Connie's Vortex dishcloth. It is really neato mosquito looking, especially the one she made in Christmas colors. But wait, check this out! You can see what people have done with a similar pattern ... afghans with way more squares in it! You can see a gallery at the Wooly Thoughts site; that tan, rose, beige colored one in the bottom middle photo looks really cool. The afghan is called Curve of Pursuit, and you will find the pattern here. Check out the other afghan designs they have! I think their Penrose afghan is pretty neat looking. The Vortex dishcloth pattern can be found here (5 squares), here (6 squares), and here (7 squares).

I'd love to knit an afghan like this, but I will definitely not start one because I know I would never finish it. I mean, I am still trying to finish a baby blanket which I started in Dec 2005! So what's the likelihood of finishing something larger than a baby blanket? Perhaps I'll try the dishcloth someday. Not anytime soon. Dishcloths are leaving a bad taste in my mouth due to a lot of negativity.

--<>--


I leave you with a photo of some bears we saw at our last visit to the zoo. Sorry, I haven't yet figured out how to take photos through glass while avoiding that glare and reflection.

Have a wonderful weekend folks...

.