Embossed Twining Vine Leaf
Note:
1. More Free Patterns can be seen along the sidebar (on right side),
or you can use the Free Patterns label to view all posts.
2. Free Pseudo-Patterns or Pattern Outlines can be found using the Free Pseudo-Patterns label.
Note: You can see the follow-up cloth to this one, Embossed Leaves, which has additional embossed leaves around the center panel, here:
http://smariek.blogspot.com/2008/03/embossed-leaves.html
.

Pattern: Embossed Twining Vine Leaf (with slight tweaks, see below)
Yarn: Lily Sugar & Cream, Softly Taupe color, 1 ball
Needles: 4.5 mm (US7)
Yarn: Lily Sugar & Cream, Softly Taupe color, 1 ball
Needles: 4.5 mm (US7)
If you don't want to read the story behind this dishcloth, then just scroll down to the bottom where I give an outline of how I made the cloth.
A little while ago, Peggy M emailed me to ask whether I had used the Embossed Twining Vine Leaf pattern from BW2 pg 138. She was trying to use it in a baby blanket and mentioned having some problems reduplicating one of the second leaves without changing the pattern, which in turn threw everything off in the row and caused holes when decreasing. I have often stopped on that pattern while flipping through my BWs, but I never got around to doing anything with it. (There is something similar in HG5, which is a 20 stitch panel instead of the BW 26 stitch panel.) Well, I thought now is as good a time to give the pattern a whirl to see how it knit up. Perhaps there was an error in the pattern. I'd have to knit it up to get a better feel for the pattern.

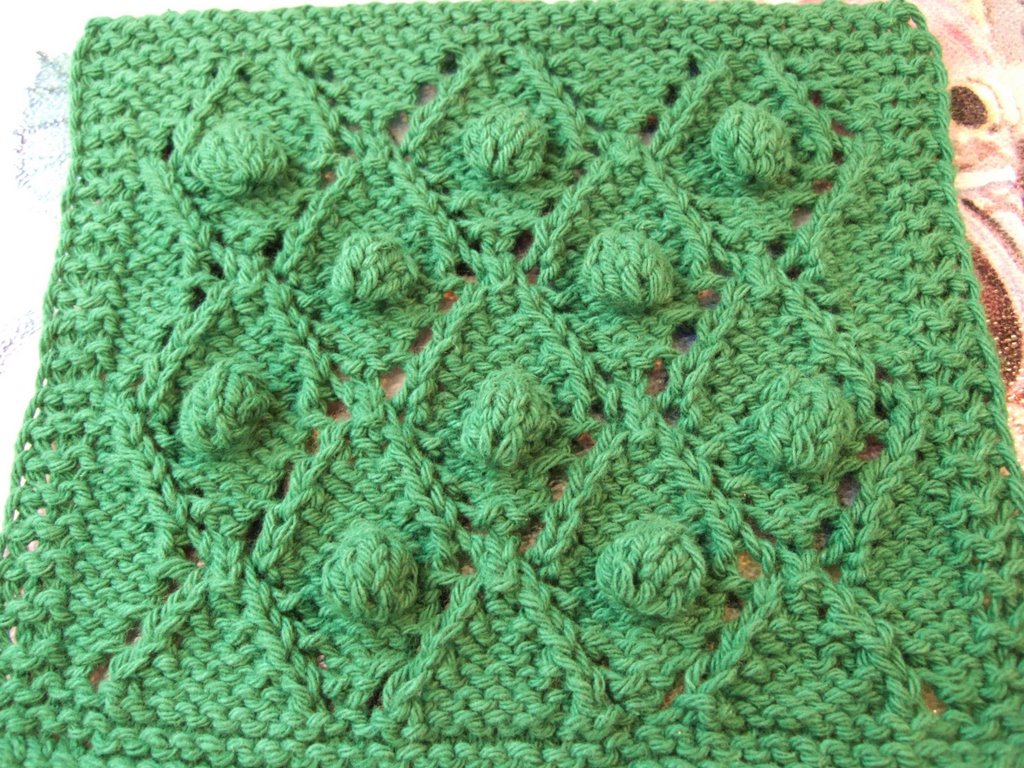
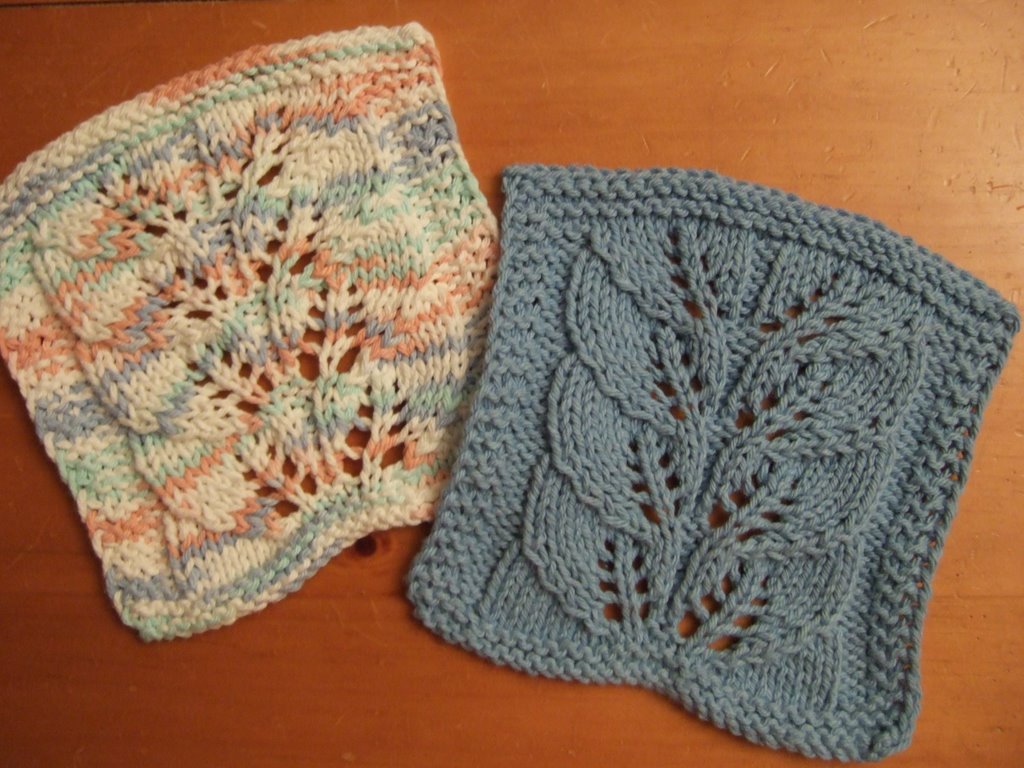
So I grabbed a remnant ball of kitchen cotton yarn and went at it. As you can see from the photo above, I was short a few rows. See that dangling end of yarn at the top? That's what I had left. I didn't even get to knit the top border and bind off. I wasn't sure I'd have enough yarn. I thought making a short bottom border would help, but it clearly wasn't enough. I probably also should have made it a bit narrower too. So I put the stitches onto waste yarn to photograph what I did manage to knit up; this will ultimately get frogged and reincarnated into a smaller dishcloth.
I didn't find any errors in the pattern, however I could see some pitfalls if you're not paying attention.
1. Mind those Yarn Overs, especially wrapping the yarn all the way around when doing a YO before a purl stitch (such as in Row 10 and Row 22).
2. Mind those increases. There are 3 different types of increases in the pattern. (I changed all three decreases, and condensed it down to two decreases (one Knit Increase, one Purl Increase), read further for more info).
3. The three decreases are pretty straight forward (K2Tog, SSK, P2Tog), just pay attention to where they have to be done. Also need to make sure you do the double decreases on Row 12 and Row 24, but I think it's obvious when you get to the tip of the leaf.

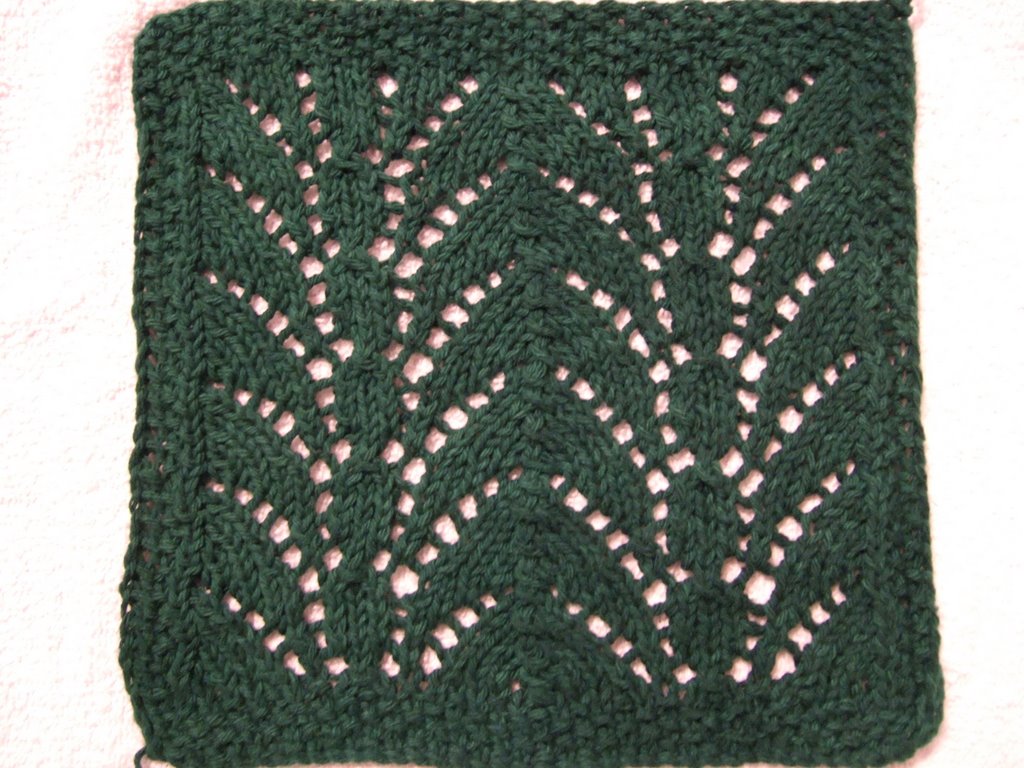
If you look closely, the upper part looks slightly neater than the lower part. What particularly bugged me were the big gaping holes to the left of the right leaf branch (red arrow in photo below), so I tweaked a bit to get it to look less obvious (blue arrow in photo below). I also didn't care for how untidy the left leaf branch looked (pink arrow in photo below), but I think my tweaks must have improved it cuz it looks better in the upper one (purple arrow in photo below). The main stem running up the center is probably neater on the upper part too, but it's not as noticeable an improvement.

I discovered sometime after row 15-ish of the pattern that I didn't like how the pattern handled increases and decreases. I can't say exactly where I started, but somewhere along the way I did change the way I did the Purl Increase, KFB and M1F instructions.
So I did this for the Purl Increase (in place of "purl into front and back" of next stitch):
1. Purl into the top loop of the stitch in the row below the first stitch on left-hand needle (inserting needle point downward from front, not through the stitch from behind).
2. Purl into the first stitch on the left-hand needle.
I did KRL (Knit Right Loop) for the Knit Increase on Row 2 and Row 14 (in place of "knit into front and back" of stitch):
1. Insert right-hand needle into right loop of stitch just below next stitch, place it onto the left-hand needle and knit it.
2. Knit first stitch on the left-hand needle.
And I did step #1 of KRL in place of the M1 (aka M1F) on Row 12 and Row 24.
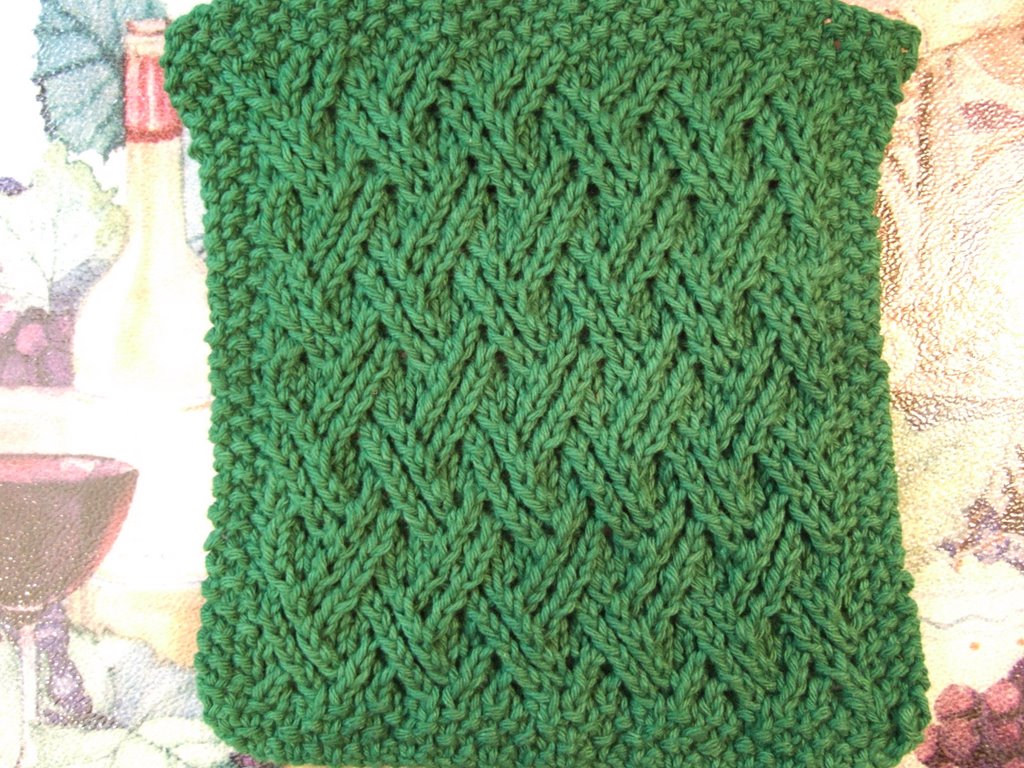
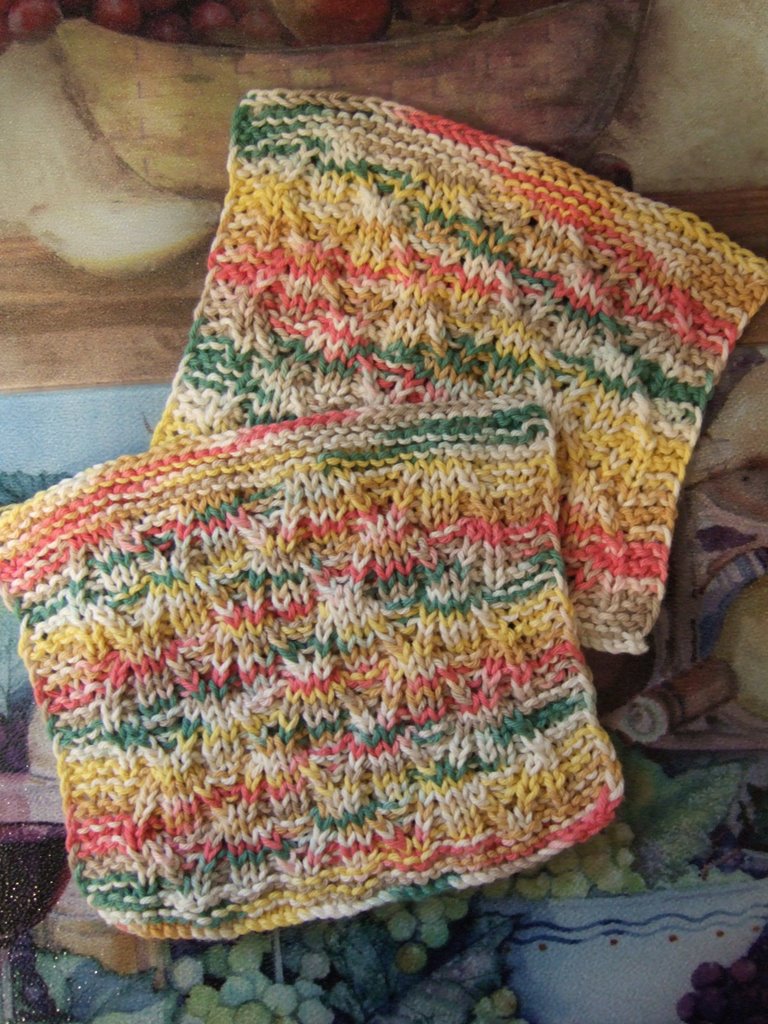
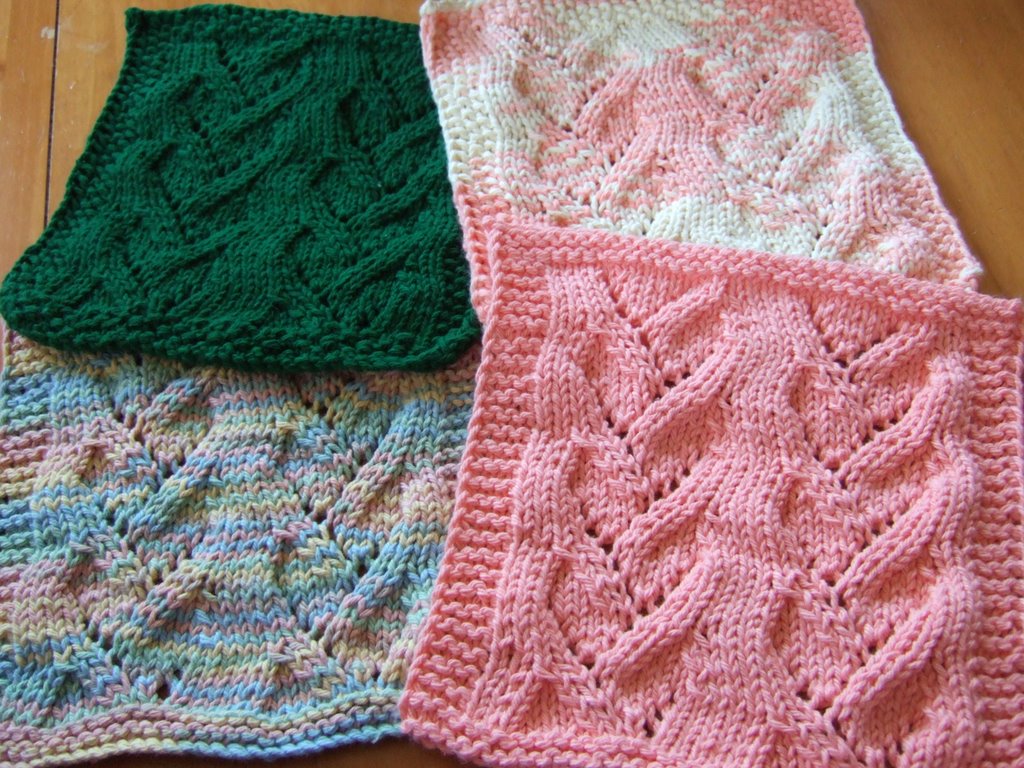
I believe some combination of these tweaks helped make the upper portion look a bit more tidy than the lower portion. I pulled out another ball of kitchen cotton yarn, a brand new full ball, and made another one. I applied my tweaks to this taupe colored cloth. You can compare the results of the taupe colored cloth below with the experimental green cloth above:

Here's an outline of what I did to make this dishcloth:
Abbreviations:
B4 = (4-stitch border) Knit 4 stitches
K = knit
K2Tog = knit 2 together
KRL = Knit Right Loop (see above for step instructions)
P = purl
Purl Inc = Purl Increase (see above for step instructions)
P2Tog = purl 2 together
S2KP = Slip 2 stitches together, Knit 1 stitch, Pass 2 slipped stitches over
SSK = slip, slip, knit
Cast on 44 stitches.
Knit for 6 rows.
Work 2 repeats of pattern:
Row 1: B4, K10, P5, K4, P3, K14, B4
Row 2: B4, P12, P2Tog, KRL, K2, P4, K2 YO, K1, YO, K2, P10, B4
Row 3: B4, K10, P7, K4, P2, K1, P1, K13, B4
Row 4: B4, P11, P2Tog, K1, Purl Inc, K2, P4, K3, YO, K1, YO, K3, P10, B4
Row 5: B4, K10, P9, K4, P2, K2, P1, K12, B4
Row 6: B4, P10, P2Tog, K1, Purl Inc, P1, K2, P4, SSK, K5, K2Tog, P10, B4
Row 7: B4, K10, P7, K4, P2, K3, P1, K11, B4
Row 8: B4, P9, P2Tog, K1, Purl Inc, P2, K2, P4, SSK, K3, K2Tog, P10, B4
Row 9: B4, K10, P5, K4, P2, K4, P1, K10, B4
Row 10: B4, P10, YO, K1, YO, P4, K2, P4, SSK, K1, K2Tog, P10, B4
Row 11: B4, K10, P3, K4, P2, K4, P3, K10, B4
Row 12: B4, P10, (K1, YO) twice, K1, P4, K1, KRL, P2Tog, P2, S2KP, P10, B4
Row 13: B4, K14, P3, K4, P5, K10, B4
Row 14: B4, P10, K2, YO, K1, YO, K2, P4, K1, KRL, K1, P2Tog, P12, B4
Row 15: B4, K13, P1, K1, P2, K4, P7, K10, B4
Row 16: B4, P10, K3, YO, K1, YO, K3, P4, K2, Purl Inc, K1, P2Tog, P11, B4
Row 17: B4, K12, P1, K2, P2, K4, P9, K10, B4
Row 18: B4, P10, SSK, K5, K2Tog, P4, K2, P1, Purl Inc, K1, P2Tog, P10, B4
Row 19: B4, K11, P1, K3, P2, K4, P7, K10, B4
Row 20: B4, P10, SSK, K3, K2Tog, P4, K2, P2, Purl Inc, K1, P2Tog, P9, B4
Row 21: B4, K10, P1, K4, P2, K4, P5, K10, B4
Row 22: B4, P10, SSK, K1, K2Tog, P4, K2, P4, YO, K1, YO, P10, B4
Row 23: B4, K10, P3, K4, P2, K4, P3, K10, B4
Row 24: B4, P10, S2KP, P2, P2Tog, K1, KRL, P4, (K1, YO) twice, K1, P10, B4
Knit 5 rows.
Bind off. Weave in ends. Block slightly.
(Hint: use your fingers to gently press down the purl stitches around the leaves to help make the leaves "pop" more.)
Stitches used in this cloth include:
Embossed Twining Vine Leaf, BW2 pg 238
Garter Stitch, BW1 pg 10
Reverse Stocknitte Stitch, MT pg 3
.


of Cable Scarves")


6 stitch(es):
I think there's a mistake on row 8? It looks like it's a stitch short. If I go by the same line later in the pattern (row 20 looks like it's a backwards version of row 8), I think the last bit should be p10, b4 rather than p9, b4. Is that correct?
You are correct, row 8 should end with P10, B4. Thanks for pointing this out to me, I have corrected the pattern.
Oh good! I kept thinking I had messed up somewhere along the way and I must have recounted that row and the one before it about a million times. Thanks so much for your very prompt reply! I tend to second guess myself a lot, so even though I thought that might be the fix, I kept mulling it over last night wondering if I messed it up. I'm somewhat obsessive at times, haha:)
First of all - I totally LOVE your site. I'm new to the knitting world, and it has been a wonderful resource. Thank you!
Secondly, I respect you even more because you are a fan of Serenity. Good job. Very good job. Did you watch Joss's Dollhouse?
Now to the business: I had great success with this pattern - it was my first lesson in increases and decreases and I love the results. I tried it both ways - the original and with your changes. I definitely think the changes resulted in a cleaner look. Thank you for sharing this pattern.
Question: I was thinking of making a scarf with this pattern, I was going to have the twining leaves go up to a design in the middle of the scarf - not sure what yet - and then reverse. This way, the leaves will be going "up" the scarf from either end. Do you know how to "reverse" the leaf to get this to work? I've been trying to figure it out, and I don't think I'm skillful enough to figure it out. Any hints or suggestions would be great. Also, I don't need the whole pattern translated, I can figure out the vine, I just need the leaf.
I hope this makes, sense. If not, feel free to contact me and I'll try to explain better.
Thanks again!
Thanks so much for this!
I would knit 2 halves and seam them in the middle in order to get the leaves to appear right-side-up when you wear it with the ends hanging in front (like how I did this with the St Albans Scarf, you can see how both ends appear right-side-up in the photo: http://smariek.blogspot.com/2008/11/photographing-red.html)
Post a Comment